
An accurate and efficient order management system is key to streamlined ecommerce operations. Accurate WooCommerce order management is less challenging when you only have a few sales, but once your business starts to pickup, errors are inevitable.
Sending packages to the wrong address, or shipping the wrong product can destroy your business reputation in a hurry.
Well-planned order management not only streamlines the entire fulfillment process, but it also help reduce the number of unneeded errors. The time spent fixing fulfillment issues is time that you could spend on the activities that help grow your business, whether it’s coming up with new product ideas or growing your brand.
In this post, we will outline how you can use WooCommerce and a few handy extensions to create a streamlined order management flow for your ecommerce business.
Ecommerce order fulfillment basics
When a retailer receives an order from a customer, there are a variety of steps needed to process the order. This includes everything from receiving, tracking, and fulfilling customer orders. Let’s examine the most integral steps in the typical WooCommerce order management process:
Picking
When a customer places an order, someone from the warehouse needs to pick all the items from the shelves. It is a simple task but can quickly become time-consuming if you run a larger warehouse.
Packing
The packing process is where the items are weighed and given the appropriate shipping materials and labels. The packing slip lists the content of the package, including the weight, dimensions, item details, quantities and SKU numbers.
Shipping
The final step of the fulfillment process is the shipping and delivery. Item are taken to or picked up by the carrier, entering their logistics network until the package reaches the customer.
WooCommerce orders management
The WooCommerce platform includes a native order management dashboard. Here are the key components of the WooCommerce order management interface:
Viewing all orders
The WooCommerce > Orders page provides a comprehensive of all your past and present orders.
When you visit the page, you’ll find all your WooCommerce orders listed in a table. Each order contains the order #, customer name, date, status, export status, and order total.
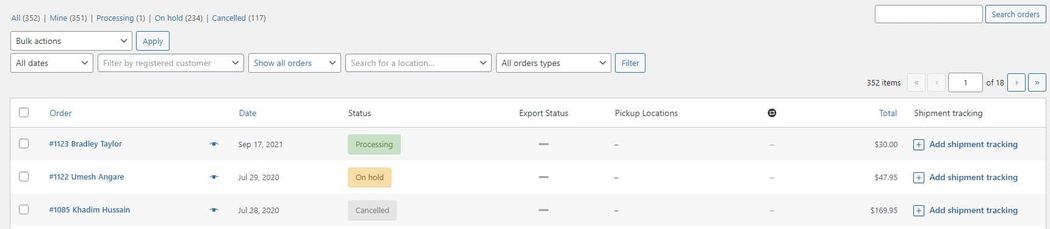
The final column of the dashboard is for Shipment tracking. This will display the tracking number, URL, and carrier for the delivery. You can apply this number to each order manually from the dashboard.
If you use third-party extensions, they may add details to the dashboard.
For instance, in our example you can see a column for Pickup Locations as well as Subscription relationship
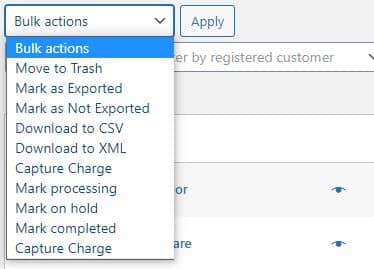
If you want to edit your orders in bulk, you can do so from the dashboard. Click the Bulk actions window to reveal the options. For example, you could change the order status for a group of orders from processing to completed.
The dashboard features several filters you can use to refine the orders. The date filter lets you select a specific month. With the customer filter, you can enter a customer’s name into the search bar and the filter will populate all matching users.
Note, this filter will only work for customers that registered for an account. If a customer completed the purchase using a guest checkout you will not be able to search by their name.
You can also filter by order type. This is useful if you accept alternative forms of orders such as memberships or subscriptions.
Order statuses
Below are the different statuses for WooCommerce order management:
- Pending installment — Order received but not paid
- Failed — Payment failed or was declined
- Processing — Payment received and stock levels have been updated.
- On-Hold — Awaiting payment and stock levels have been updated.
- Finished — Refunded by administrator
- Canceled — Canceled by an admin or the customer
Searching for orders
You can find specific orders using the search box in the upper-right corner of the dashboard. The search supports order numbers, customer names, and other order details like the billing address. After you click Search, the platform will display the matching orders.
Viewing single orders
To review the details for a single order, click the link in the Order column. From the order page, you can see the various order details including the customer’s address, phone number, account status, and order status.
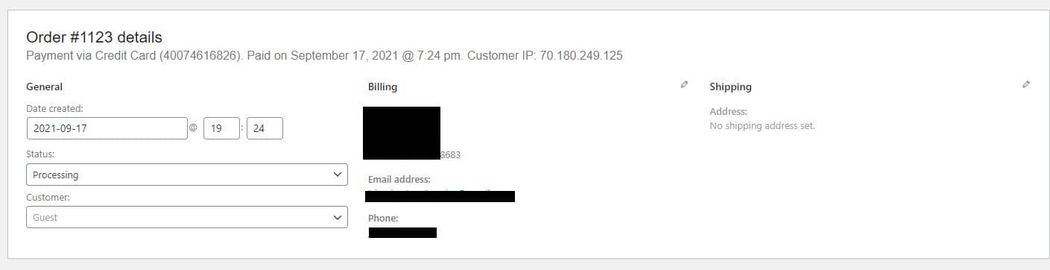
The interface allows you to edit most of these variables. You can change the date and time by using the dropdown date and quantity selectors. It also enables you to change the customer and order status using the same method.
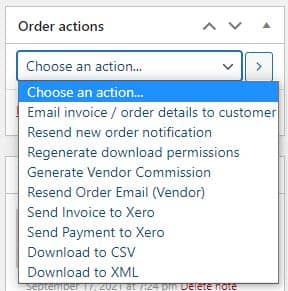
The order actions window gives you several tools for managing the order. You can send an invoice to the customer or resend the order notification to the appropriate admin.
Additionally, you can perform actions for different WooCommerce extensions. For example, if you use WooCommerce Vendors to manage a multi-vendor marketplace you can use the order actions to generate a vendor commission.
With the Managed WordPress Ecommerce Hosting plan from GoDaddy Pro, you get a separate panel for shipment tracking. Here, you can add the tracking number and carrier information like you can from the orders dashboard.

Order notes
The order notes panel displays status changes and updates for the transaction. Different actions like payments and changes to stock levels will be automatically reflected in the order notes.
You can also use the panel to add your own custom notes.
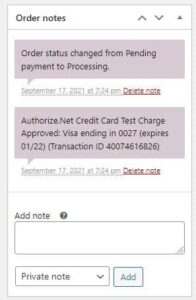
The notes are displayed in one of three colors:
- Purple — Indicates a status notice such as payment gateway details.
- Grey — Notes are for general status updates including status changes and private notes.
- Blue — Notes are notifications sent to customers via email.
If an order is delayed you can quickly add a note that will go to the customer. They will then be automatically notified.
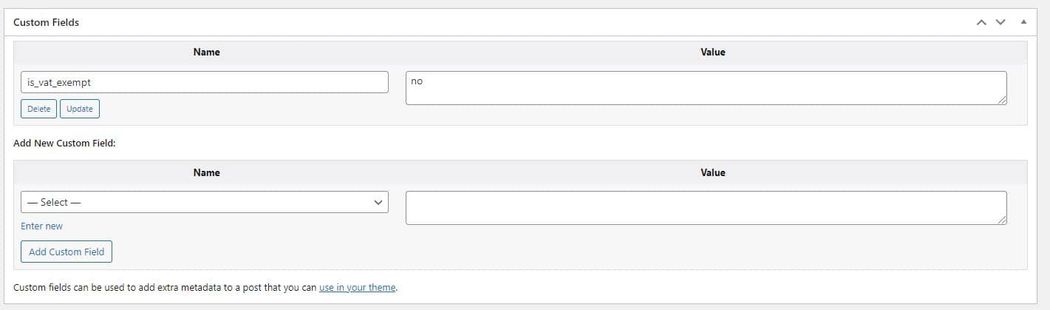
Custom fields
The custom fields section lets you apply your variables to your orders. They do so by adding extra metadata.
Handling orders with the WooCommerce order management system
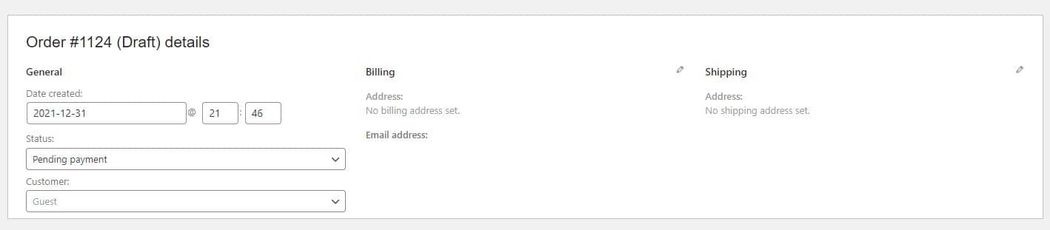
Creating orders
You can also add your orders manually. To create a new order, select Add order from the dashboard. This will take you to an order page that mirrors the typical record for an order. All the essential fields are editable and you will use these to create the new order.
Paying for pending orders
You can pay for pending orders using the payment link from the order overview.
The customer’s access to the payment link will depend on whether they signed in to complete the purchase.
If the customer is a guest, anyone with the link can view and use the payment page. If the customer is a registered user, they will need to log in to access the link. The customer can do so by going to My Account > Orders.
How to improve WooCommerce order management with plugins
Sequential Order Numbers
By default, WooCommerce assigns random order numbers to each order. If you want your orders in chronological order, there are a few different approaches you can take.
With the GoDaddy Managed WordPress Ecommerce hosting plan, you get built-in functionality for sequential order numbers. You also have the ability to choose a starting order number and to add a prefix or suffix to the order numbers.
If you do not have our hosting plan, another option to implement sequential orders into your store is to use the Sequential Orders Pro extension. The plugin offers the same functionality as the native features in the Managed WordPress Ecommerce hosting plan.
Order Status Manager
For some businesses, the default WooCommerce order statuses may not suit their workflow. With the WooCommerce Order Status Manager plugin, you can create custom order statuses in workflows enabling your business to process orders efficiently.
You can also use the extension to create a “next status flow. With this tool, you can add an action button to your order pages and bulk actions to your orders dashboard.
Once the plugin is active, you can view your initial order statuses by going to WooCommerce > Settings > Order Statuses. To create additional statuses you have the option to add one from scratch or to import status.
The latter works if you have already created custom order statuses using another plugin or code snippet. To import your prior statuses, click Import custom statuses.

To change the order of the statuses, you can use the drag and drop functionality to arrange them in the sequence that works best for you. This will also change the order in which they appear on the Edit Order page. It also changes how they are displayed in the order bulk actions dropdown.
To add a new status click Add Order Status. From the creation page, begin adding the data for the new status. In addition to a name and URL slug, you will need to set a color, icon, action icon, and description.
If you want to apply a next status, click on the box and select the following step in your workflow.
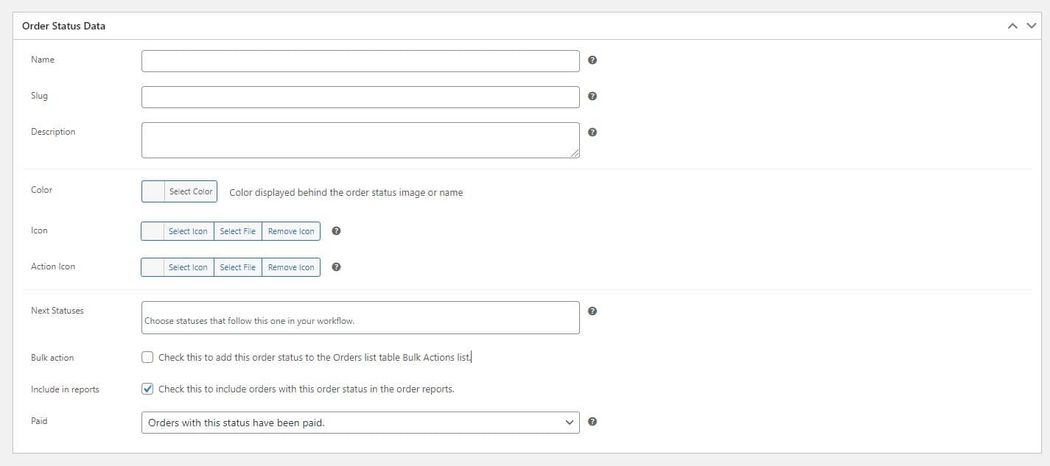
Click Save Order Status after you enter the details and the plugin will create the new status.
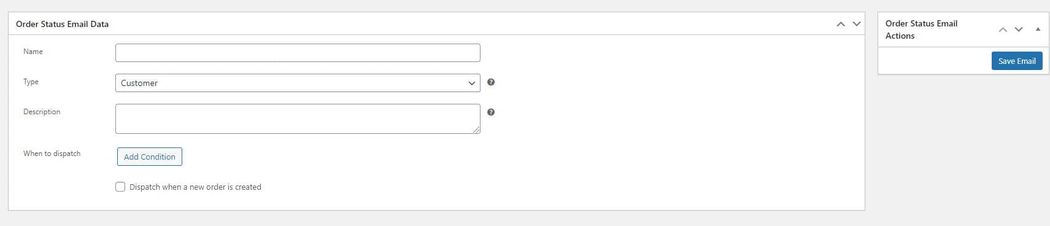
Set up Emails
After you finish creating your custom order statuses, you will want to configure which emails customers will receive for each status change.
To update the messages go to WooCommerce > Settings > Order Statuses > Emails.
Click Add email and enter a name, description, and type. You can then proceed to populate the details for the message.
Order status control
A key to efficient order management is to reduce the number of manual steps needed to complete the fulfillment process. One way to do this is to automatically update order statuses and complete orders.
By default, WooCommerce only auto-completes paid orders for products that are both Downloadable and Virtual.
Depending on your store, you may have other types of orders that you want to automatically complete. With the Order Status Control extension (included in our Managed WordPress Ecommerce Hosting plan), you control which types of paid orders automatically receive a Completed status.
When an order set to auto-complete is paid, it skips the Processing status and goes right to the Completed Status. This helps streamline order administration for those that don’t require any action on your part between the different steps.
You can set the plugin to auto-complete for all paid orders, virtual orders that are not downloadable, or no orders.
To setup Order Status Control, go to WooCommerce > Settings > General. Scroll down until you find Orders to Auto-Complete. You can then select the types of orders to auto-complete.

When a customer places an order that meets these criteria, it will automatically update to the Completed status. This will then appear in the Order Notes.
The plugin only completes paid orders with a payment method that calls:
woocommerce_payment_complete() / $order->payment_complete()
Most popular payments do such and will work without issue.
Conclusion
The popularity of ecommerce means that customers expect to order whatever they like, whenever they like, and without issue.
Fortunately, WooCommerce provides a straightforward and easy-to-use platform for managing your ecommerce orders. It allows you to automate repetitive work and gives you clear details about current inventory levels and orders that need attention. Easily extendable, you can use the OMS to sync your data across your various platforms to provide a more holistic customer experience.