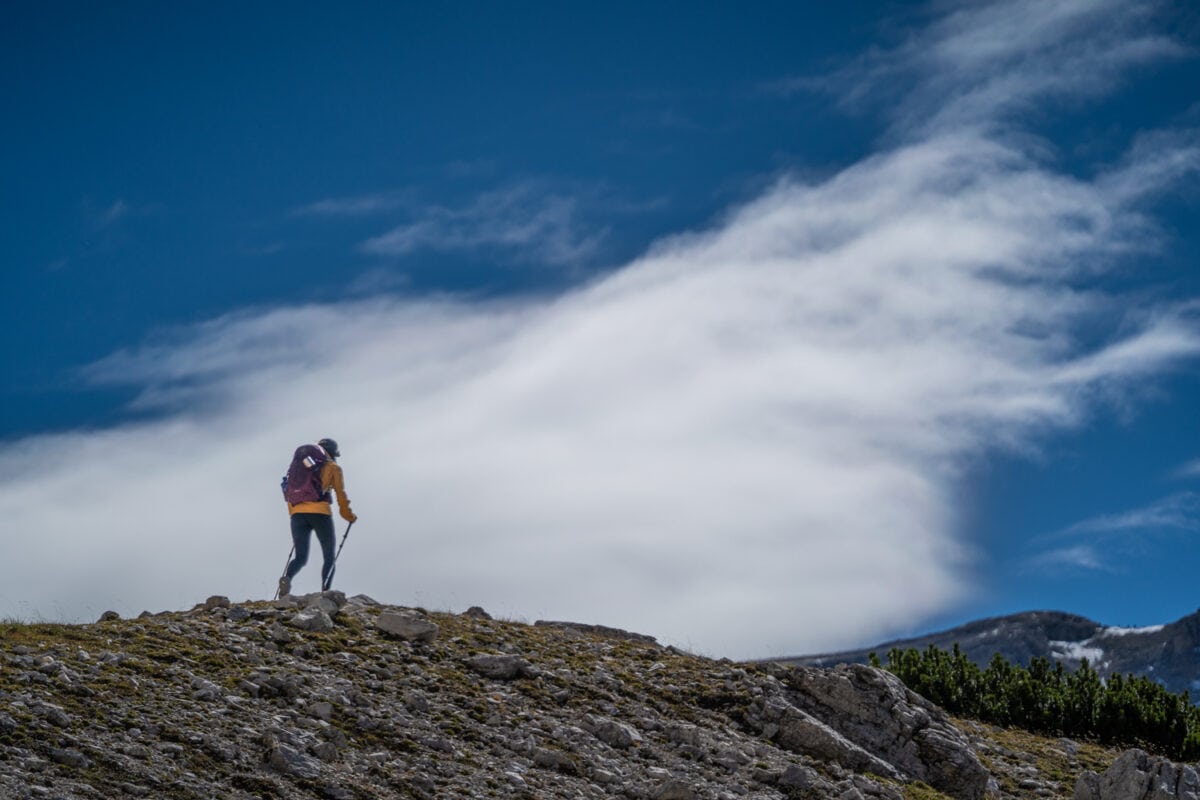
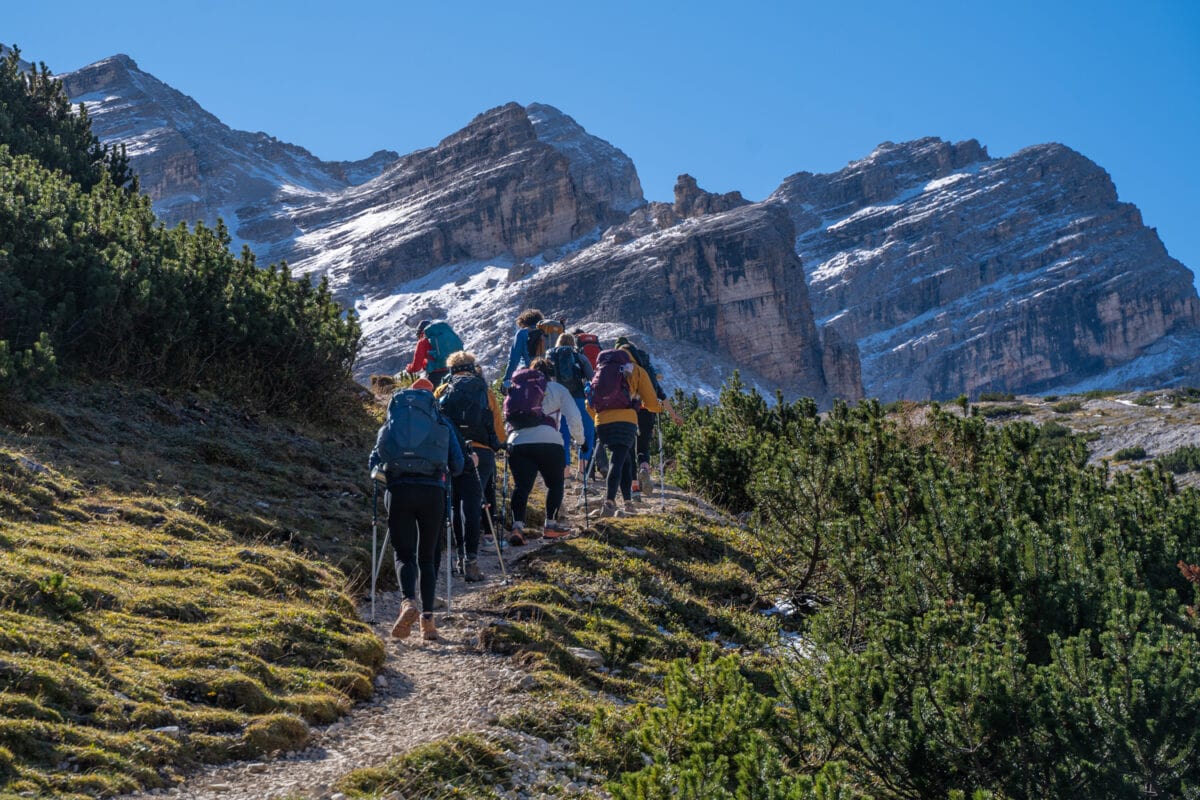
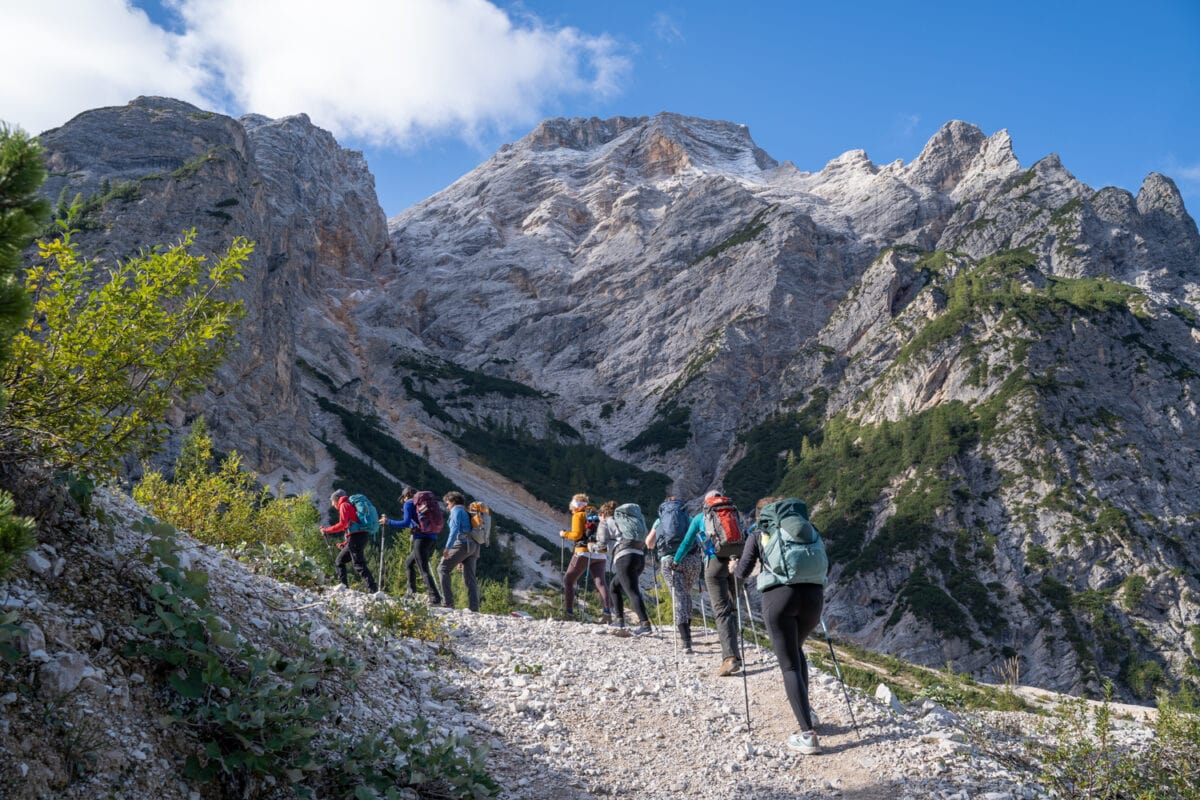
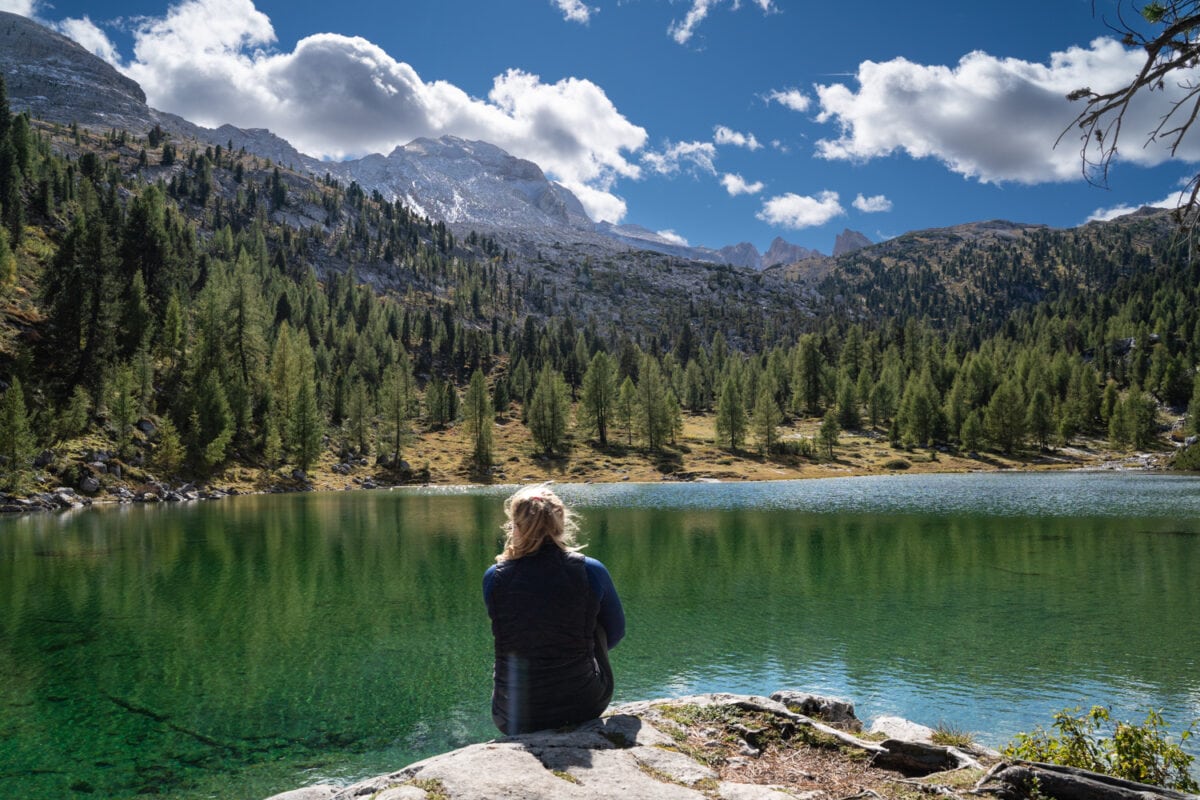
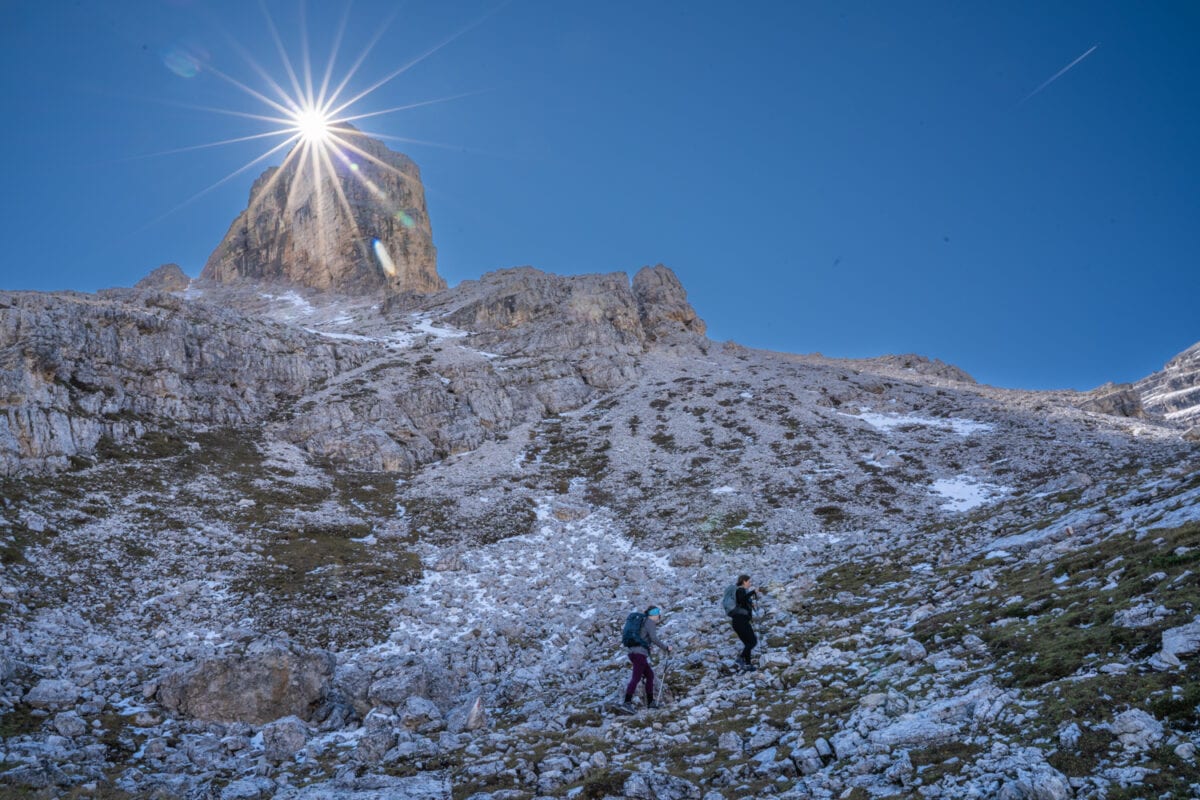
As I started the climb up the Alta Via 1 trail from Brais Lake, my body was anxious with excitement – the kind of excitement you get when you start an epic journey. This was the beginning of a day of lots of elevation gain, I just hoped that I was in good enough shape to make it. I was nervous, yet I was excited to enter the world of thru-hiking once again with an group of new people to get to know along the way.
I knew this was going to be a challenging hike, but I also knew that my body and mind needed this multi-day adventure in the mountains more than ever. What I didn’t know is that it would be this incredibly beautiful.
Chances are if you haven’t heard of the Dolomites yet – soon it will be a place on your radar. The 2026 Winter Olympics will be in Cortina Italy in the heart of the Dolomites. You’ll soon see the stunning Dolomites mountains in the heart of winter. However, I invite you to beat the crowds there and head there sooner rather than later – after all – it’s always better to lead than follow!
Where and What are the Dolomites
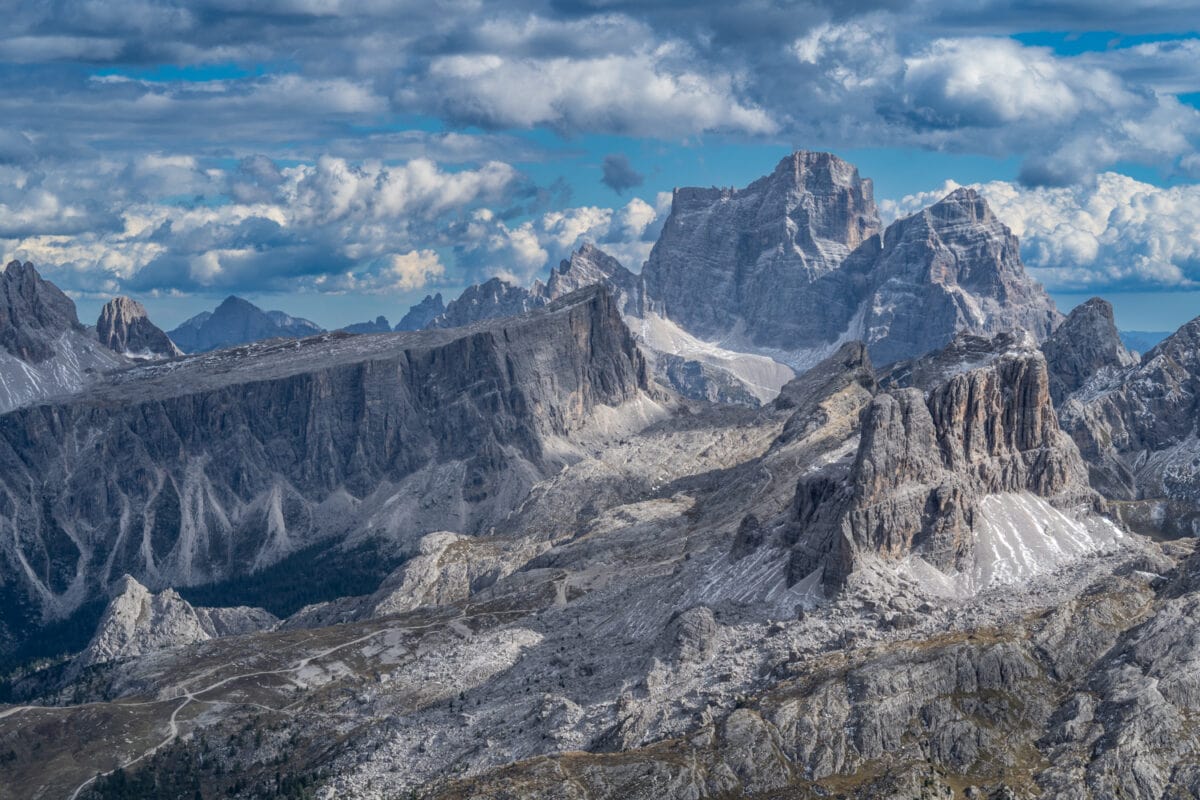
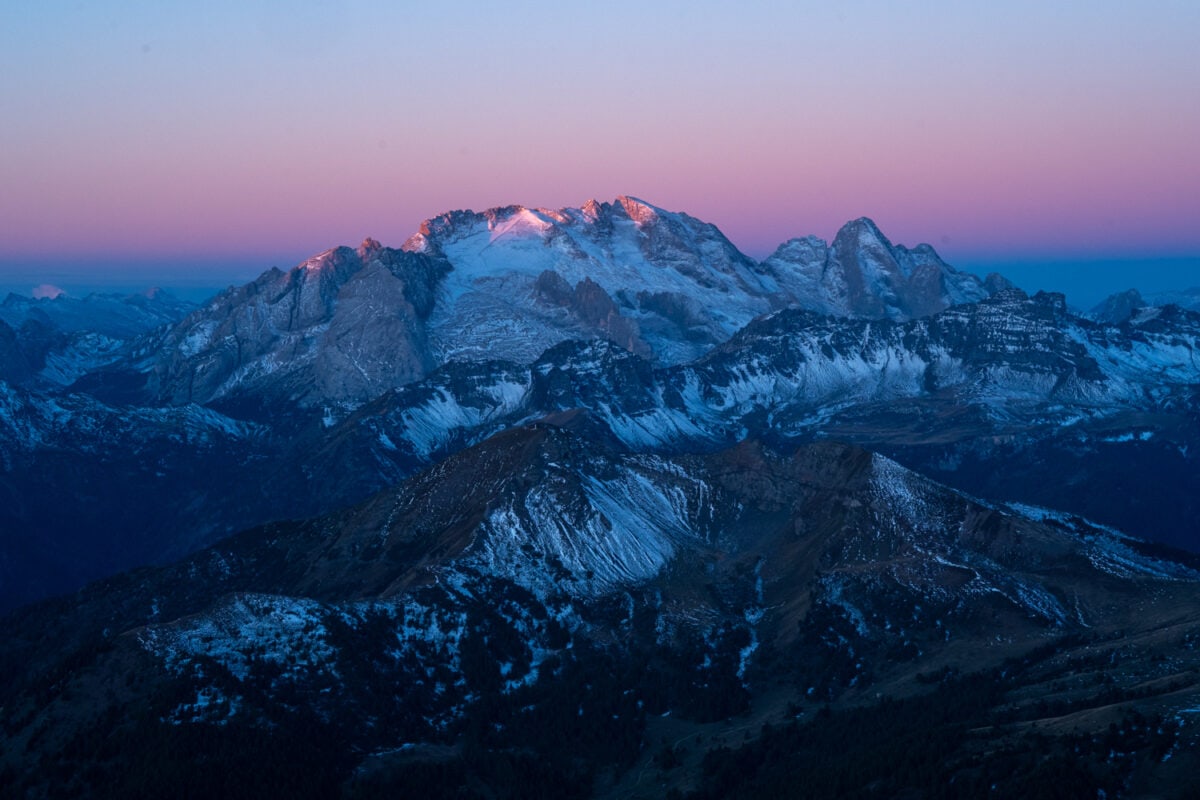
The Dolomites, located in northeastern Italy, is a mountainous region renowned for its stunning beauty and unique geological formations. The Dolomites is a part of the Southern Limestone Alps and covers an area of over 140,000 hectares. It was designated a UNESCO World Heritage site in 2009, thanks to its distinctive geology and natural beauty.
Dolomites History
The Dolomites have a rich history, from their geologic origins to their role in World War I. The Alta Via 1 takes you through the heart of this history, with numerous war memorials and fortifications dotting the landscape. The hike also offers a chance to learn about the local culture and traditions of the Ladin people, who have lived in the Dolomites for thousands of years.
The mountain range is composed of a unique rock called dolomite, which was formed over 250 million years ago from the ancient ocean bed. This rock is characterized by its light-colored, jagged peaks and steep ridges, creating a landscape that is unlike any other in the world.
Alta Via 1 Hike Through the Dolomites
I was there to take on the Alta Via 1, a multi-day hike traversing through the heart of the Dolomites. It can take anywhere from 8 to 12 days depending on your speed. The trek offers panoramic views of the iconic jagged peaks, turquoise alpine lakes, and rolling green meadows that make the Dolomites such a unique and beautiful landscape.
The Alta Via 1 hike utilizes the mountain hut system (rifugios) where you can sleep and eat, making it one of the world’s most popular thru hikes (link). ‘Rifugio’ means ‘shelter’ in Italian, but it is also interchangeable with usually ‘mountain hut’. These are no basic huts…you’ll be well taken care of and comfortable at the rifugios!
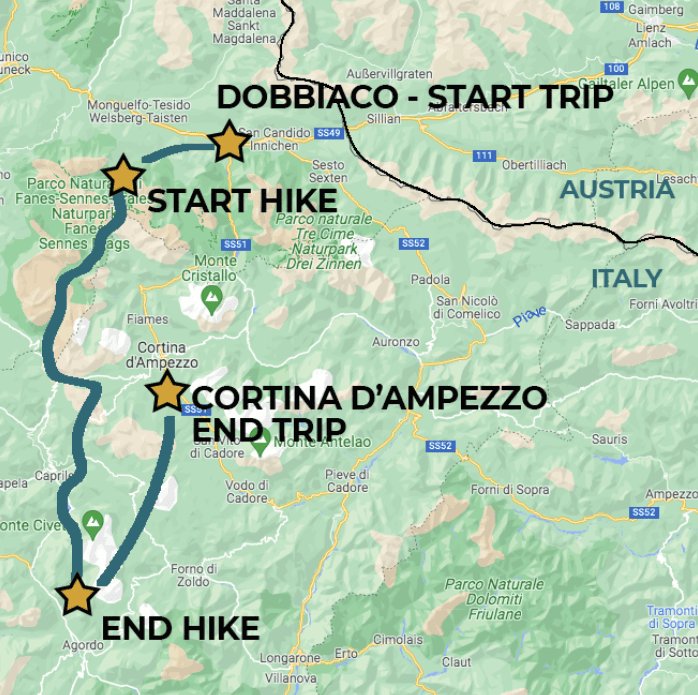
Our Alta Via 1 Route Map

3 Ways to Hike the Dolomites Alta Via 1
1. Independent Hiking
If you have the time, you can take on the Alta Via 1 independently – doing all the planning yourself. With approximately 30 rifugios along the route, there are many ways you can slice and dice your itinerary if you are doing the Alta Via 1 independently. You can tailor it just for you, your hiking fitness, and interests.
There are tons of resources out there for the Alta Via 1 independent hiker.
Alta Via 1 Rifugios – booking, details, location and more!
Maps – Tabacco Dolomite Map
Books/Route Guides – The best loved book/guide map is this Alta Via 1 Guide
Blogs – there are plenty of people who have detailed out their independent hiking journey for the Alta Via 1 where you can get all the nitty gritty details to plan and hike it yourself.
2. Alta Via 1 Self-Guided
A step above independent hiking is self-guided. This is where you hire a company to set up all of your logistics (rifugios, transfers, food, luggage movement) and you hike on your own according to their itinerary. You don’t have to worry about making your own reservations or wonder about what route to take – that’s all decided for you.
This is a popular way to do the Dolomites – a little more expensive than independent, but you will have all the planning done for you – and that’s worth quite a lot! One of the companies I recommend for the Alta Via 1 Self-Guided is Slo Ways Travel – an Italian company that knows the region well.
In this Dolomites self guided itinerary they provide the rifugio bookings, maps, and 24 hr. phone support. Luggage transfer and transportation transfers are optional extras.
Note: If you do check them out, please tell them you learned about it in Ottsworld – I really appreciate it.
3. Hike Alta Via 1 With a Group
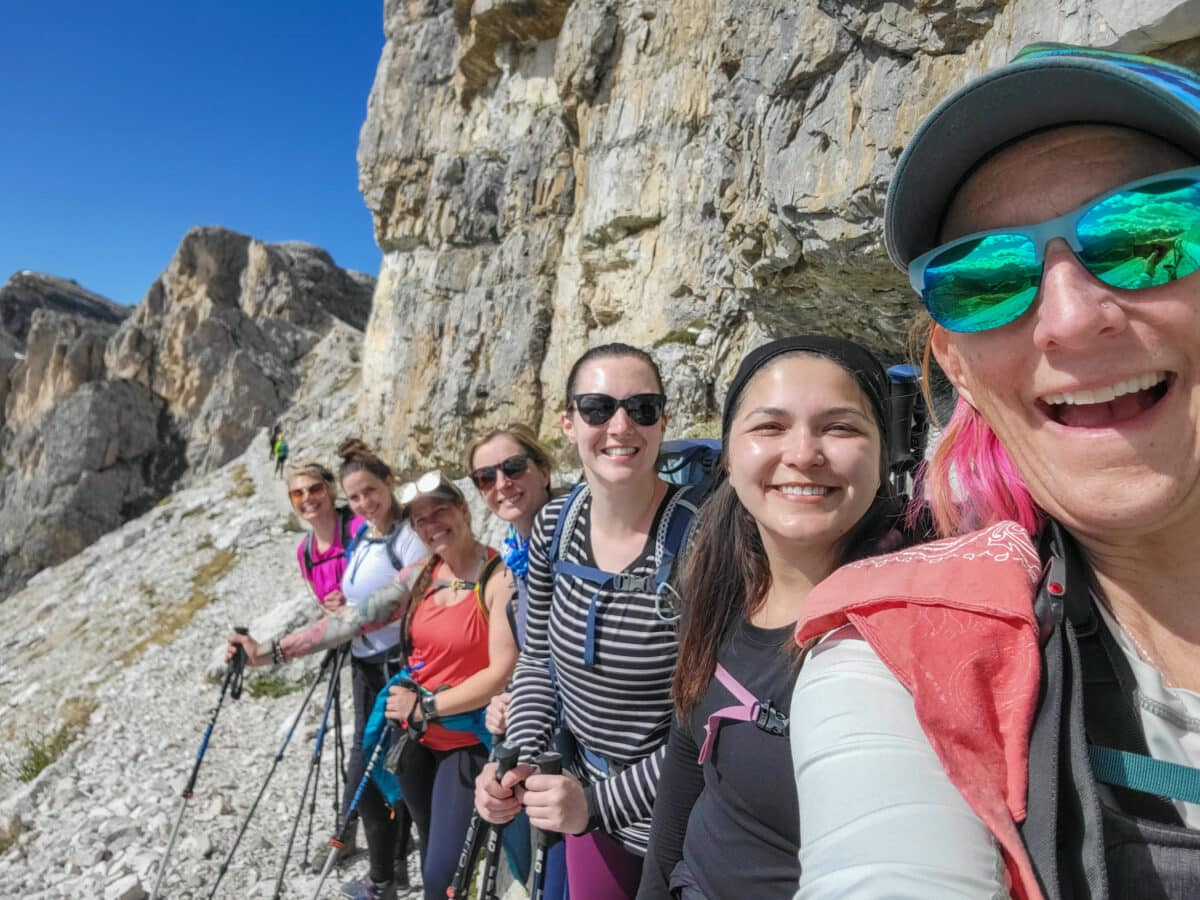
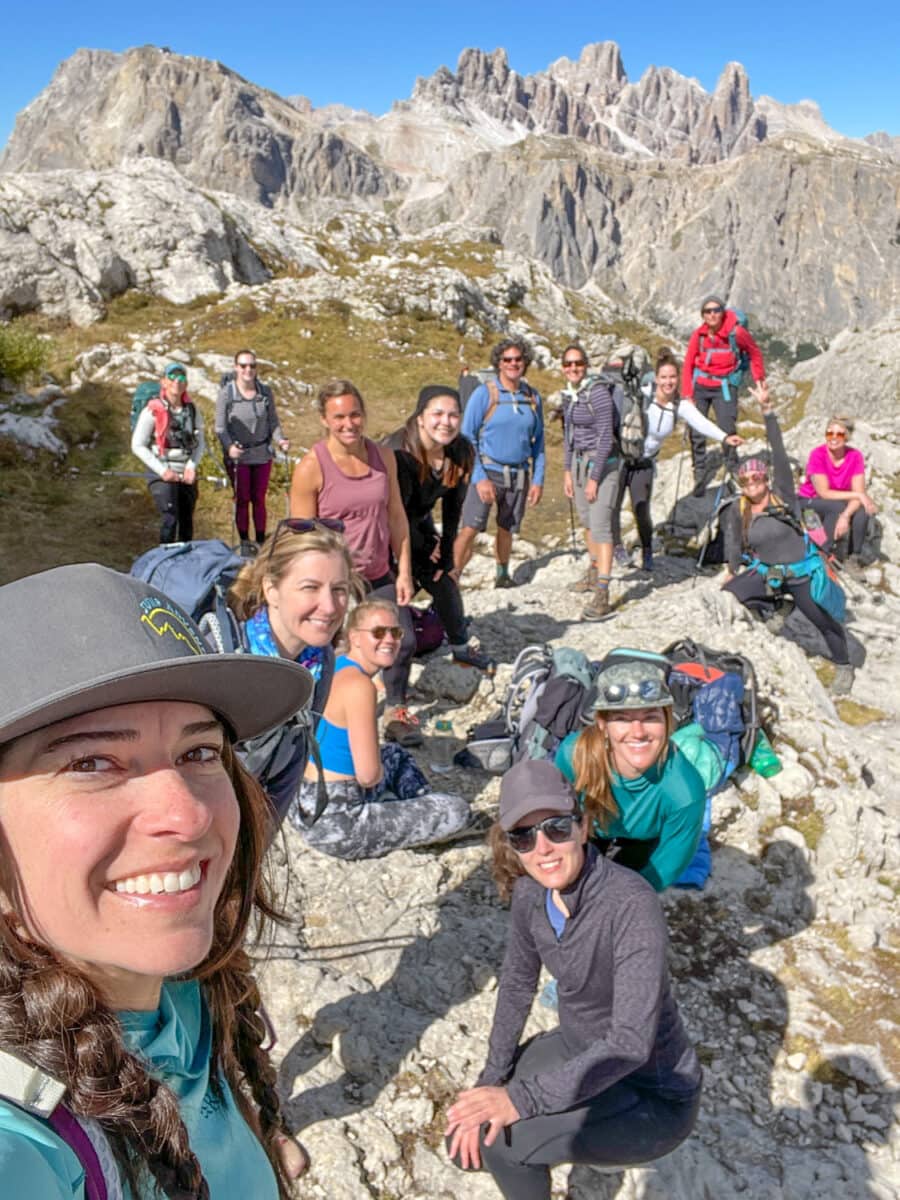
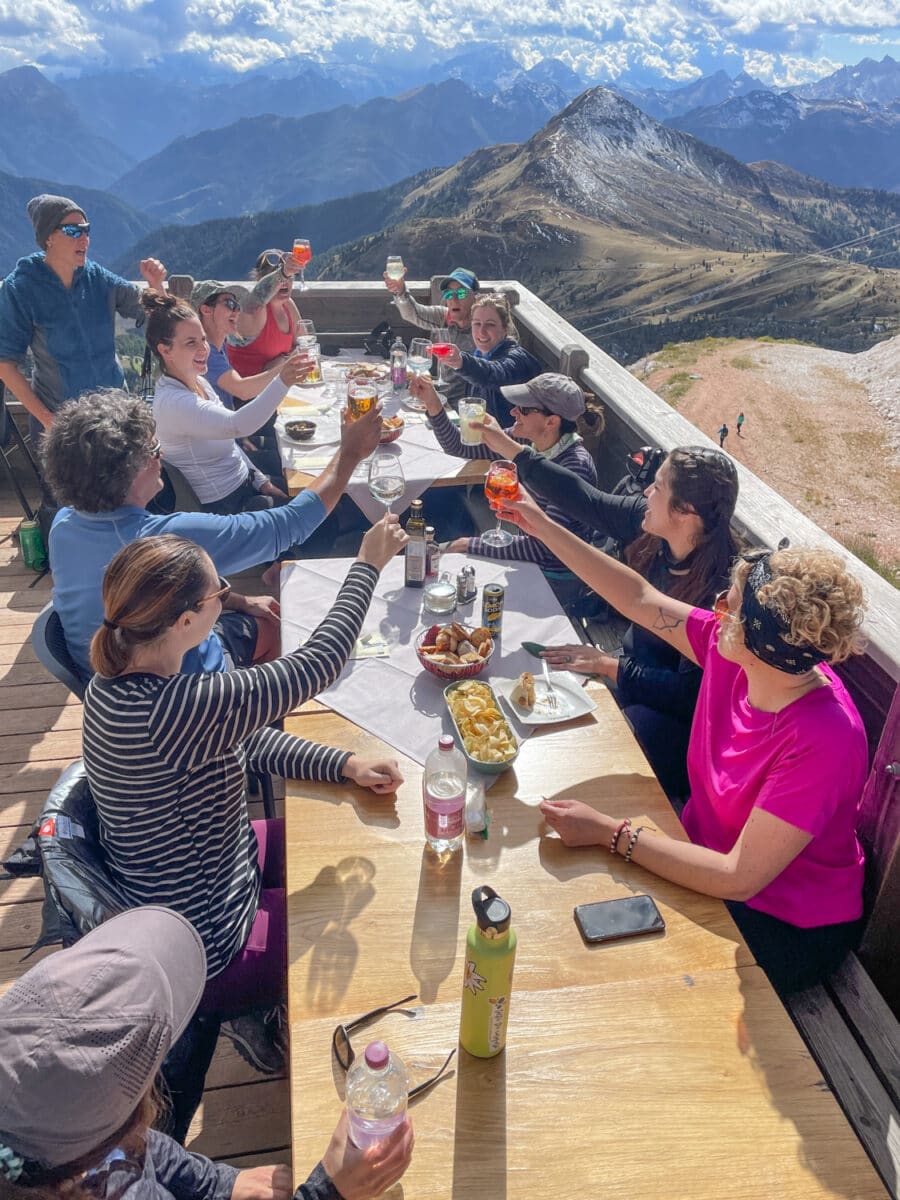
This was how I tackled the Alta Via 1 hike – with a group of 14 people – and it made the whole experience so much more rewarding! I knew a couple of the people prior to the hike, but most were strangers. However, I had 8 days to get to know them while hiking among majestic mountains – I can’t imagine a better social setting for making new friends. I absolutely loved the camaraderie; it took the hike to a whole other level of goodness!
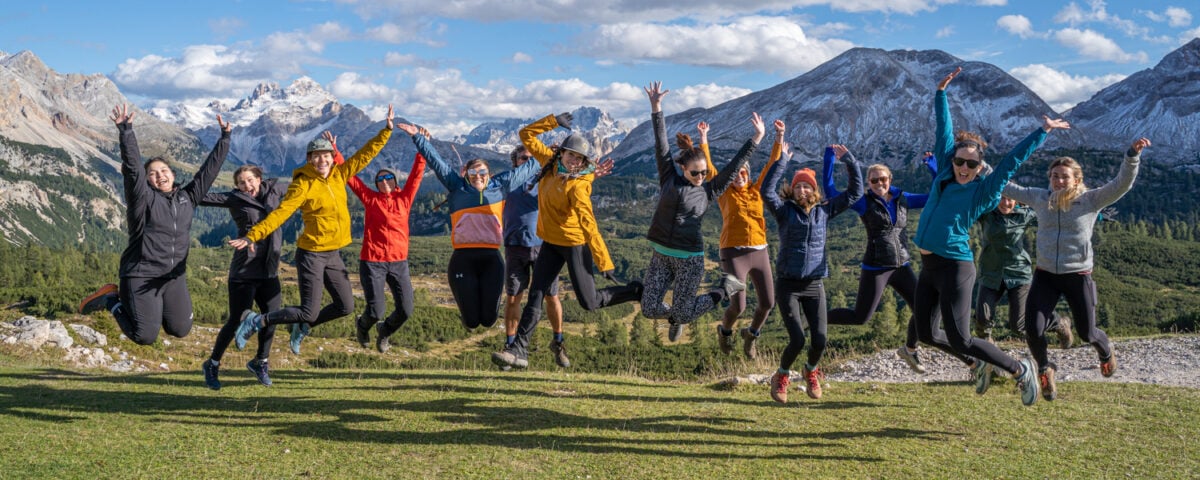
I went with Jump Adventures – a tour company run by my good friend Jackie Nourse. She designs and hosts active adventures for those who want to get outside their comfort zones and have an EPIC experience with new friends. I joined her 8 night Group Dolomites Hiking Itinerary, and it was the highlight of my travel year. Not only was the incredible outdoor experience mind-blowing (as you’ll see below), but it was a rare social treat for me getting to do an outdoor adventure with so many cool people.
Jump Adventures is offering another chance to do this group hike in September 2023! If you watched me take it on in 2022, or are a solo traveler that really wants to go with a group, then please check out her awesome tour! Plus – if you tell her that you learned about it on Ottsworld, I’ll send you a special travel gift that you will be able to take with you and use on the hike (something from my gear list below)! But you must say that you heard about it from Ottsworld when you sign up!
Benefits of a Group Hike on Alta Via 1
If you still aren’t on the ‘group hiking’ train…let me share some of the benefits of hiking with others in the Dolomites.
Let Someone Else Do the Planning
All logistics are handled for you, even your luggage transfers
Make New Friendships
I find that after 50 it’s sort of hard to make new friends. However going on a group hike is a wonderful way to meet people who you already have something in common with…a love of the outdoors and hiking. Friendships will be formed…I guarantee it.
No More Fear of Getting Lost
Have a guide to lead the way so you never have those ‘lost’ moments – maybe you lack the confidence to hike a new trail yourself…a group hike is the solution!
Knowledge of a Local Guide
Hiking with a group is sort of like a moving classroom. A local guide can answer any questions about the area and history as well as help with the language barrier. For this particular hike our local guide Laura taught us all about the Ladin people, who have lived in the Dolomites for thousands of years. The Ladin people have their own language and cultural traditions that we were exposed to during the hike.
Build Confidence
If you are sort of new to hiking, it’s a great way to build up confidence in your outdoor skills within the safety and support of a group. Consider it a stepping stone…a really fun one!
People To Cheer You On
Every hike I’ve ever done has those moments where you just don’t think you can do it – you feel deflated. But nothing beats the moment when you hear someone from your group yell, “You can do it!” or “great job!” or in my case, “There’s a beer at the top waiting for you!”.
What to Expect When Hiking the Dolomites Alta Via 1 Route
I will be focusing on hiking the Alta Via 1 with a small group since that’s how I did this trip. This means most all planning is done for you – all you have to do is hike and enjoy! Here’s what you can expect when you hike the Alta Via 1 on a group tour…hint…expect to have an incredible time!
Hike Difficulty
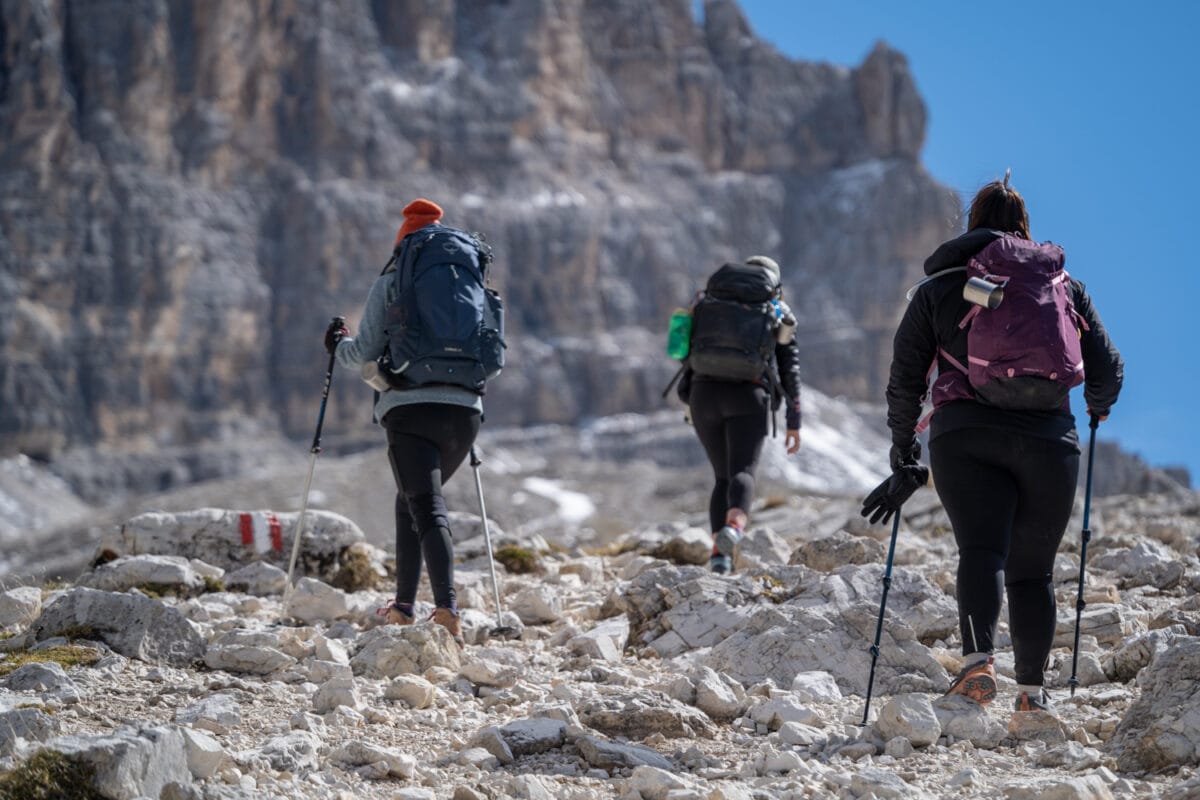
Of course, this is hard to gauge because everyone rates hikes differently based on their own fitness level. For me – I would rank this a moderate to hard hike. We hiked nearly 50 miles with average daily elevation gains/losses of 2700 feet – this certainly wasn’t easy. However, I have seen some people write about it as an easy hike – so to each his/her own I guess.
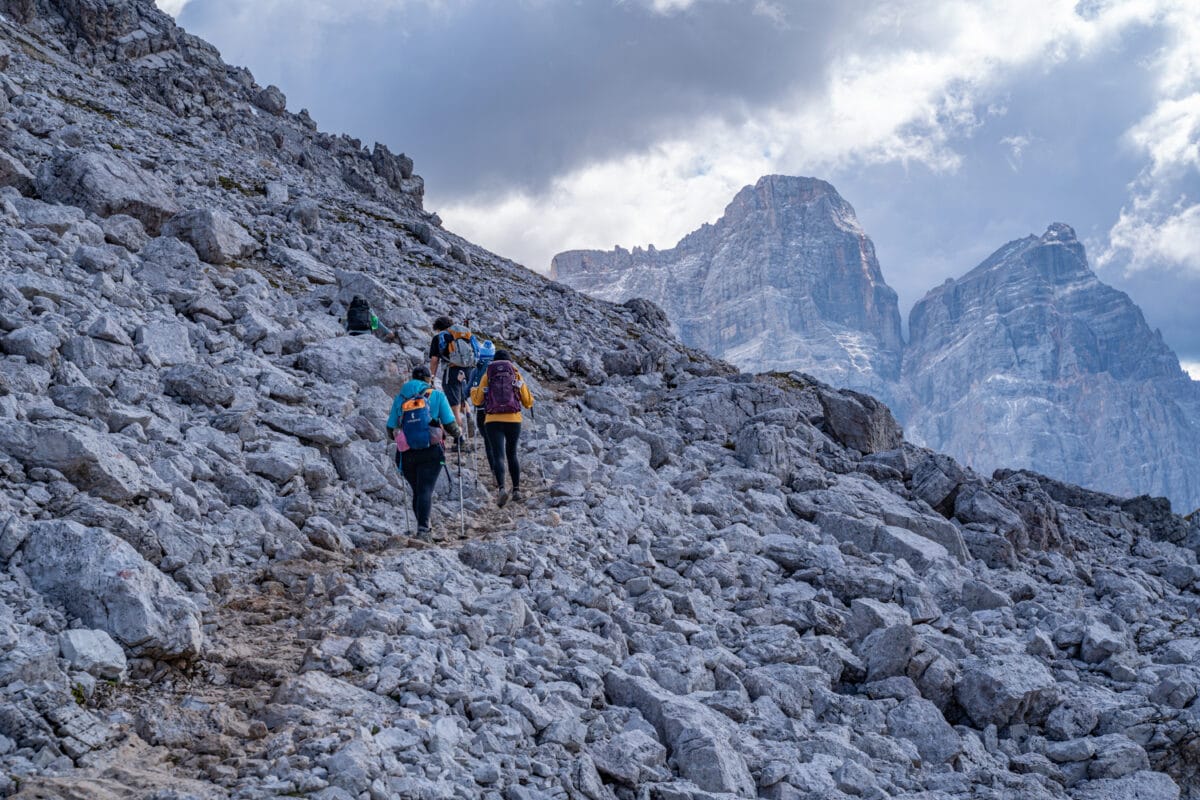
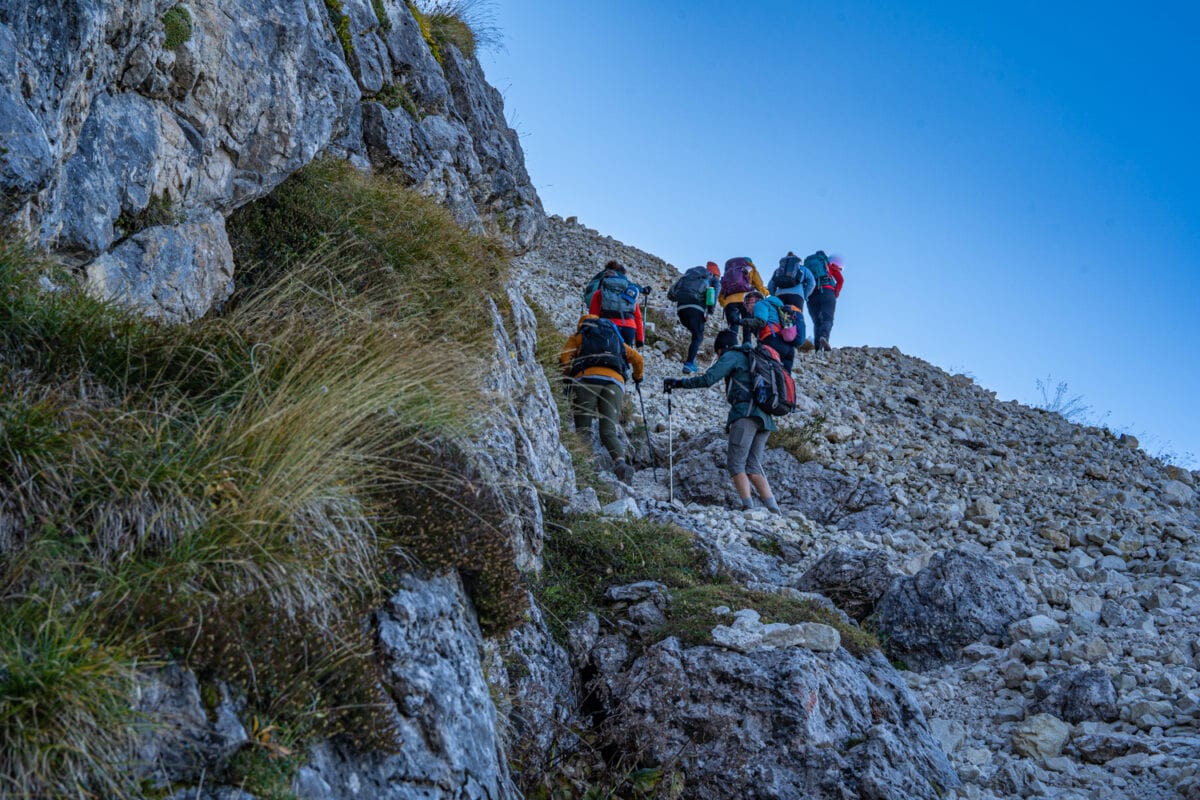
I found it really challenging. There were times we had to scramble up boulders, there were lots of steep switchbacks, and the trails were rocky in general. You got as high as 8,900 ft so at times you also had altitude to contend with.
If you are used to hiking in the Alps or places like Colorado – this might be normal, but for most people, you need to prepare for the Alta Via 1.
How to Train
I would suggest that you train for the up and down as much as you can. If you don’t have mountains around you to practice in, then get on a stair climber and start to strengthen those muscles 4 to 6 months out.
I love this training plan for long hikes (there’s even a downloadable pdf!) that my friend Becki put together.
Where Do You Stay Along the Alta Via 1 Hike
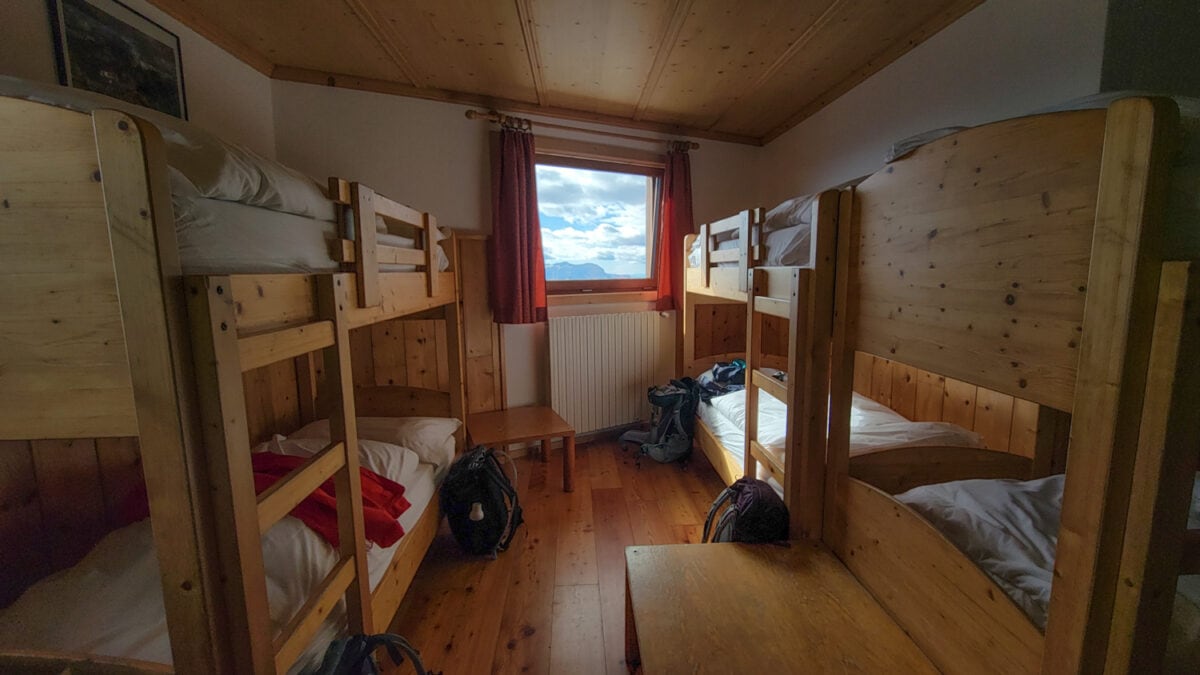
The Rifugios (mountain huts) were a slice of heaven; a warm place, full of joy and friendship, filled with a special feeling of freedom that only the mountains are able to supply. I love hiking all day, pushing myself, and then having a cozy place to stay for the night. The Dolomites are littered with cute rifugios in stunning, remote locations – these are your ‘homes’ for the night. They range in design and quality; however, it’s really the people you are with as well as other hikers that make the experience.
Most Dolomites rifugios offer dorm accommodations with anywhere from 4 to 16 people in a room. Most that we stayed in were 4 to a room. They furnish bedding – but you may want to bring a sleep sheet as well as earplugs (see gear list below). All of the rifugios we stayed in were on the nicer end (thanks group trip!) and offered incredible views, hot showers, wifi, common areas, and food/drink. A perfect place to clean up and rest after a long trail day!

Food and Drink
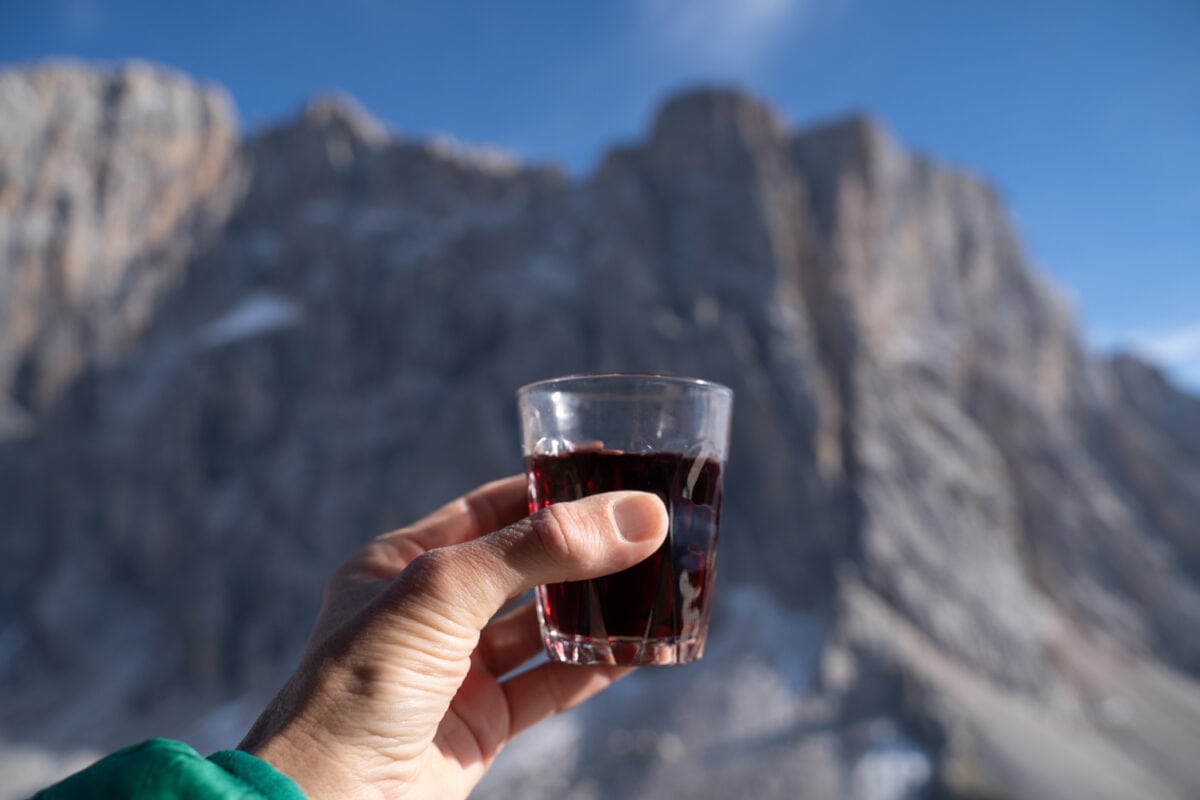
I hike to eat. And there’s no better country to eat in than Italy. This makes the Alta Via 1 hike the perfect storm for people like me! Every day I finished hiking, I would start with a drink (beer or wine) to celebrate end of the hiking day. And then that evening would feast on the pasta specialty of the area that night. There’s really no better place in the world to carbo-load than Italy.
Most days we ate a continental hearty breakfast at the rifugio, would take a packed lunch from the rifugio and eat along the trail, and then eat dinner at the hut we arrived at that evening.
There were a few times where we were able to eat lunch at rifugios because of their location on our hike for the day. I loved those days. It might seem weird to eat a big lunch in the middle of a hike…but when it’s homemade pasta…I don’t care. Some of my best memories were fresh pasta in the middle of the hiking day.
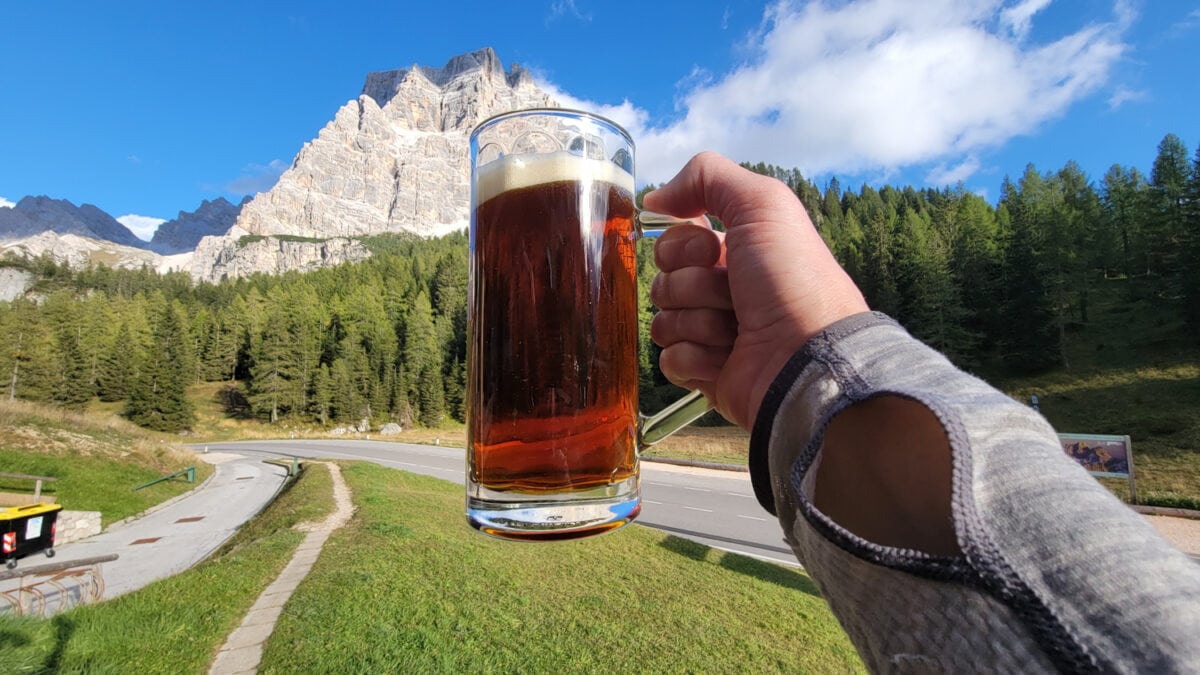
Every rifugio also offered very reasonably priced wine (and it was good!) and local beer. One of our rifugio’s was even a brewery! Rifugio Lavarella on Day 2 is Europe’s highest altitude brewery and the beer was really great – and so was the view!

Plus – on this particular Dolomites group itinerary from Jump Adventures – the meals were all included which is soooo nice. You never have to worry about extra spending money…except for all of that wine and beer I drank!
Language Barriers Along the Alta Via 1
It is true that once you get into remote places in the Dolomites there is less English spoken, but don’t let that deter you – you can get away with English pretty much everywhere. Granted – it’s always nice to try to learn a bit of the local language – but don’t fear that you won’t be able to get around because you don’t know Italian. There are always ways to get around a language barrier.
In addition, on a guided Dolomites hike, you have an Italian-speaking guide that is with you! So – if you really are having trouble communicating, they can help. Or they can also teach you some useful phrases in Italian!
Luggage Support
We were able to have our luggage moved from rifugio to rifugio on our group hike. It makes that hike so much more enjoyable when you just have to take a day pack. The luggage support ran like clockwork. Every day when we showed up at our end point, our luggage would be there waiting for us, and we could change into comfortable shoes and clothes!
There were two huts on our route where no luggage support was available since there were no roads there. On those days our luggage was moved to the next hut with road support, and we just packed a few extra things in our daypack for that night.
Sauna Experiences in the Dolomites and Massage
At the rifugios you’ll also find some wellness perks. Some have saunas – which is perfect for your aching body! Since I was hiking in mid-September, it was quite chilly in the evenings, so a hot sauna was really appealing.
I loved this cute little sauna at Rifugio Lavarella – and nothing beats a cold water dunk after the sauna. I slept SO WELL that night!
In addition, on my group trip we were able to organize massages when we finished the hike back at our hotel in Cortina. Pure bliss!
Guide and Alta Via 1 Trail Markings
Our guide Laura had been guiding groups through the Dolomites for years and knew so much about the area. She led the way and handled all of our ‘administrative tasks’ – like getting us started off in the morning, picking out lunch spots, and being our liaison at the huts.
Plus – she was just darn fun. I learned so much from her about the history of the area as well as the current day Italian political landscape, and what the food specialties were in the region.
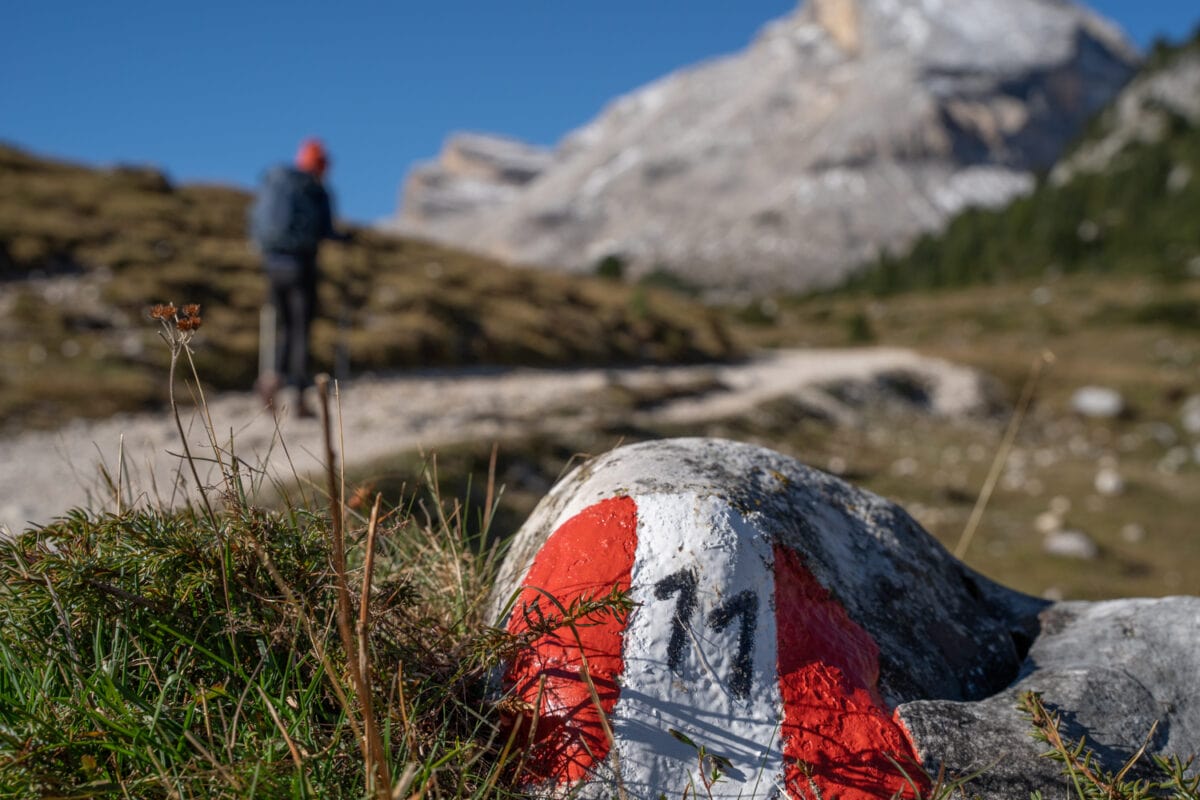
The trail was marked pretty well – however, there are a lot of little offshoot trails that can make it confusing. It was really nice to just rely on Laura for directions. It’s a perk of a group hike to just be able to follow and enjoy the moment instead of worrying if you are on the right trail. Vacations should be a way to reduce stress in our everyday lives and remind us to live in the moment – and that’s the benefit of having a guide!
Best Time of Year To hike in the Dolomites
I’m biased…but I’m pretty positive the best time of the year to do the Alta Via 1 hike is in September. And yes, this is when I went. The trails and mountain huts don’t fully open up for the summer until mid-June, and they stay open until the end of September. That means that most people hike in the Dolomites in July and August. The rifugios are normally booked up in advance, and there are quite a few people using the trails since people are on school holiday. It’s also much hotter.
In September, when school is back in session and summer has been forgotten – this is the time to go! It won’t be empty trails, but it will be more reasonable.
September can mean cooler weather to hike in too. In fact – we ran into snow and ice on a few of the higher elevations. However, when hiking and exerting energy, I enjoy cooler temps – and September is perfect for that. We were also lucky in that we had sun every day until the last one when I finally had to put on my rain gear! July and August tend to be pretty hot and there are frequent afternoon storms. And June can be a gamble as at higher elevations you can still have snow and ice.
Bathrooms
Every day except one did we not have a place in the middle of the day to use a proper bathroom. On a typical hiking day on the Alta Via 1 you will encounter bathrooms at rifugios alone the trail. However – there are also plenty of places to pee in nature…and the views are pretty nice! If you take a hike like this – then I think you always need to be ok with doing your business in nature. However – on this particular group trip – bathrooms were quite accessible.
Money Matters Along the Trail
On this group trip – you really don’t need to bring much money as most everything is included. If you plan to drink alcohol – then plan to pay for that – and maybe a few extra snacks. You can use credit cards at most of the rifugios. I recommend bringing one credit card and not more than $100 in cash for the hike though.
Internet Connectivity in the Dolomites
Internet is available at all of the rifugios – even the remote ones. Some are faster than others of course. Cell phone coverage was also available for me for 80% of the hike. I of course recommend that since you have a guide and everything taken care of for you on a group hike, then why not just log off and enjoy the fact that you just need to hike.
Alta Via 1 Day by Day Hiking in the Dolomites
Here’s what I experienced day by day on my group hike with Jump Adventures.
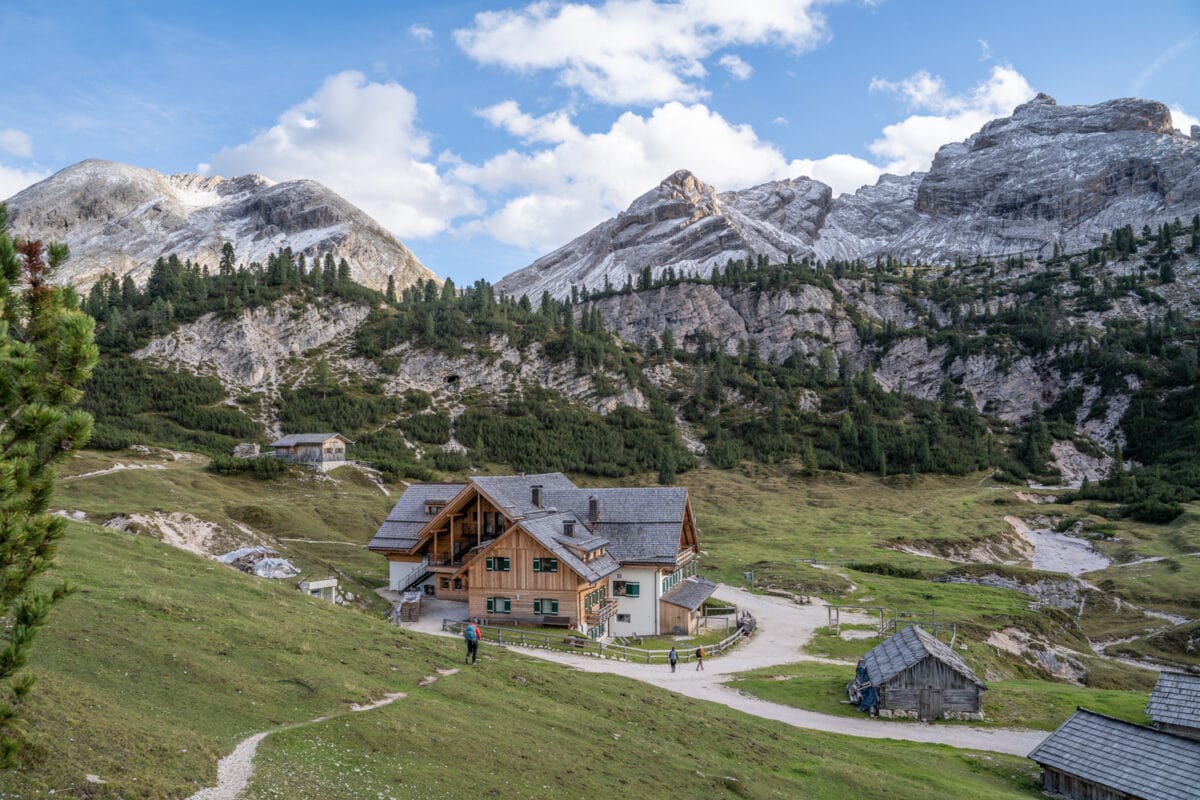
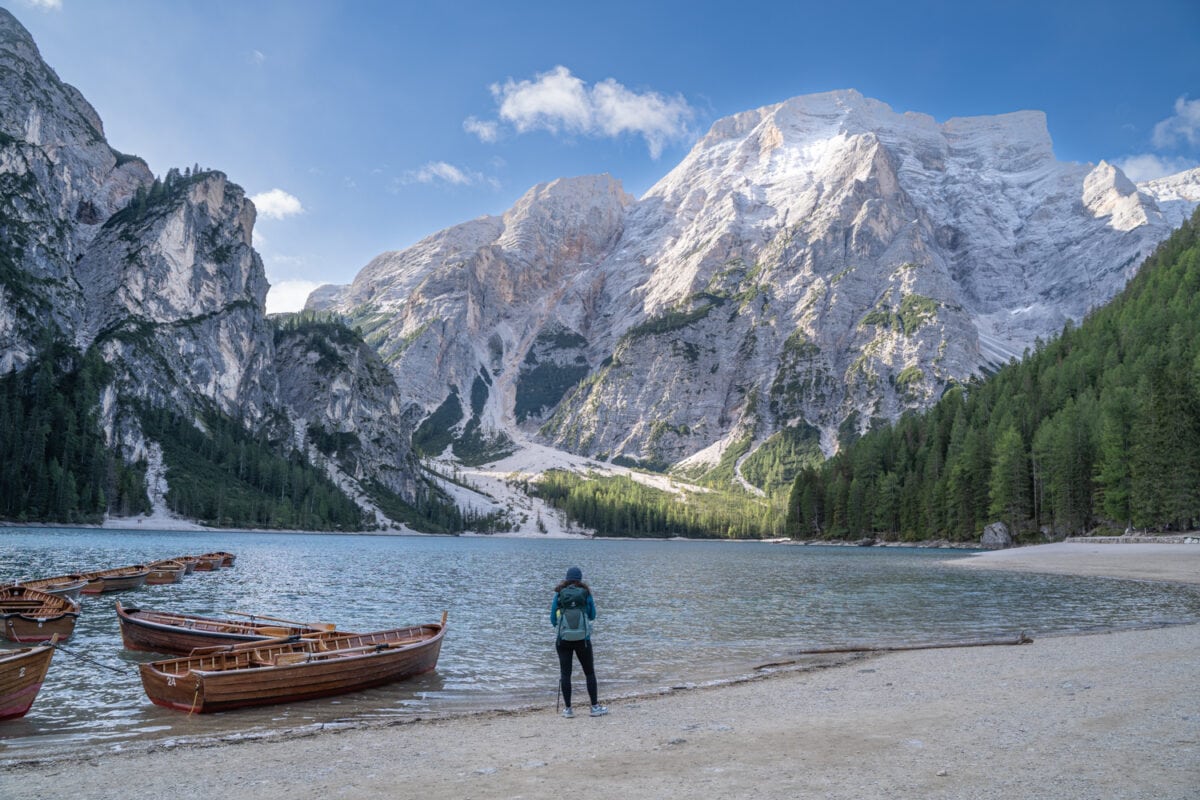
Day 1 – Lake Brais to Rifugio Fodara Vedla
7 miles | 3635 ft Elevation Gain | 1564 ft Elevation Loss | Max Altitude 7805 ft.
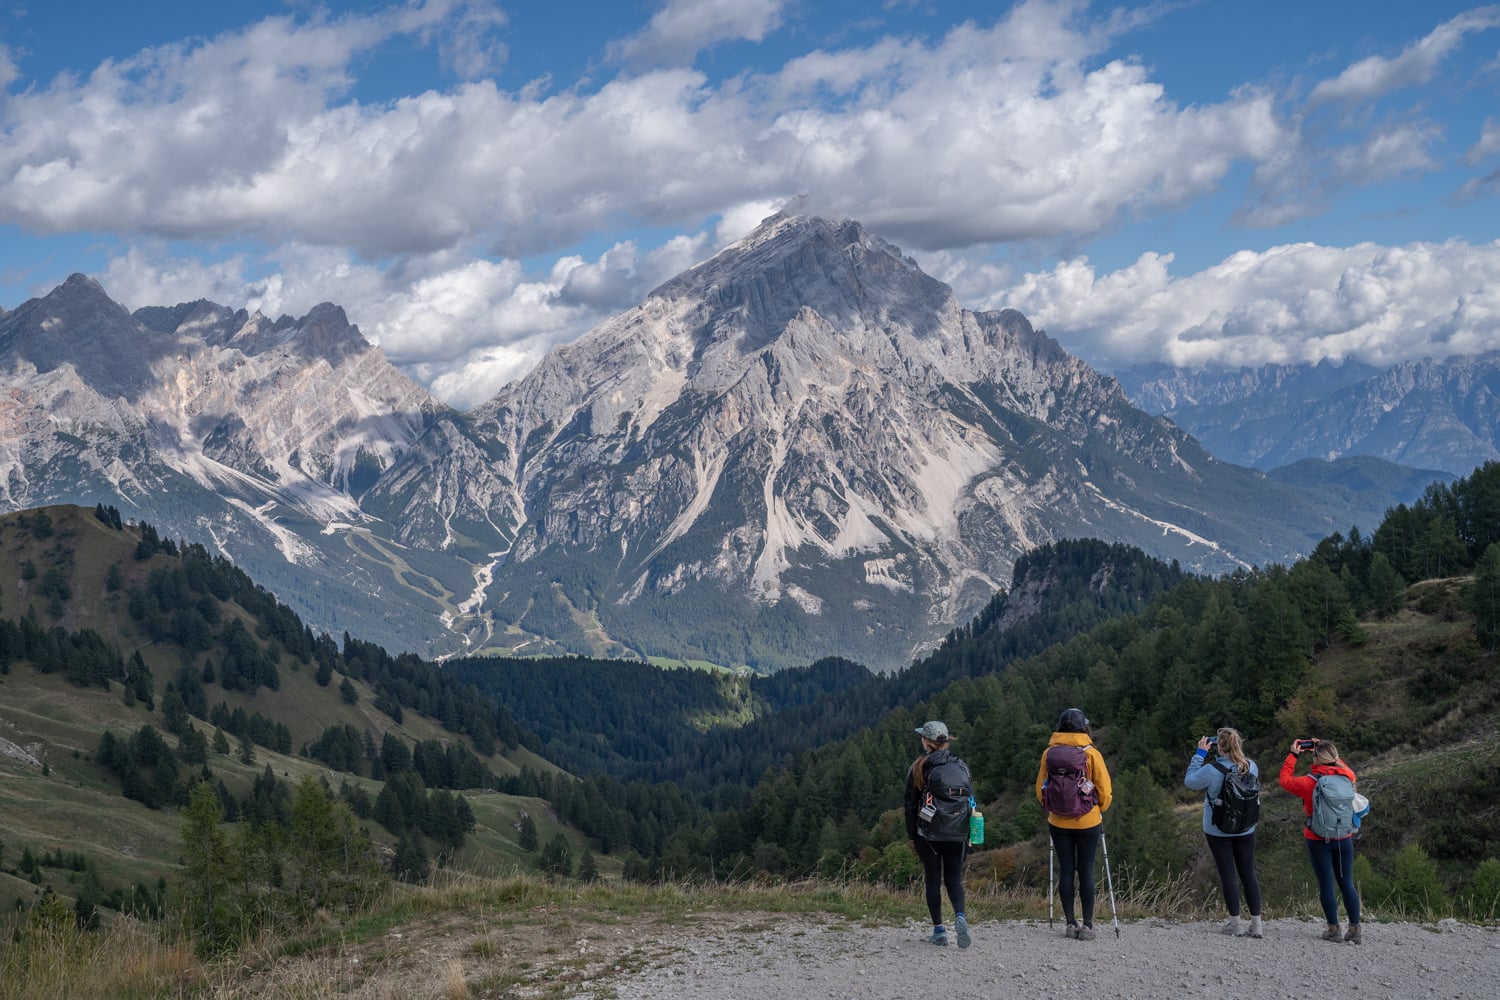
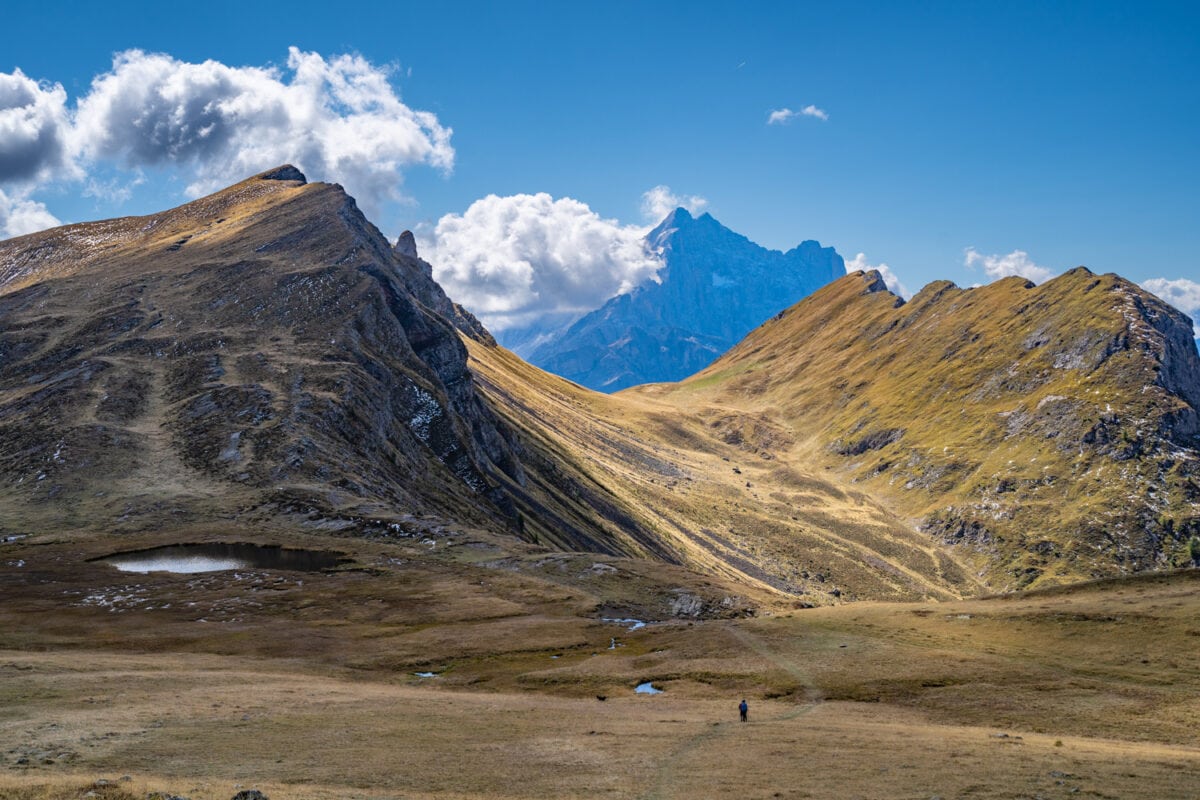
The Alta Via 1 starts with a bang! You start at beautiful Lake Brais hiking around the lake, but once you get to the other side – prepare to go up…lots of up. The first day in the Dolomites is always a challenge as you get your legs moving and get used to the altitude. Luckily, the scenery will take your mind off your tired legs and heavy breathing! I had heard about Italy’s Dolomites, but I had no idea they were this beautiful. The landscapes were so varied as well as the fast-changing weather. We had sun and snow all on day 1.
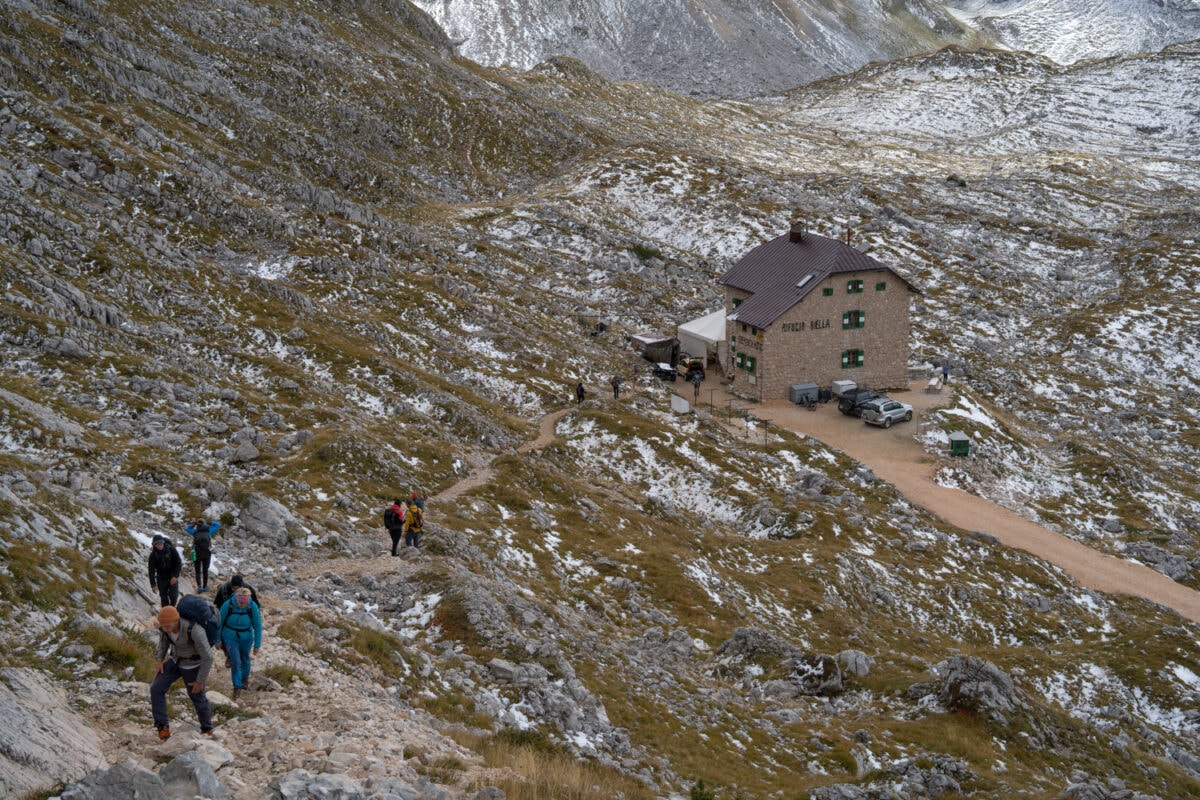
I can’t remember ever being so excited to get to a lunch stop before. But when I finally got to the top of the last big climb and looked down and saw the smoke puffs coming out of the chimney at Rifugio Biella (https://rifugiobiella.it/en/) I practically ran down the trail to get there! They had some of the best pasta Bolognese that I’ve ever had in my life! I’m sure the fact that I had to work so hard for it played into my love of it…but hey – that’s fair. After such a tough morning of climbing, the steaming pasta and meat sauce was just what I needed.
The remainder of the day was filled with rolling hills and incredible scenery.
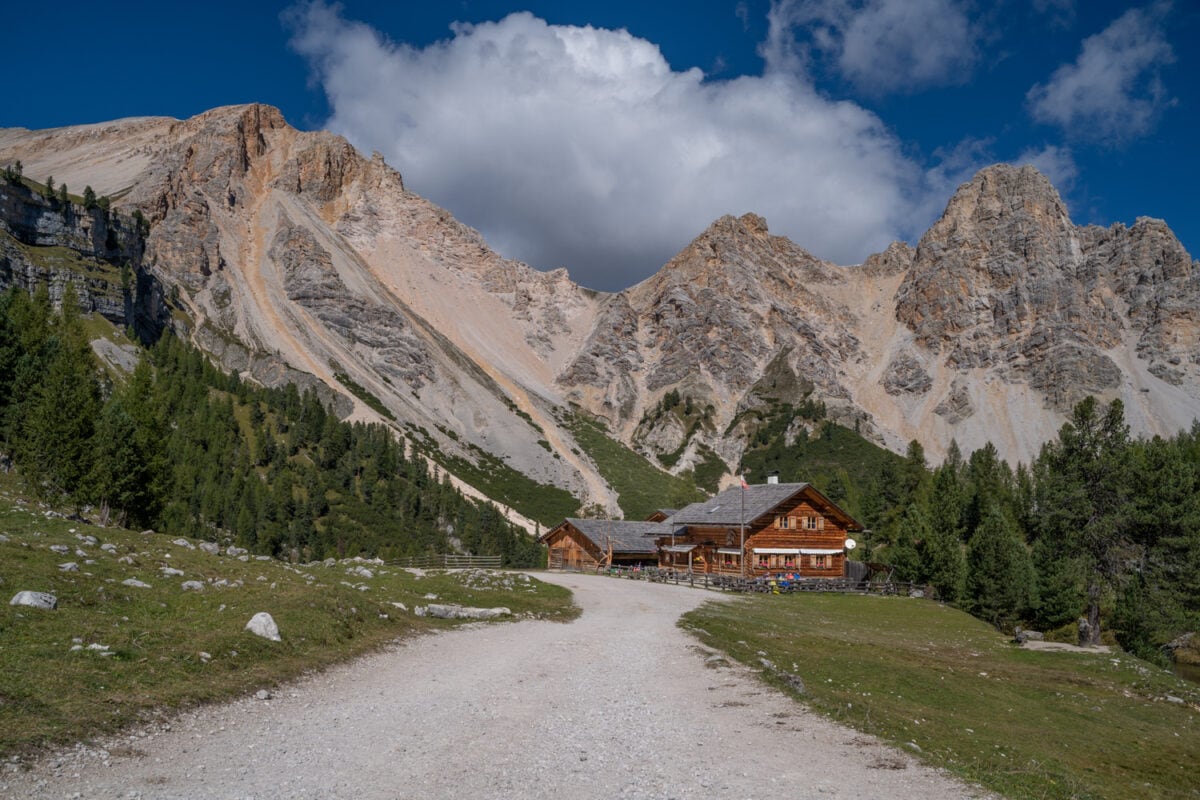
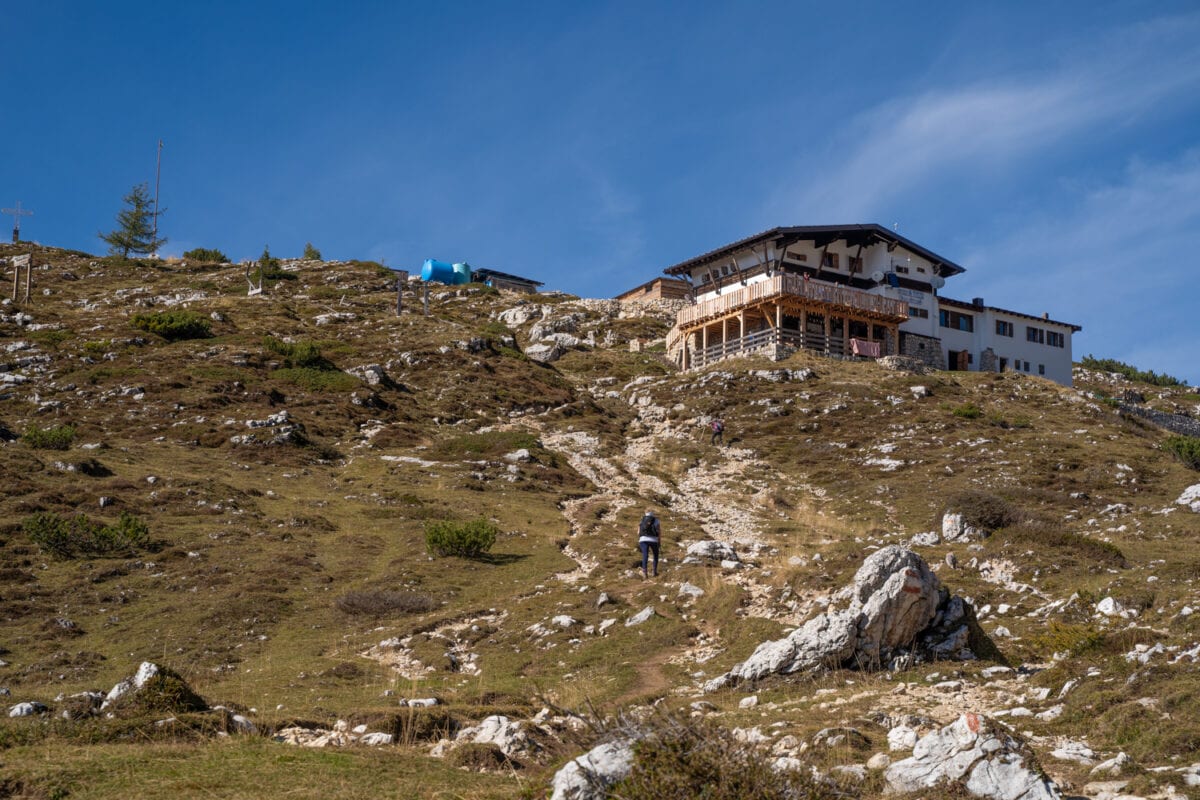
Fodara Vedla Rifugio
There’s really no better feeling than getting the first glimpse of your end-of-day rifugio. Created at an old WWI military base location, Fodara has served as a family home and now refuge for 100 years! And it’s still family-run, giving it a special feeling of coziness. This was probably the nicest rifugio we stayed in as some of the rooms even had private bathrooms! The entire building has been updated, and everything was made with beautiful blonde-colored wood. The breakfast spread in the morning was probably one of the best we had the entire trip – yogurt, eggs, fresh pastries – Fodara spoiled us!
Day 2 – Fodara Vedla to Lavarella – Fanes Plateau
6 miles | 1991 ft Elevation Gain | 2221 ft Elevation Loss | Max Altitude 7024 ft.
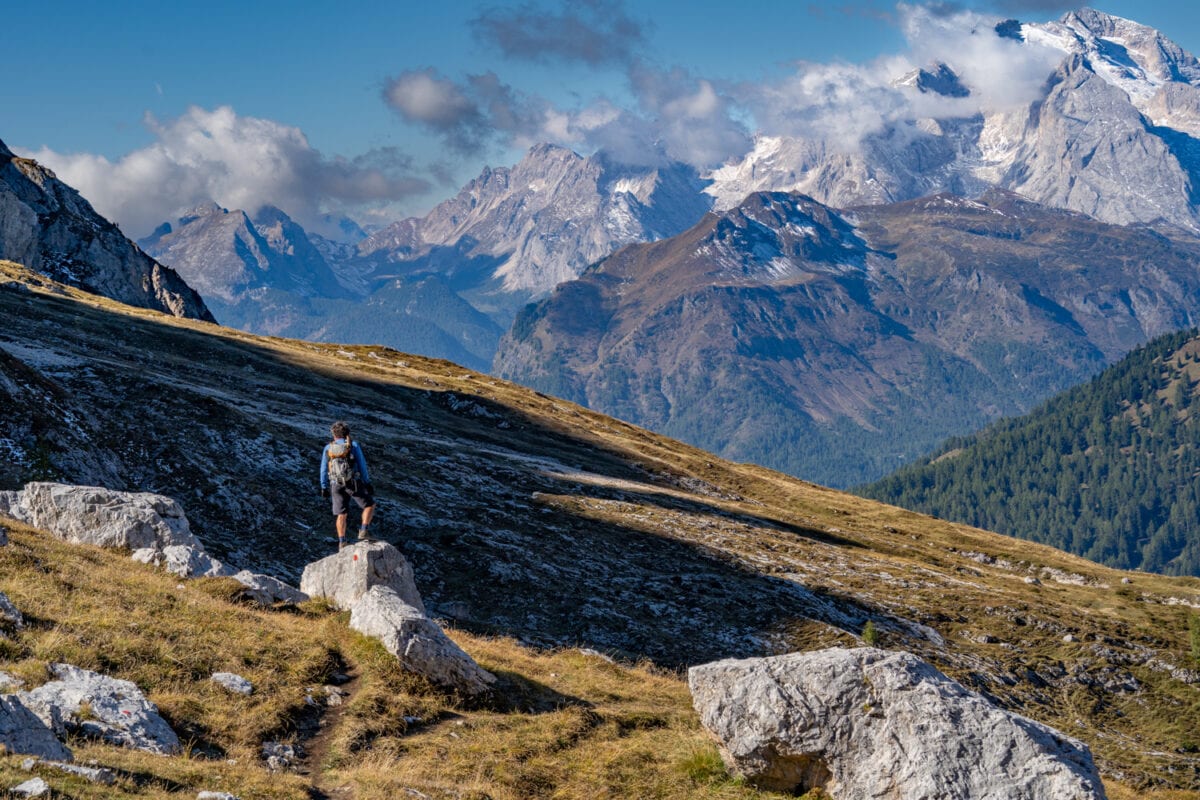
Today we had a pretty steep descent after breakfast and then back up, up, up to the Fanes Plateau. However, overall, the hiking was pretty moderate today. But the views were anything but moderate!
We followed along a stream for the second half of the hike. Is there anything more soothing than a trickling stream in the mountains…not really.
Rifugio Lavarella
We arrived at Rifugio Lavarella (and brewery) early in the afternoon so we had plenty of time to really enjoy our surroundings. The lodge and little farm buildings lie at the heart of the Fanes Sennes Braies natural park. The beer never tasted so good on a sunny day in the Dolomites! The sun-filled patio was full of hikers, bikers, and a jovial air of people who love the outdoors…my people! And we even had time for a foot soak in the nearby alpine lake, then it was off to the cute little sauna.
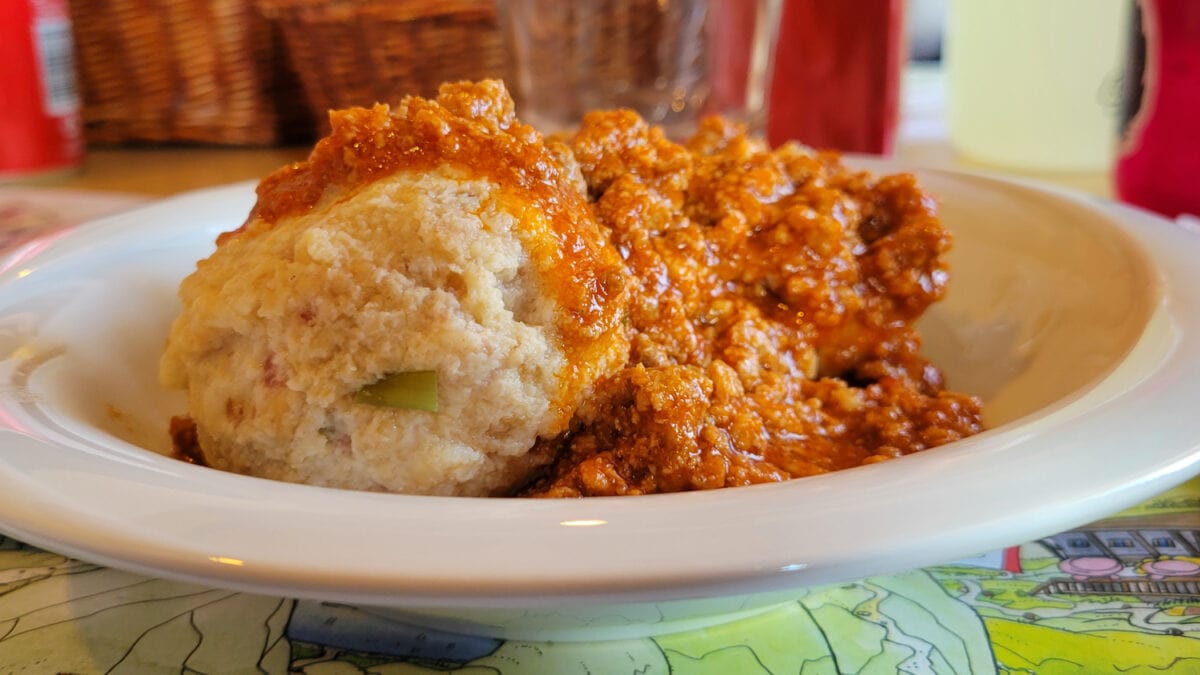
The food at Lavarella was just as delicious as their beer. They serve traditional South Tyrol dishes that are hearty and fueling for hiking! This was my first taste of canederli, delicious large round dumplings made from a mixture of stale bread, flour, eggs and milk served with a hearty tomato sauce. They even had a basil dumpling. Needless to say – I slept like a rock that night after hiking, sauna, and canederli!
Day 3 – Rifugio Lavarella to Rifugio Lagazuoi
7.5 miles | 4307 ft Elevation Gain | 2175 ft Elevation Loss | Max Altitude 8953 ft.
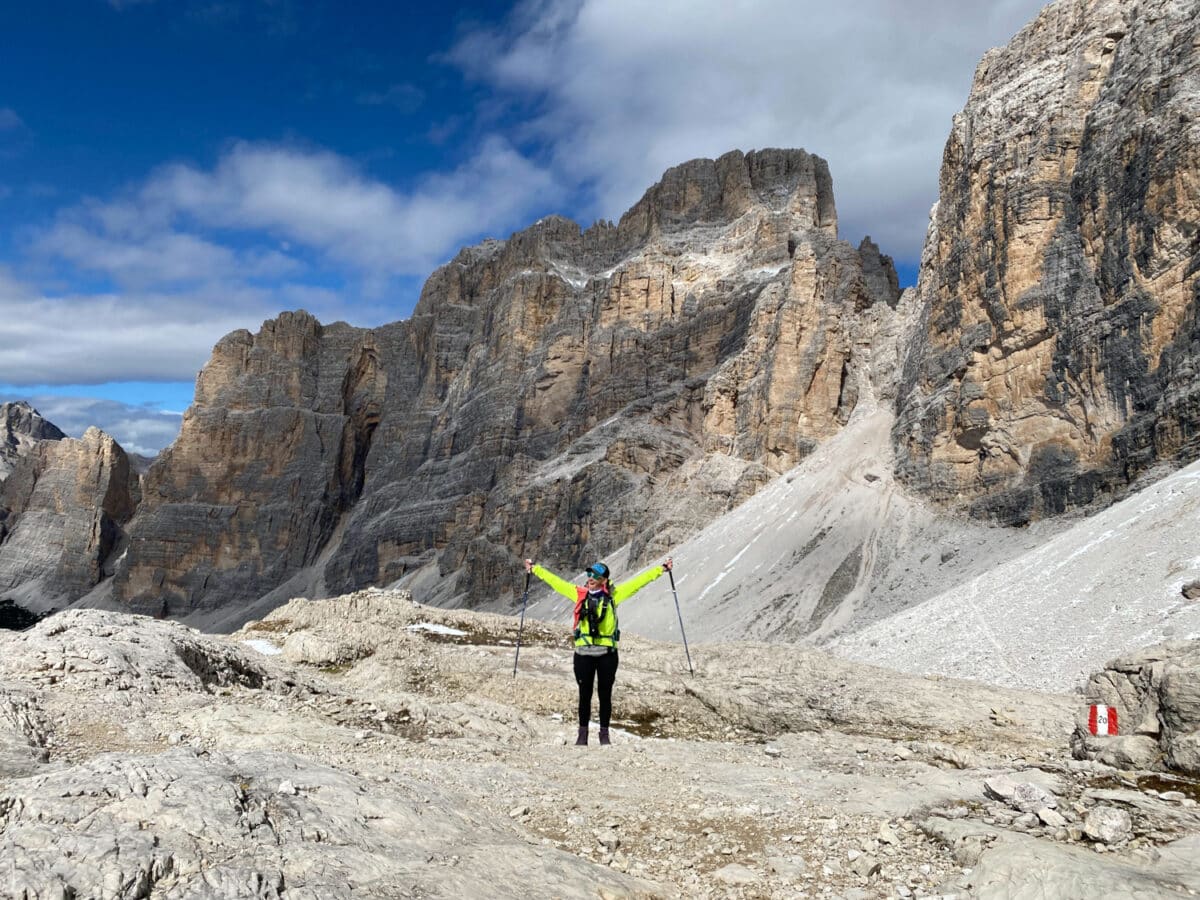
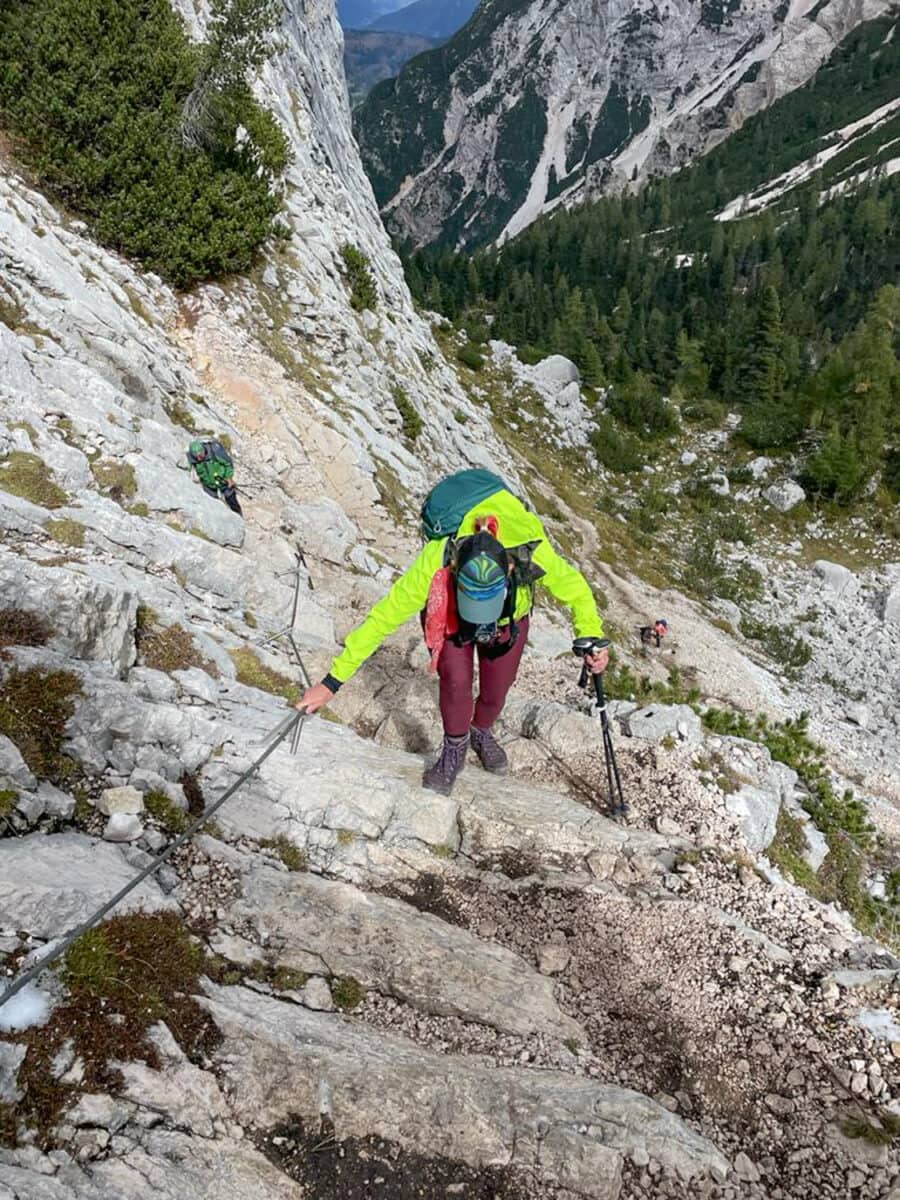
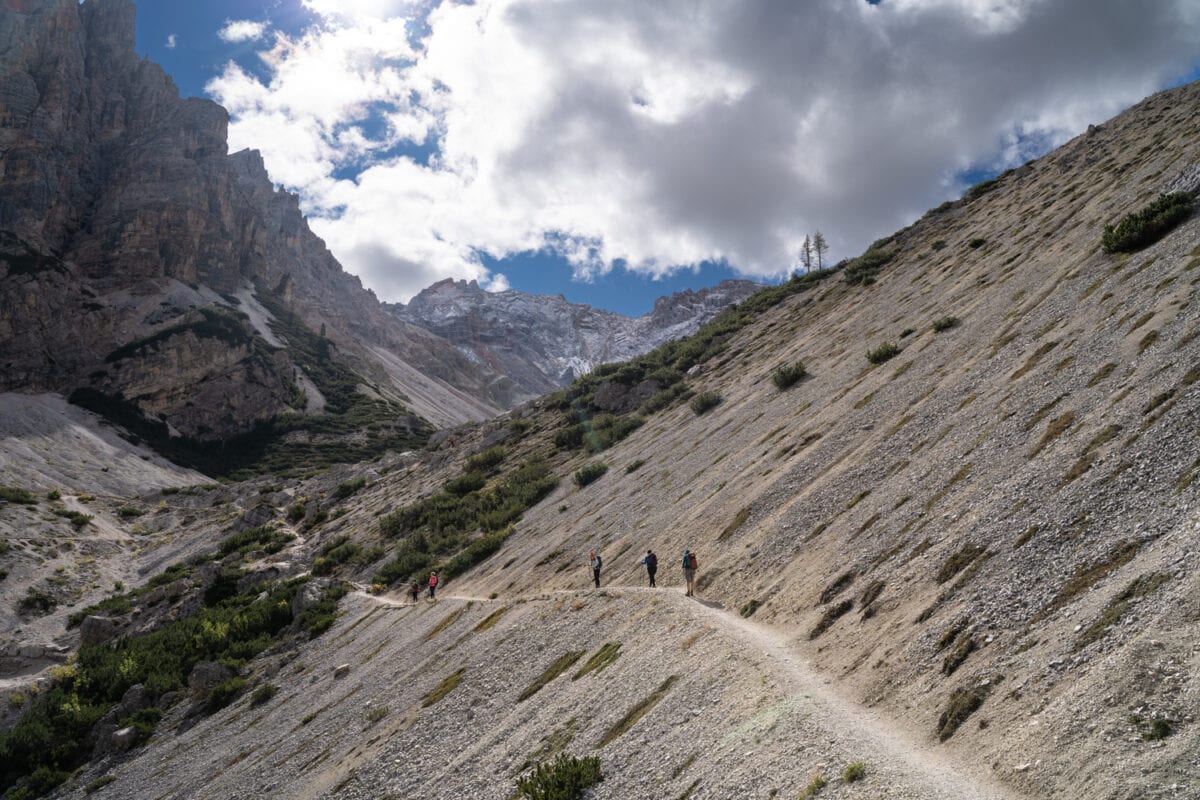
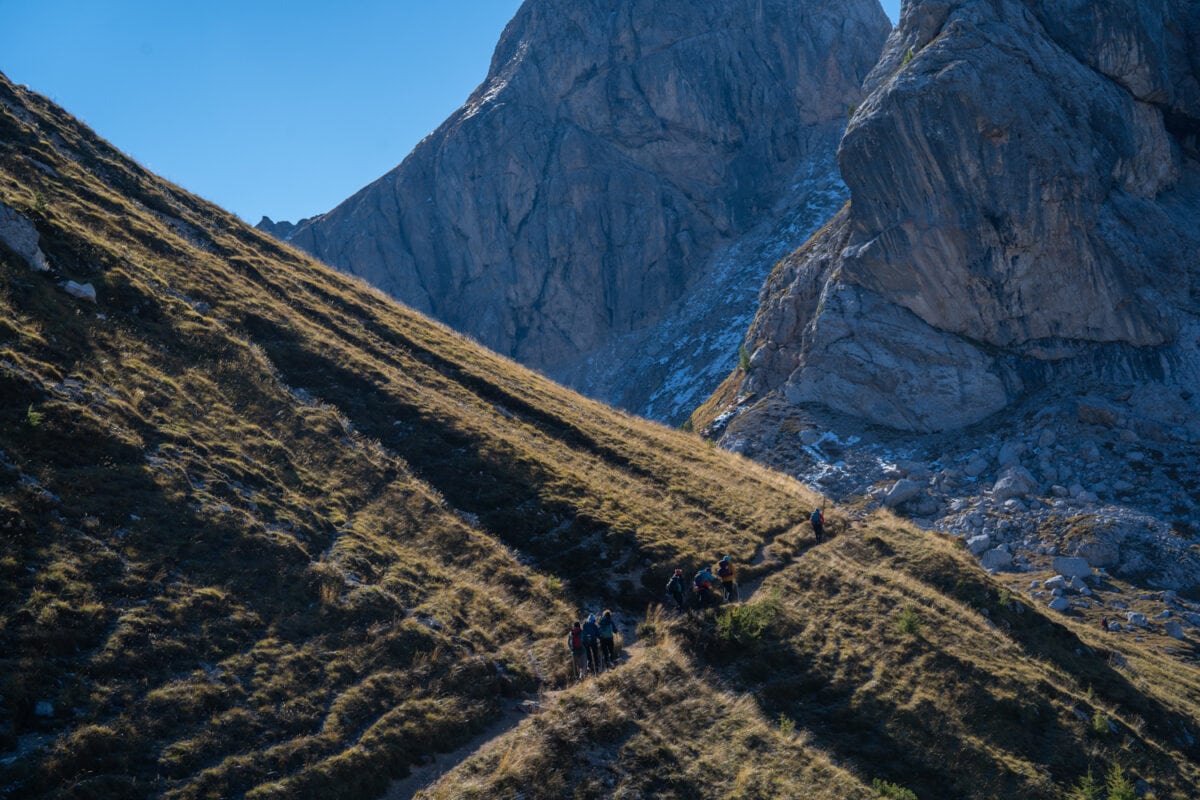
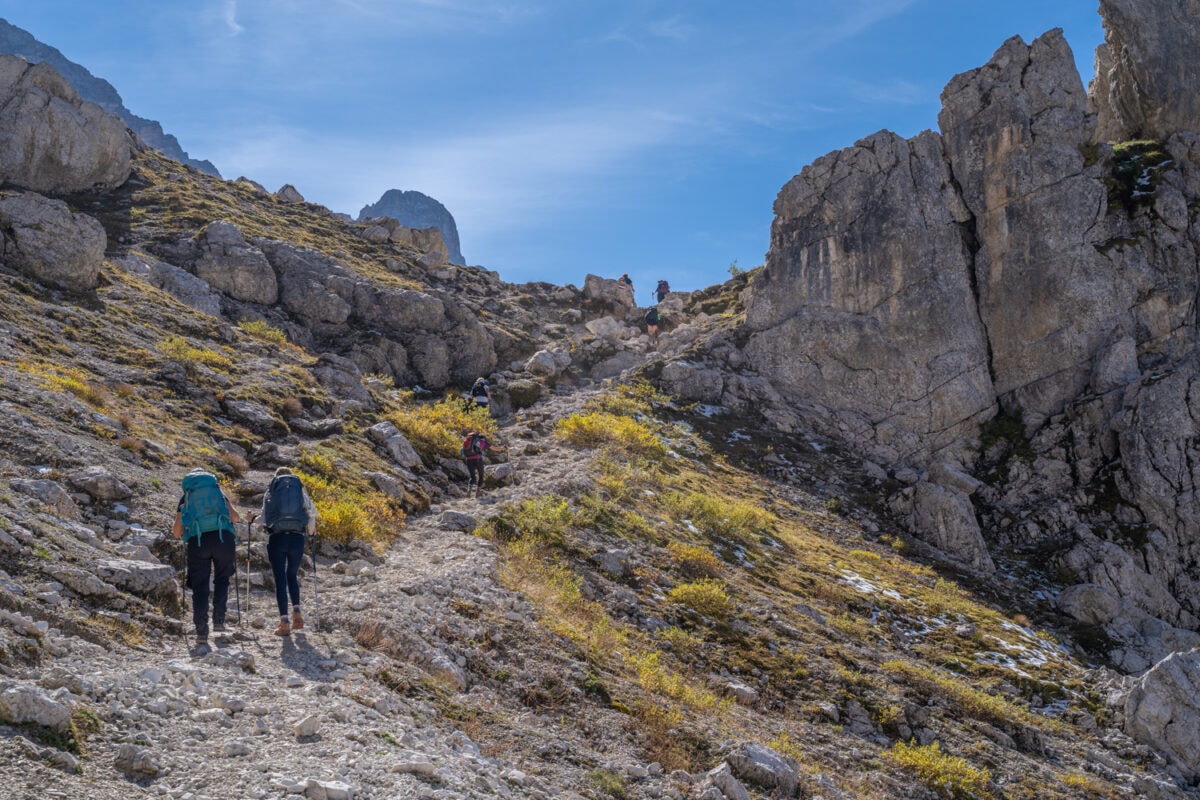
Let me just say…this day was EPIC. The views were epic, the trail was epic, the gain and loss were epic, and the rifugio was epic. However – you had to work pretty darn hard for all of that epic-ness. Our hike started really pleasant – and sort of flat, then we started up Forcella del Lago – a saddle pass through the pointy mountains. The climb was beautiful …and then we got to the top.
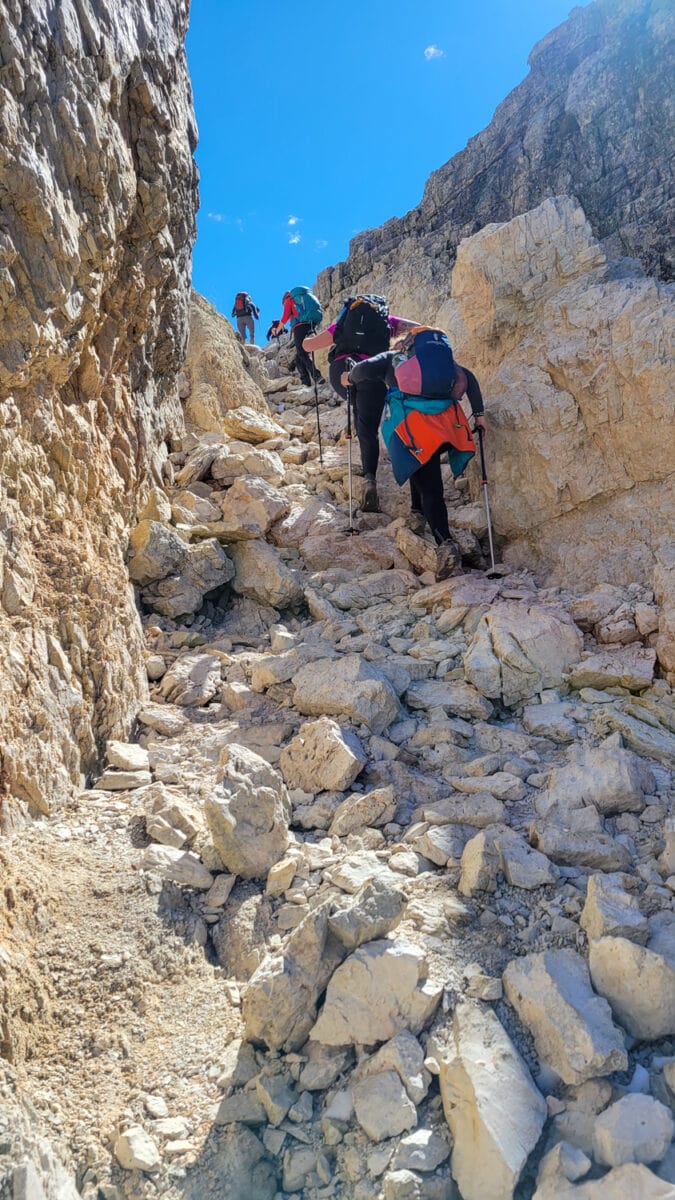
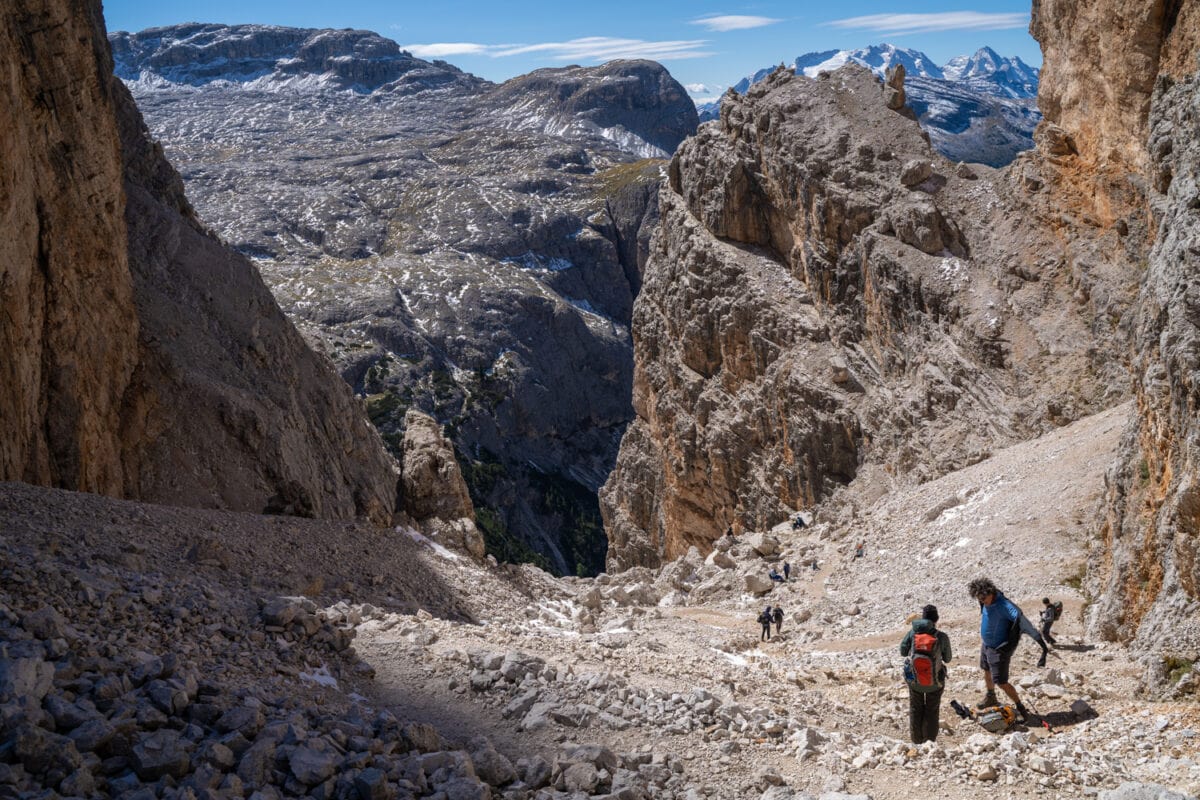
From the top you could see the steep, narrow switchbacks that felt like they were stacked on top of each other. Way below that you could see a green alpine lake. Laura told us that was our lunch stop. It felt like a dot in the landscape. Then Laura pointed out far, far in the distance at a height higher than what we were currently at, our rifugio we were trying to make it to for the night.
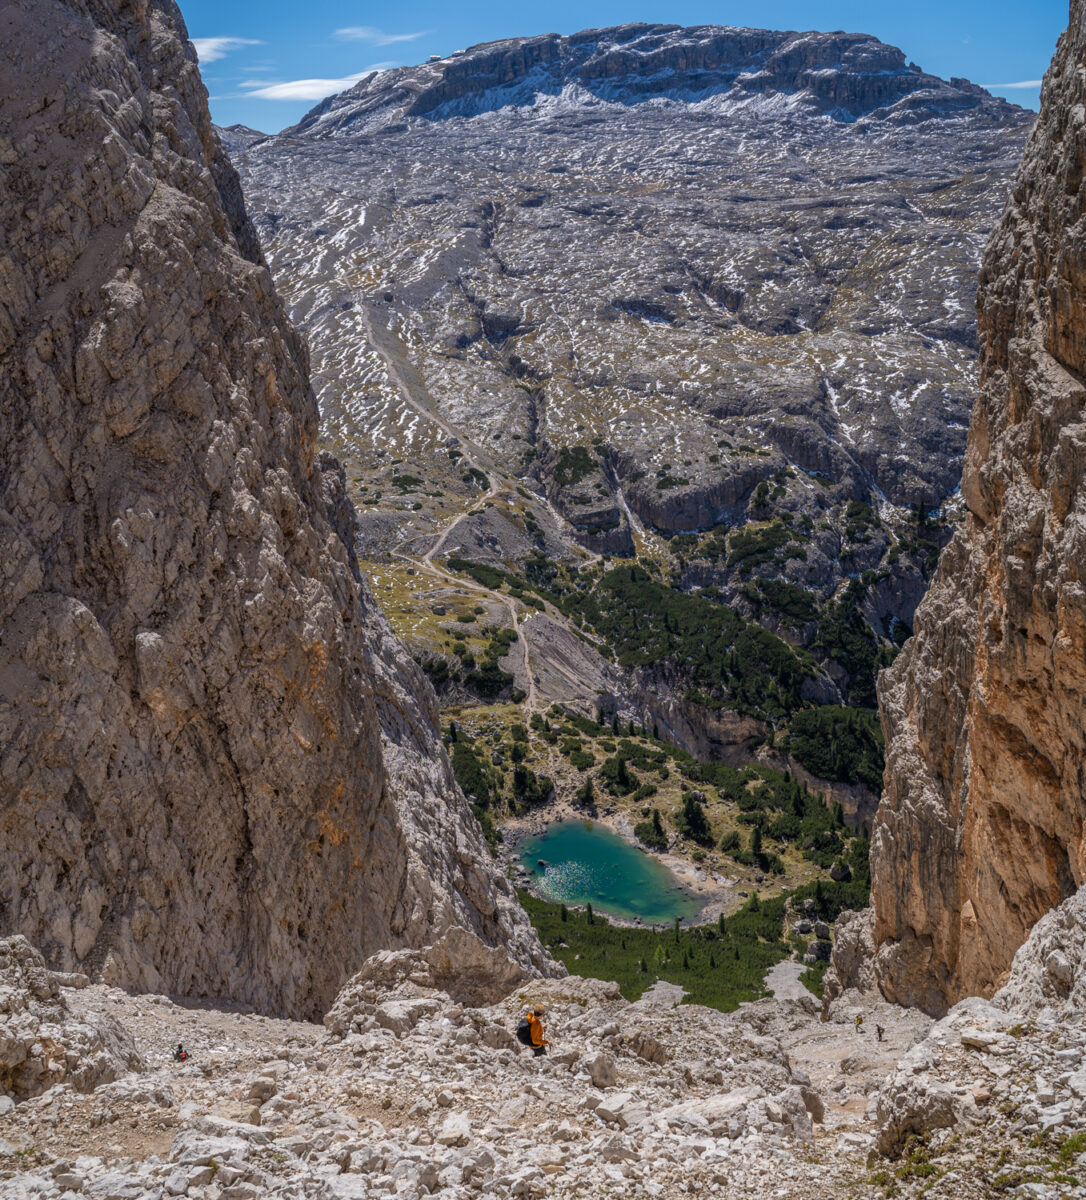
I stared down the switchbacks made of scree and my knees buckled – I hate heights and narrow ledges – and this was the perfect storm of my hiking fears. Luckily, I had hiking poles with me to give me a sense of security as I started to traverse the switchbacks ever so slowly.
I made it down eventually – but was the last one in our group! Lunch at the lake was a treat, but we couldn’t rest long as we had another long climb up to Rifugio Lagazuoi that was a speck on top of the distant hill.
We passed a number of WWI caves, this was an area of fierce fighting. I huffed and puffed my way back up never-ending switchbacks…but the view that greeted me at the top was jaw-dropping.
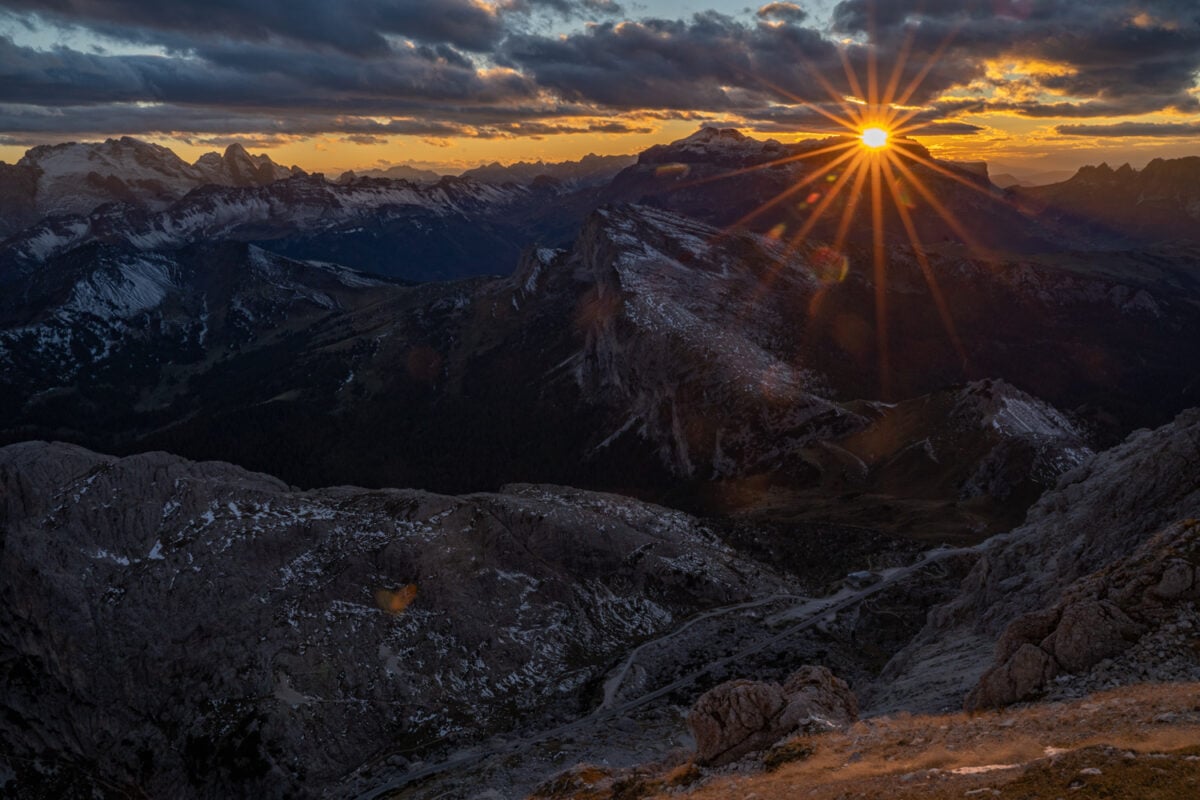
Rifugio Lagazuoi
Lagazuoi was the highest point we would reach in this hike at nearly 9,000 ft. There was a large patio in front where photographers set up their tripods to get that perfect golden hour image. This also meant it was the perfect location for sunrise photography too. Here we shared a bigger dorm room that our entire group took over – another nice thing about being with a group – sometimes it’s just a big slumber part with friends.
Day 4 – Rifugio Lagazuoi to Rifugio Averau
5 miles | 2486 ft Elevation Gain | 3336 ft Elevation Loss | Max Altitude 8953 ft.
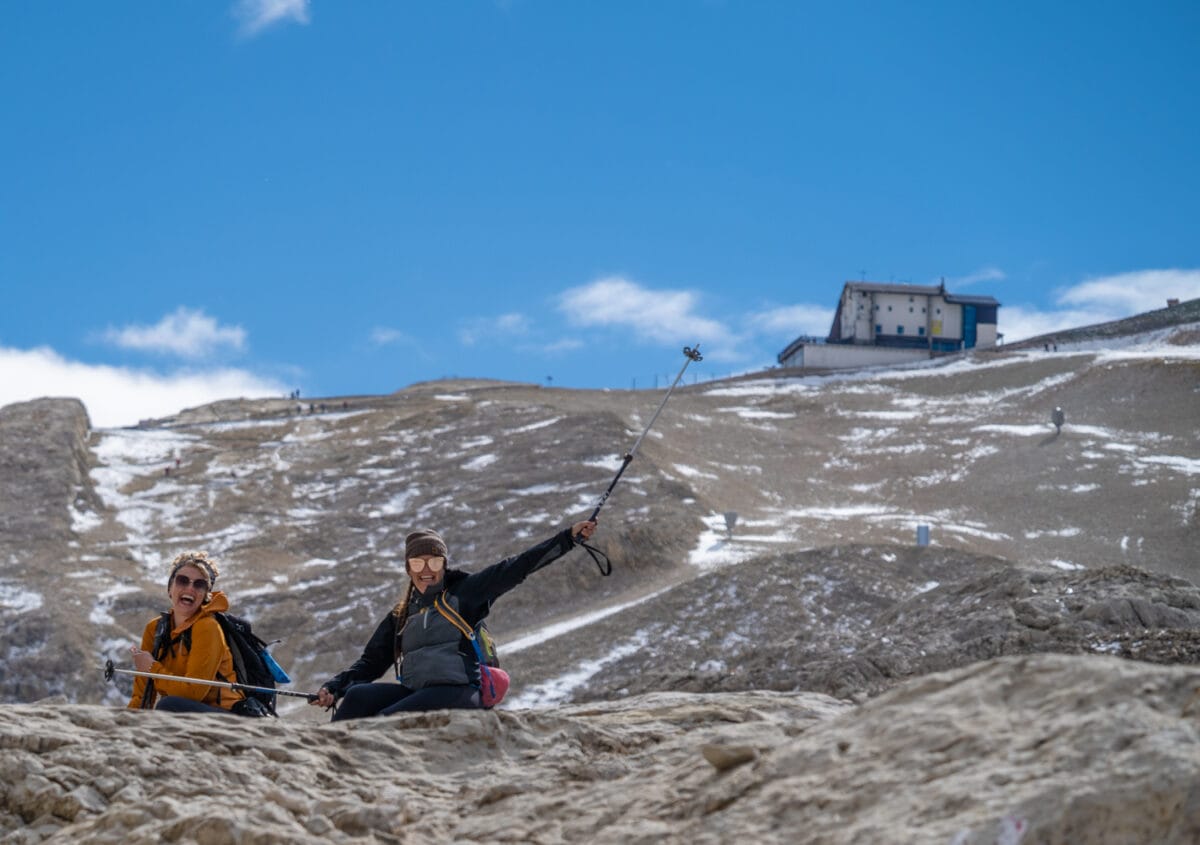
A short day after our strenuous hike the day before. Today we had a choice of taking the via ferrata down the mountain or the cable car. Since I am not a fan of heights and narrow ledges – I opted for the cable car. However, most of our group did the guided via ferrata and loved it. I was pretty darn happy riding the gondola down – and so were my knees.
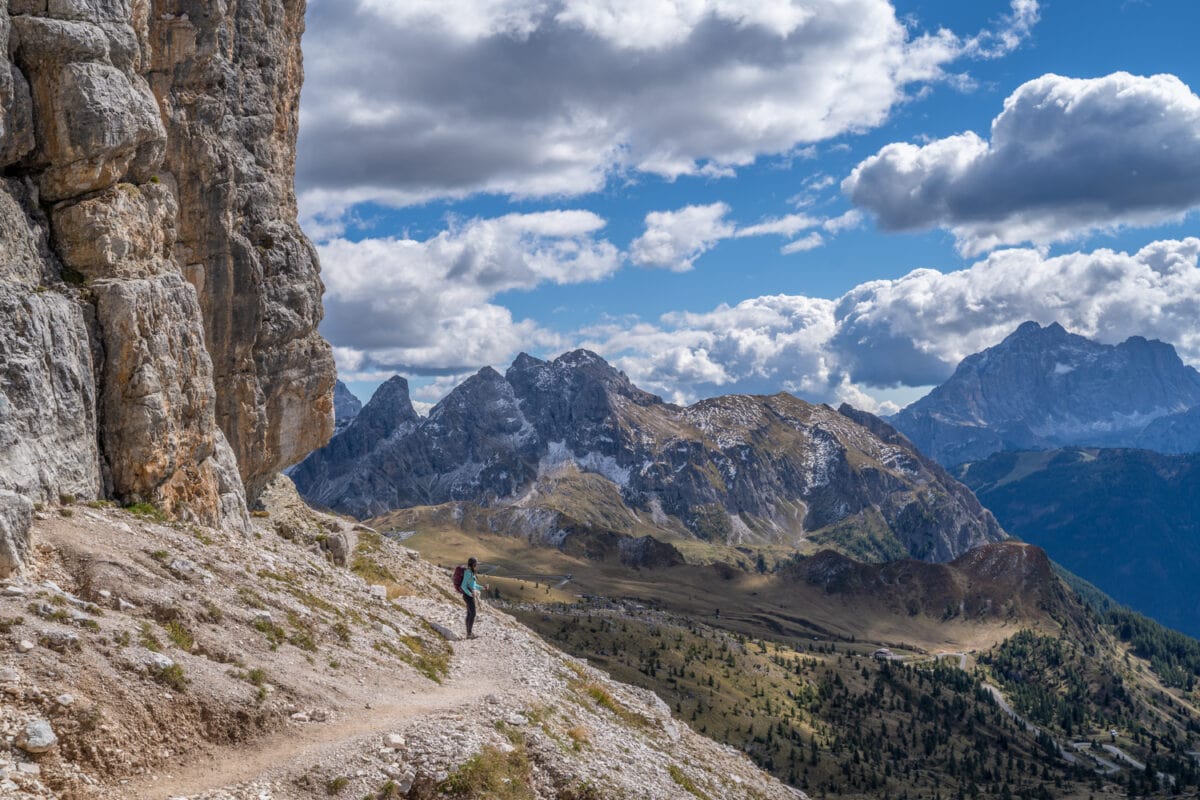
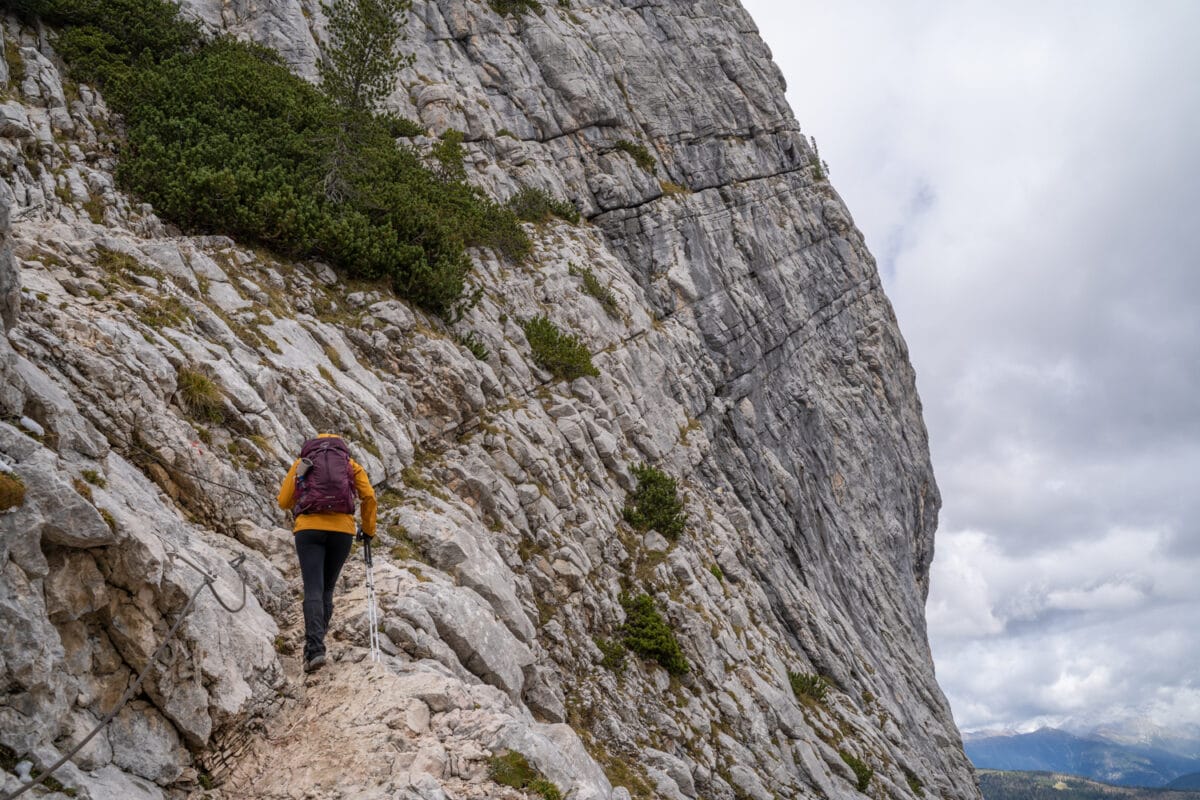
After we came down from Lagazuoi, we started right back up again. There was a steep scramble section where you must be prepared to use your hands and then the last kilometer was a narrow ledge along a mountain with stunning views. That little ledge trail led us straight to Rifugio Averau


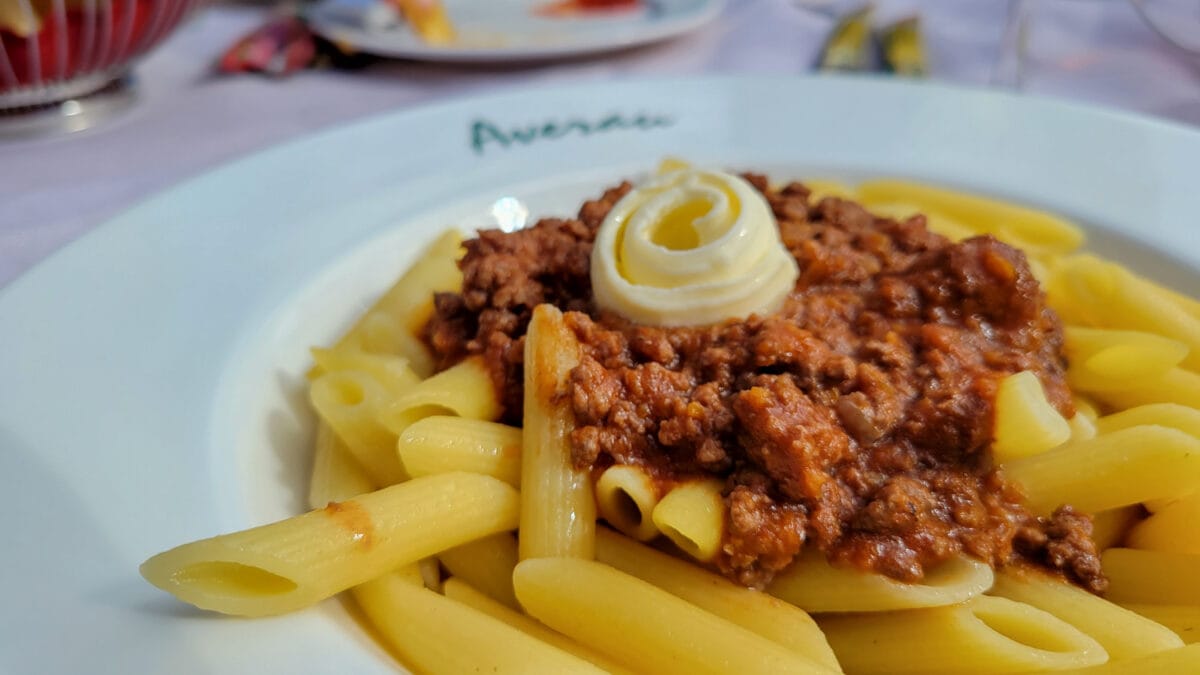
Rifugio Averau
Because it was a short hiking distance day, we arrived at Averau in time for a late lunch. We all sat out on the sun bathed patio and enjoyed a classic Hugo cocktail and Bolognese pasta to die for. This was my first Hugo – a proseco drink with elderflower syrup, mint, and soda water – it won me over with the first sip! It’s so refreshing after a hike…even more so than a cold beer. The rifugio had delicious food and a really cute atmosphere. The rooms were a bit packed, with beds but the showers were warm and the beds comfortable.
Day 5 – Rifugio Averau to Rifugio Staulanza
9 miles | 2070 ft Elevation Gain | 4042 ft Elevation Loss | Max Altitude 7742 ft.
We got an early start since this would be our longest day covering 9 miles. Even though today our stats said we had twice as much down as up, it certainly didn’t feel like it! We descended from the rifugio for an hour and then started back up steep switchbacks again. However those switchbacks didn’t deposit us on a steep summit – but a big plateau.
After a short hike on the plateau, we stopped for lunch. Averau had provided us delicious packed lunch and we sat on the grass and had a little picnic lunch for 40 mintues. It was the most memorable lunch stop I can remember; just look at the view.
We continued on over the plateau and then started a long, long descent towards Rifugio Staulanza. We crossed a number of rock slides and followed along a stream through a wooded area until we saw signs of civilization again.
Rifugio Staulanza
This Rifugio was not perched high on a mountain like the others, it was surrounded by forest! And there was a road nearby – which felt like a strange site at the time. Staulanza had a whole spa downstairs with steam rooms, water therapy, and a dry sauna. Our entire group splurged on this opportunity to repair our weary bodies!
Day 6 – Rifugio Staulanza to Rifugio Tissi
7 miles | 2952 ft Elevation Gain | 1312 ft Elevation Loss | Max Altitude 7680 ft.
Our first stop this morning was hiking to a cheese farm! The family-owned simple farm was situated right along the trail. Their sheepdogs ran out and welcomed us and we went inside to enjoy the simple setting with a crackling fireplace. We of course sampled cheese before we continued onward and upward.
At the top of the 2nd mountain pass was a beautiful little rifugio perched in the saddle. It was surrounded by towering sheer rockface. Here we had a spectacular and filling lunch of pasta before we set out on our way again down the hill to another alpine lake. We made a long stop here so I enjoyed a cold, cold foot soak in the sun, while others in our group braved the ice-cold water and went for a dip.
We had a final up and down through rocky terrain all with our the rifugio shining in the sun in the distance – like a carrot. I think this was the most dramatic landscape I had seen a rifugio perched on yet. When I didn’t know if I could make it the final push – the group cheered me on and got me up the final 200 ft. Jackie even had a glass of wine waiting for me at the top!
Rifugio Tissi
Rifugio Tissi was perched high up a mountainside and looked out on sheer rockface. It was a gorgeous space for sunset photos. But even more impressive, Tissi had a resident cat. I had heard about the mysterious cat, but was never really able to find it.
Tissi’s rooms were the most cramped, but it was still comfortable and warm – which is all I really ask for. The food was hearty and the atmosphere jovial. I was exhausted that night and went to bed early. However, in the middle of the night the mysterious orange kitty pushed our door open and came and slept in my bed! I was so excited that she chose me and my bed.
Day 7 – Rifugio Tissi to Capanna Trieste and Cortina
6 miles | 875 ft Elevation Gain | 4553 ft Elevation Loss | Max Altitude 7408 ft.
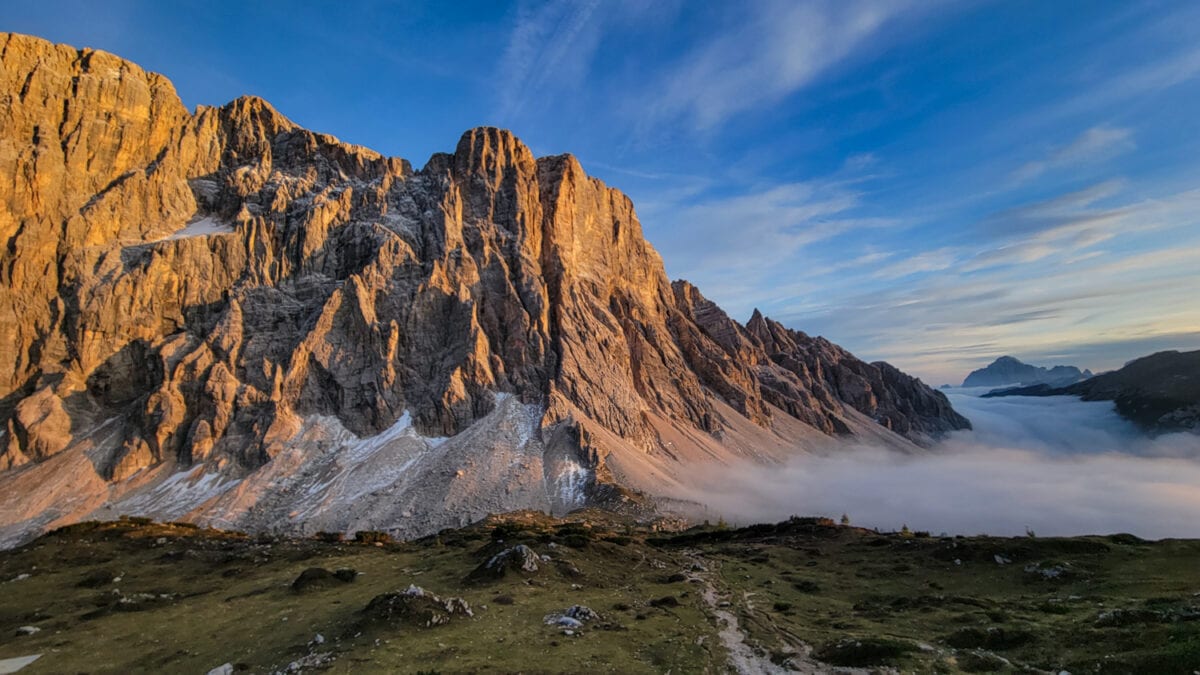
On the last day I woke up above the clouds. For the first time in 7 days of hiking, we had a cloudy day, but we were so high up at Rigufio Tissi that we were above the clouds in the beginning. I knew today’s hike would be a killer for my knees with 4553 feet of descent, hiking poles were really necessary today.
We descended past the rock slides, through valleys, and then forest. We stopped for a hearty lunch at a rifugio and then finished the last few miles on a gravel road that zig zagged down the mountain.
The moment we reached our ending rifugio, little drops of rain started to fall…the timing was perfect. As I hoisted my beer to the Dolomites I was thrilled to have finished the Alta Via 1 – it was 50 miles in some of the most beautiful mountains in the world! I beamed with pride.
Recommended Hiking Gear for Alta Via 1
Since we hiked at the end of the season – layering was very important when it came to gear. The temperatures changed quite a bit throughout the day. You’ll want to be prepared for any kind of weather.
Check out my article on Essential Hiking Gear for the basics, and here is some necessary gear for the Alta Via 1 that you should make sure you bring along.
Hiking Clothing
- I used hiking tights from Fjallraven most days. I like them because they have pockets, and the seat and knees are reinforced which is great for sitting on rocks and eating lunch or resting.
- I brought a technical short sleeve shirt, and a long sleeve shirt
- Quarter zip fleece or mid layer
- Rain Jacket and pants are essential (even though we didn’t really have rain!) I stuck with GORE-TEX PacLite – the best rain gear there is! Plus – it’s packs down really small and barely adds anything to your pack. The great thing about GORE-TEX is that is not only is waterproof but it’s great for wind protection. So even though I didn’t use it for rain, I used it for wind nearly every day.
- At this time of year I also took a puffy jacket – and did wear it a couple of times. I found it especially useful when we stopped for lunch when your body cools down rapidly and you need to try to keep in some warmth.
- Merino Wool Hiking Socks (Point 6 are my favorite)
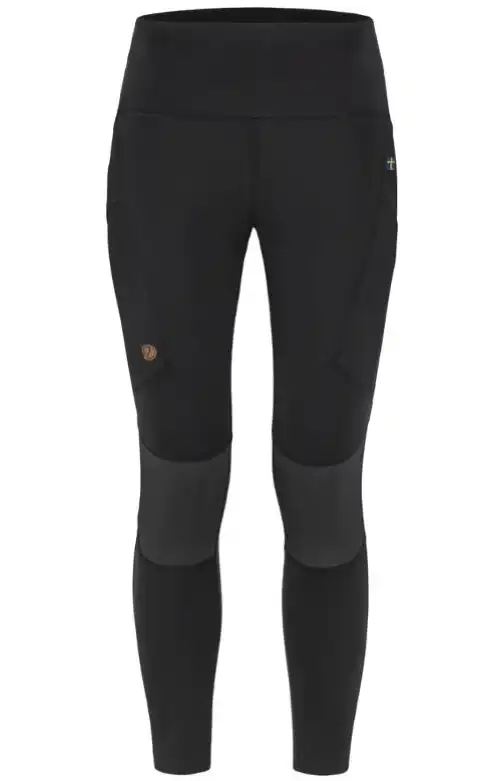
Fjallraven Abisko Trekking Tights Pro
These are great for fall trekking where you need a little more warmth than shorts. I love the reinforced knees and butt which makes them durable enough to sit on a rock and eat lunch. Plus – I love the side pockets and comfortable waist band.
I earn a commission if you click this link and make a purchase, at no additional cost to you.
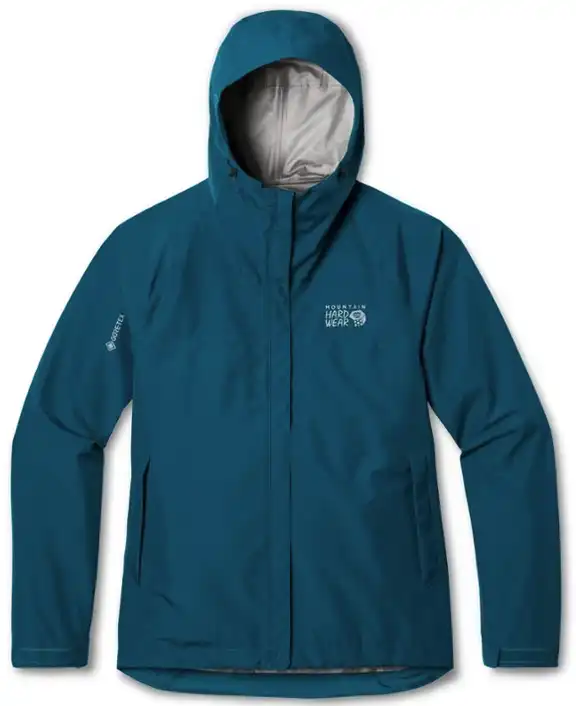
Mountain Hardwear Exposure/2 GORE-TEX PACLITE Jacket
2-layer GORE-TEX PACLITE® waterproof/breathable fabric offers everyday protection in wet weather and is fully seam-sealed to lock out moisture. Packs down really small making it perfect for hiking as it doesn’t take up much room in your daypack!
I earn a commission if you click this link and make a purchase, at no additional cost to you.

Title Nine Vibe Tank Top
I love Title Nine’s tanks because they’re super soft and dry fast.
I earn a commission if you click this link and make a purchase, at no additional cost to you.
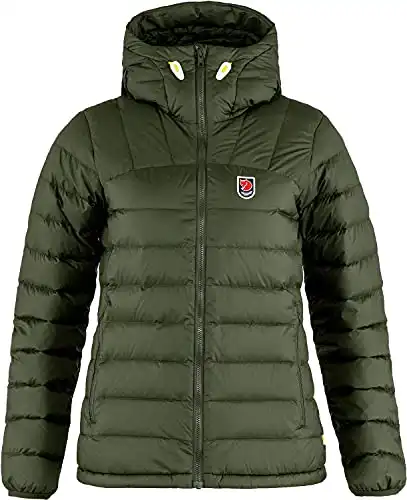
Fjallraven Expedition Pack Down Hoodie
A great top layer for winter months. Perfect for snow shoeing and winter travel. Plenty of pockets and a great hood with fleece lining that is soft on your face.
I earn a commission if you click this link and make a purchase, at no additional cost to you.
02/24/2023 07:17 pm GMT
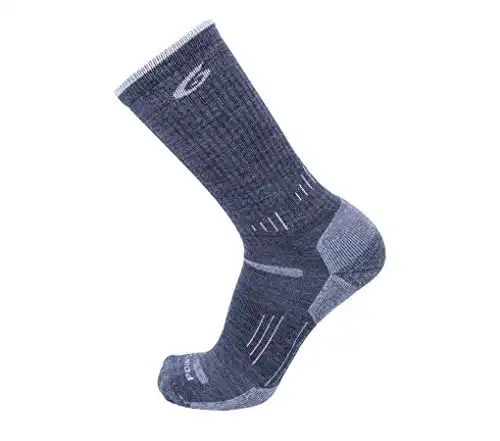
Point6 Essential Crew Sock
The cozy merino wool cushioning next to the skin insulates the foot from hot spots. Now featuring 37.5 Technology to keep you dry in the office or on the mountain.
I earn a commission if you click this link and make a purchase, at no additional cost to you.
02/24/2023 05:02 pm GMT
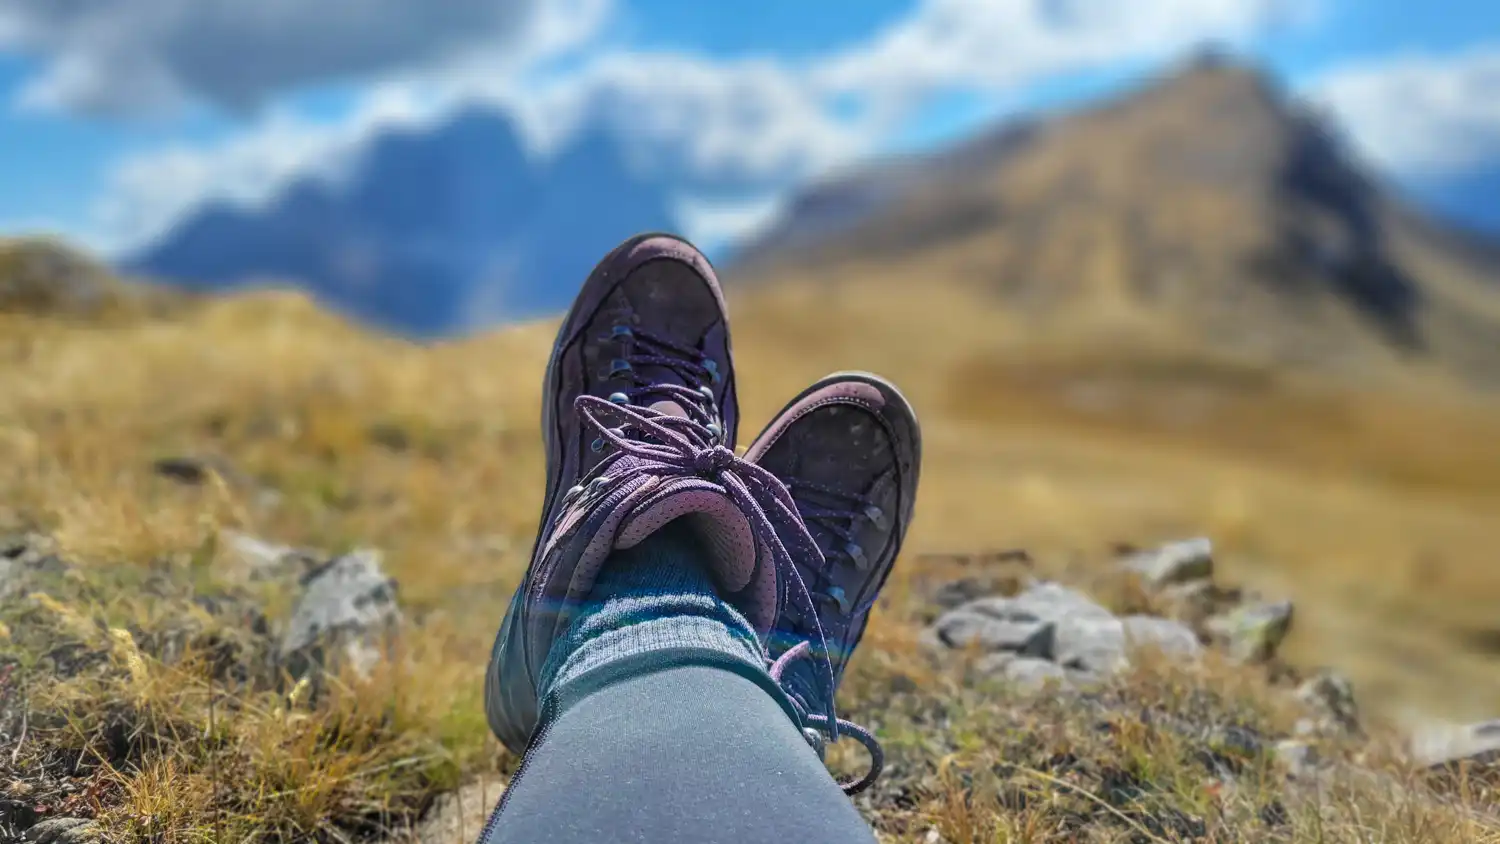
Hiking Boots
I used the Lowa Renegade boots for this hike and they worked great. Some people in my group did wear trail running shoes – but I really appreciated proper hiking boots with a stiff sole for the rocks and ankle support.
Lowa Renegade GTX Mid Hiking Boots
Super comfortable, lightweight, and GORE-TEX waterproof! Perfect for a challenging thru-hike.
I earn a commission if you click this link and make a purchase, at no additional cost to you.
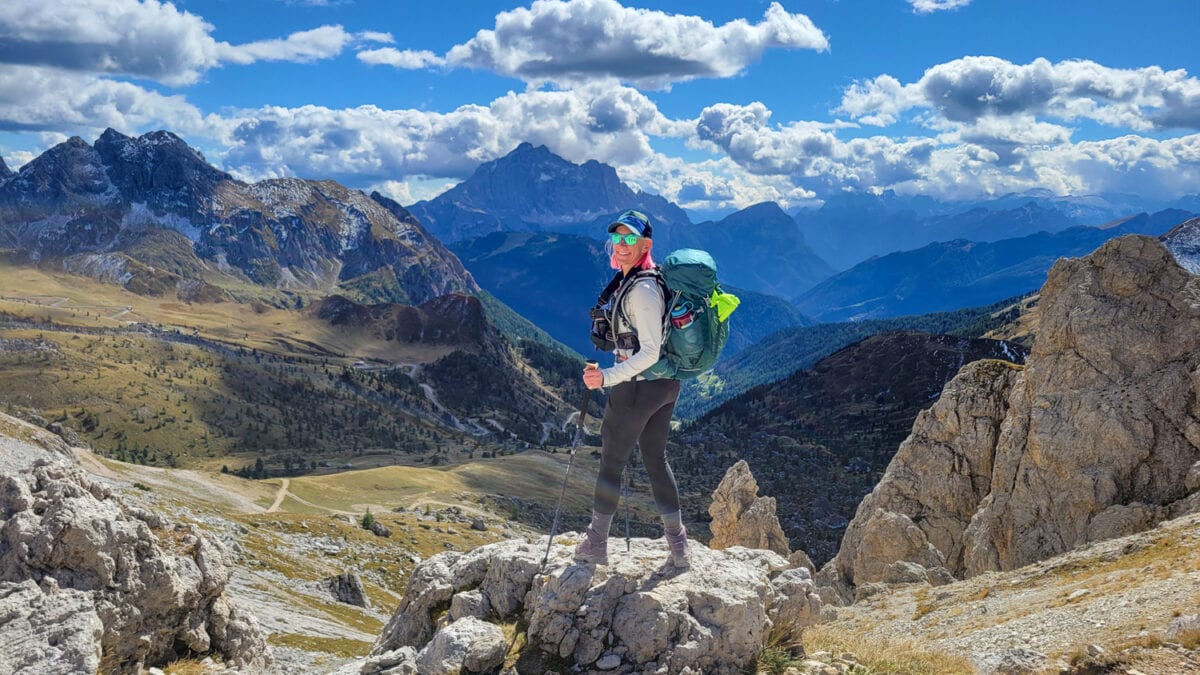
Backpack
Since we did a group hike where they moved our luggage, you could pretty easily get away with a lday pack – like the Osprey Sirrus 24 L. For this trip I chose something a bit larger since I was carrying a bunch of photo gear with me too. I used the Osprey Tempest 30L which was a great size to fit what I needed in and could stuff in extra layers on a cold day.
There are normally places to stop and refill water so you don’t have to pack it for the entire day which is great. But I do recommend using a water bladder/resevoir as you can carry 2 to 3 Liters of water in it and it’s really easy to access while you are hiking. I always find that I drink more when I use a water bladder when I hike.

Osprey Tempest 30L Womens
A women’s-specific streamlined top-loader. This versatile lightweight pack offers features—like a reservoir sleeve and trekking pole attachment points that you can get to without taking off the pack (my favorite feature!)
I earn a commission if you click this link and make a purchase, at no additional cost to you.
Hiking Poles
Hiking poles are really helpful for this hike, in fact I can’t imagine doing it without them. However I know it’s a personal choice. There is a lot of up and down on the Alta Via 1 and I find the hiking poles protect my knees and I’m not as sore at the end of the day. Here are the hiking poles I use.
Compression Socks/Sleeves
Speaking of sore…I highly recommend
My top pick

For the Rifugios Don’t Forget to Bring This
Earplugs – these are nice for the larger dorm rooms you stay in.
Ibuprofen – or whatever pain reliever you use
Sleeping bag liner – these are always nice to have for hut trips like these.
Swimsuit – for saunas!
With its breathtaking scenery, rich history, adventure, and convenience, this hike is the perfect way to experience the beauty of the Dolomites and all that this amazing region has to offer. And it’s even better when you go with a group of like-minded people who love the outdoors as much as you do
Jackie is running this Jump Adventures trip again in 2023 – you’d be crazy not to join!
And don’t forget to mention that you heard about it in Ottsworld and I’ll send you some special gear for the trip as a thankyou!
Pack your bags, lace up your hiking boots, and get ready for an unforgettable journey through one of the most beautiful and awe-inspiring landscapes in the world – all while making new friendships.
Related