Table of Contents[Hide][Show]
How to build your own egg incubator to hatch fertilized chicken eggs into healthy, medication-free chicks. This ingenious DIY project costs less than $20 and is an option even for those whose neighborhood codes don’t allow for a rooster!
Last year, during the world’s-longest-lockdown in Melbourne, Australia, we experienced our first-ever
chicken shortage.
Everyone wanted to keep chickens while they were staying at home, but the local farms quickly ran out of available chicks.
Simultaneously, egg prices took a sharp rise – increasing to as much as AU$18 per dozen at organic stores (equivalent to US $12.00 per dozen).
As a result, my kids and I started looking at alternative means for hatching our own chicks.
Mail Order Fertilized Eggs
Since our neighborhood doesn’t allow roosters, we decided to buy fertilized eggs online from breeders through local networks.
Given that fertilized eggs can last for a few weeks without incubation (hatchability starts dropping only after seven days), sending them via post was a viable option.
Surprisingly, many people have no idea about this!
Buying vs Building an Incubator
Incubators can cost anywhere from $50 to hundreds of dollars for the best models.
To keep things as budget-friendly as possible, we started looking at options to make one ourselves.
Our DIY incubator instructions are outlined in detail below.
Why Hatch Your Own Chicks?
Hatching your own chicks has a myriad of benefits.
For starters, it means that you can be almost entirely self-sufficient without dependence on farmers or egg suppliers.
You can also choose your own breed of bird, such as heritage breeds which lay well, and produce more nutrient-dense eggs.
In addition, you also have the opportunity to raise healthy, thriving chicks from birth.
This allows for controlling both their feed supply and avoiding any required medications (including mRNA vaccination) that might occur in conventional farm practices.
Building a DIY Egg Incubator
The goal of building an incubator is to create the same environment that would occur under a broody hen.
The key factors are temperature and humidity.
Humidity
The humidity for the first 18 days should be around 40-50%, then increasing up to 65-70% after day 18.
You can control the humidity by placing a small dish of water within the incubator and gently spraying a
water mist throughout the air.
Temperature
While humidity is important for high hatch rates, temperature control is crucial.
The range must remain stable in the range of 37-39 degrees Celsius (98.6 – 102.2 degrees Fahrenheit) throughout the incubation period.
Equipment You Will Need
There are five items you will need to assemble in order to build a DIY incubator.
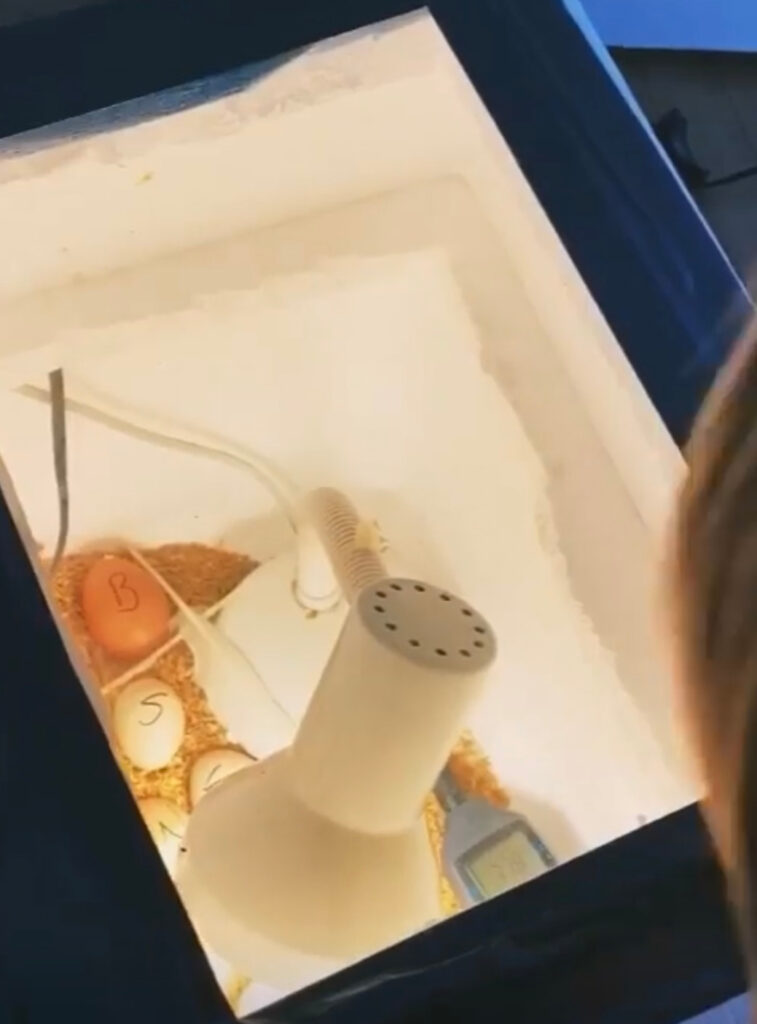
Incubator Box
The box needs to safely insulate the eggs so that the temperature remains constant.
It also needs to be able to accommodate the lamp with plenty of space, and have room for the glass window at the top.
Polystyrene or timber are usually the best options as they insulate heat well and are fairly durable.
We have a small timber box that we place inside the large polystyrene box so that the eggs have plenty of insulation around them.
Temperature and Humidity Gauge
A temperature and humidity gauge (like this one) is the only item that we purchased for the incubator setup.
It shows the temperature and humidity so that you can monitor it consistently from outside the incubator window.
They cost about $10-20 from a hardware store or online.
If you aren’t able to get one of these, the next best option would be a thermometer or similar.
Heat Lamp
A lamp with an incandescent bulb will keep the temperature constant within the incubator.
While you can purchase heat lamps or bulbs (globes) inexpensively from most hardware stores, a bedside lamp with an incandescent bulb may do the trick.
Given that the incubator is well sealed and enclosed, most commercial heat lamps actually get the environment too hot.
We started out with a recommended heat lamp but found the temperature was too high inside the incubator.
With some more experimenting, we found that our bedside lamp with an incandescent bulb or globe worked best!
The right temperature is a ‘make or break’ factor in ensuring the chickens hatch correctly.
So it’s worth organizing a heat source and temperature gauge well before you order any eggs.
Leave the heat lamp and temperature gauge in the box for a few days and check that the temperature remains constant throughout this time.
You may need to adjust the heat source or incubator design over the coming days to get it just right.
Glass Panel
A glass panel creates a ‘window’ into the incubator so that you can see the eggs and check the temperature without having to open the box.
We use a glass pane from an old photo frame and cut this onto the top section of the incubator box, securing the edges with strong tape.
Egg Rack or Woodchips
You will need a surface for keeping the eggs sturdy, making sure that they don’t roll over or bump into each other.
Sawdust and woodchips work well for us, but I have seen incubators with wire racks (like a cookie tray) and straw bedding.
Here’s a comparison of the various type of chicken bedding for you to consider.
How to Assemble
Put your incubator together and check that the window is well-sealed and that the temperature and humidity remain constant.
When your eggs arrive, mark each one on one side with a marker pen before placing them in the box.
Once the incubation process starts, you will need to turn them 2-3 times every day. The egg markings will help you to remember which ones need turning.
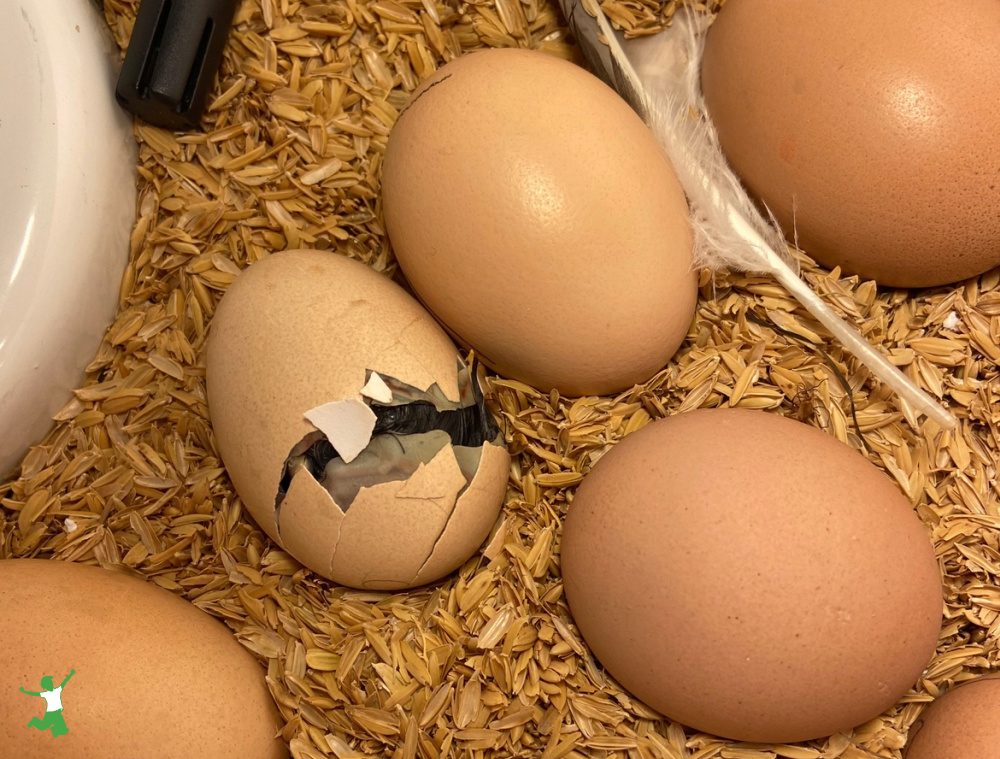
Below is a picture of our DIY egg incubator keeping some fertilized eggs warm!
Hatching Process
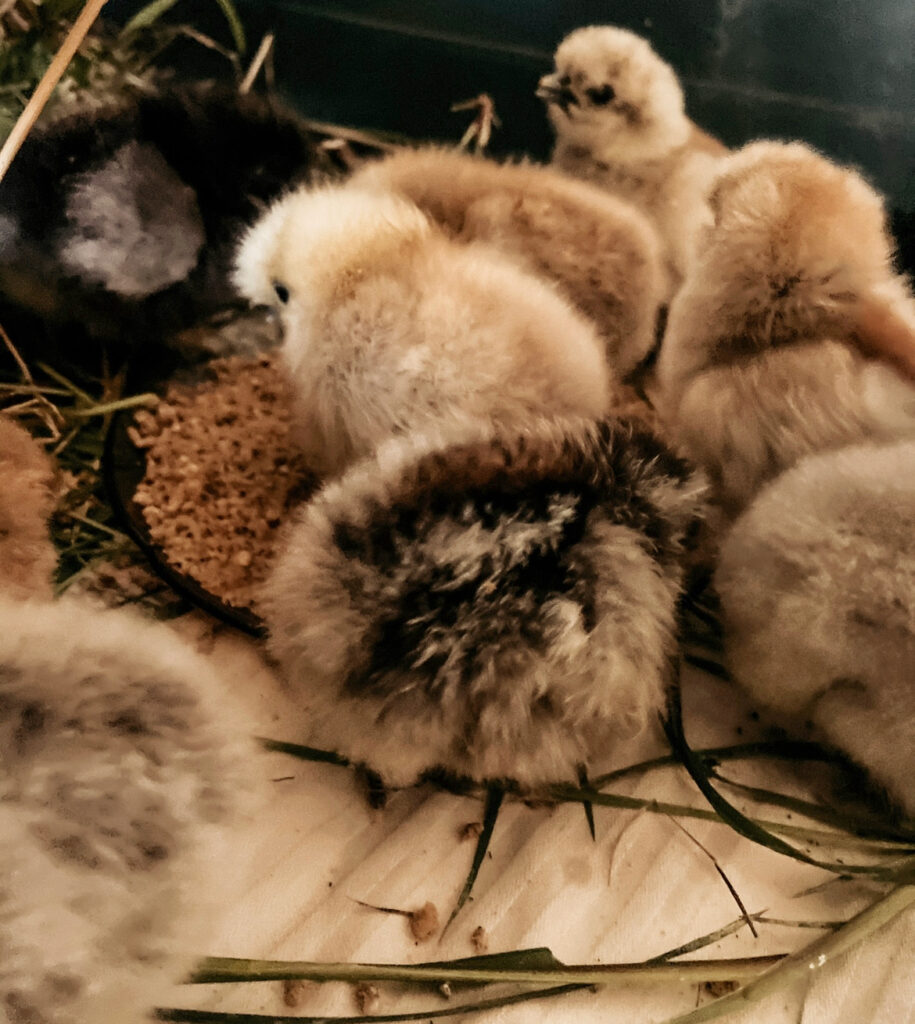
The fertilized eggs will hatch in the incubator after roughly 21 days.
By comparison, eggs kept warm under a broody hen take a bit longer at about 25 days.
You can expect a hatch rate of roughly 75%.
Note that about half of the eggs that hatch will be roosters, so make plans to gift any cockerels to friends who also keep chickens if your neighborhood doesn’t allow them.
Locally owned feed stores can give you the location of the nearest rooster sanctuary as well.
The process of eggs hatching in your homemade incubator should progress as described below to mimic the natural behavior and effects of Mama Hen.
Days 1-18
It is very important to keep the temperature consistent and the humidity between 40-50% during this time.
Gently turn the eggs 2-3 times daily and monitor the temperature and humidity gauge through the incubator window.
Days 18-21
During the last few days of incubation, the humidity needs to increase to 65-70%, and the eggs no longer require turning.
Watch them carefully through the incubator window to see any signs of hatching.
Use this time to prepare a brooder box complete with wood shavings, unmedicated soy-free chick starter, fresh water, and a heat lamp so that you have a place to care for your newly-hatched baby chicks.
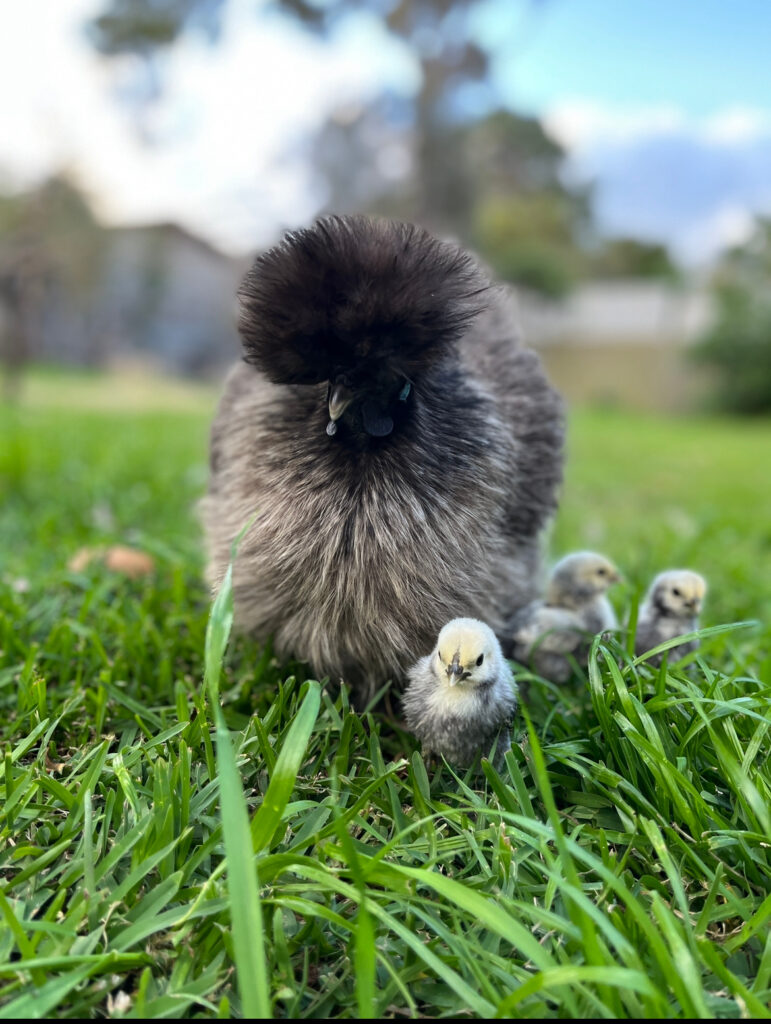
Incubators vs Broody Mother Hens
Of course, the most ‘natural’ environment for a baby chick to hatch in is under a mother hen.
With this in mind, we purposely choose a few birds within our brood that make exceptional mothers.
Silkies, Cochins and Frizzles are a few good examples.
If the timing is right, we place the fertilized eggs under the mother hen and skip the incubator process altogether.
When I refer to ‘timing’, I mean the season when mother hens become ‘broody and like to sit on eggs and hope that they hatch.
Heritage breeds of hens generally have a better capacity to do this, as their egg-laying cycle is based on a hormonal cyclical pattern.
Modern egg-laying chicken breeds lay more frequently, but this natural pattern of broodiness rarely occurs.
If the fertilized egg delivery is timed well, you can place the eggs under the hen when they arrive by post.
Sometimes, however, hens get broody, and then change their mind, so the incubator can be an excellent backup option in that scenario.
What can also happen (by pure luck or coincidence) is that the hens become broody at the same time as the chickens hatch in the incubator.
If you are lucky enough to have this occur, the baby chicks can be adopted by the broody mother. Place them underneath her during the night to start the process.
This eliminates the need for a brooder box altogether.