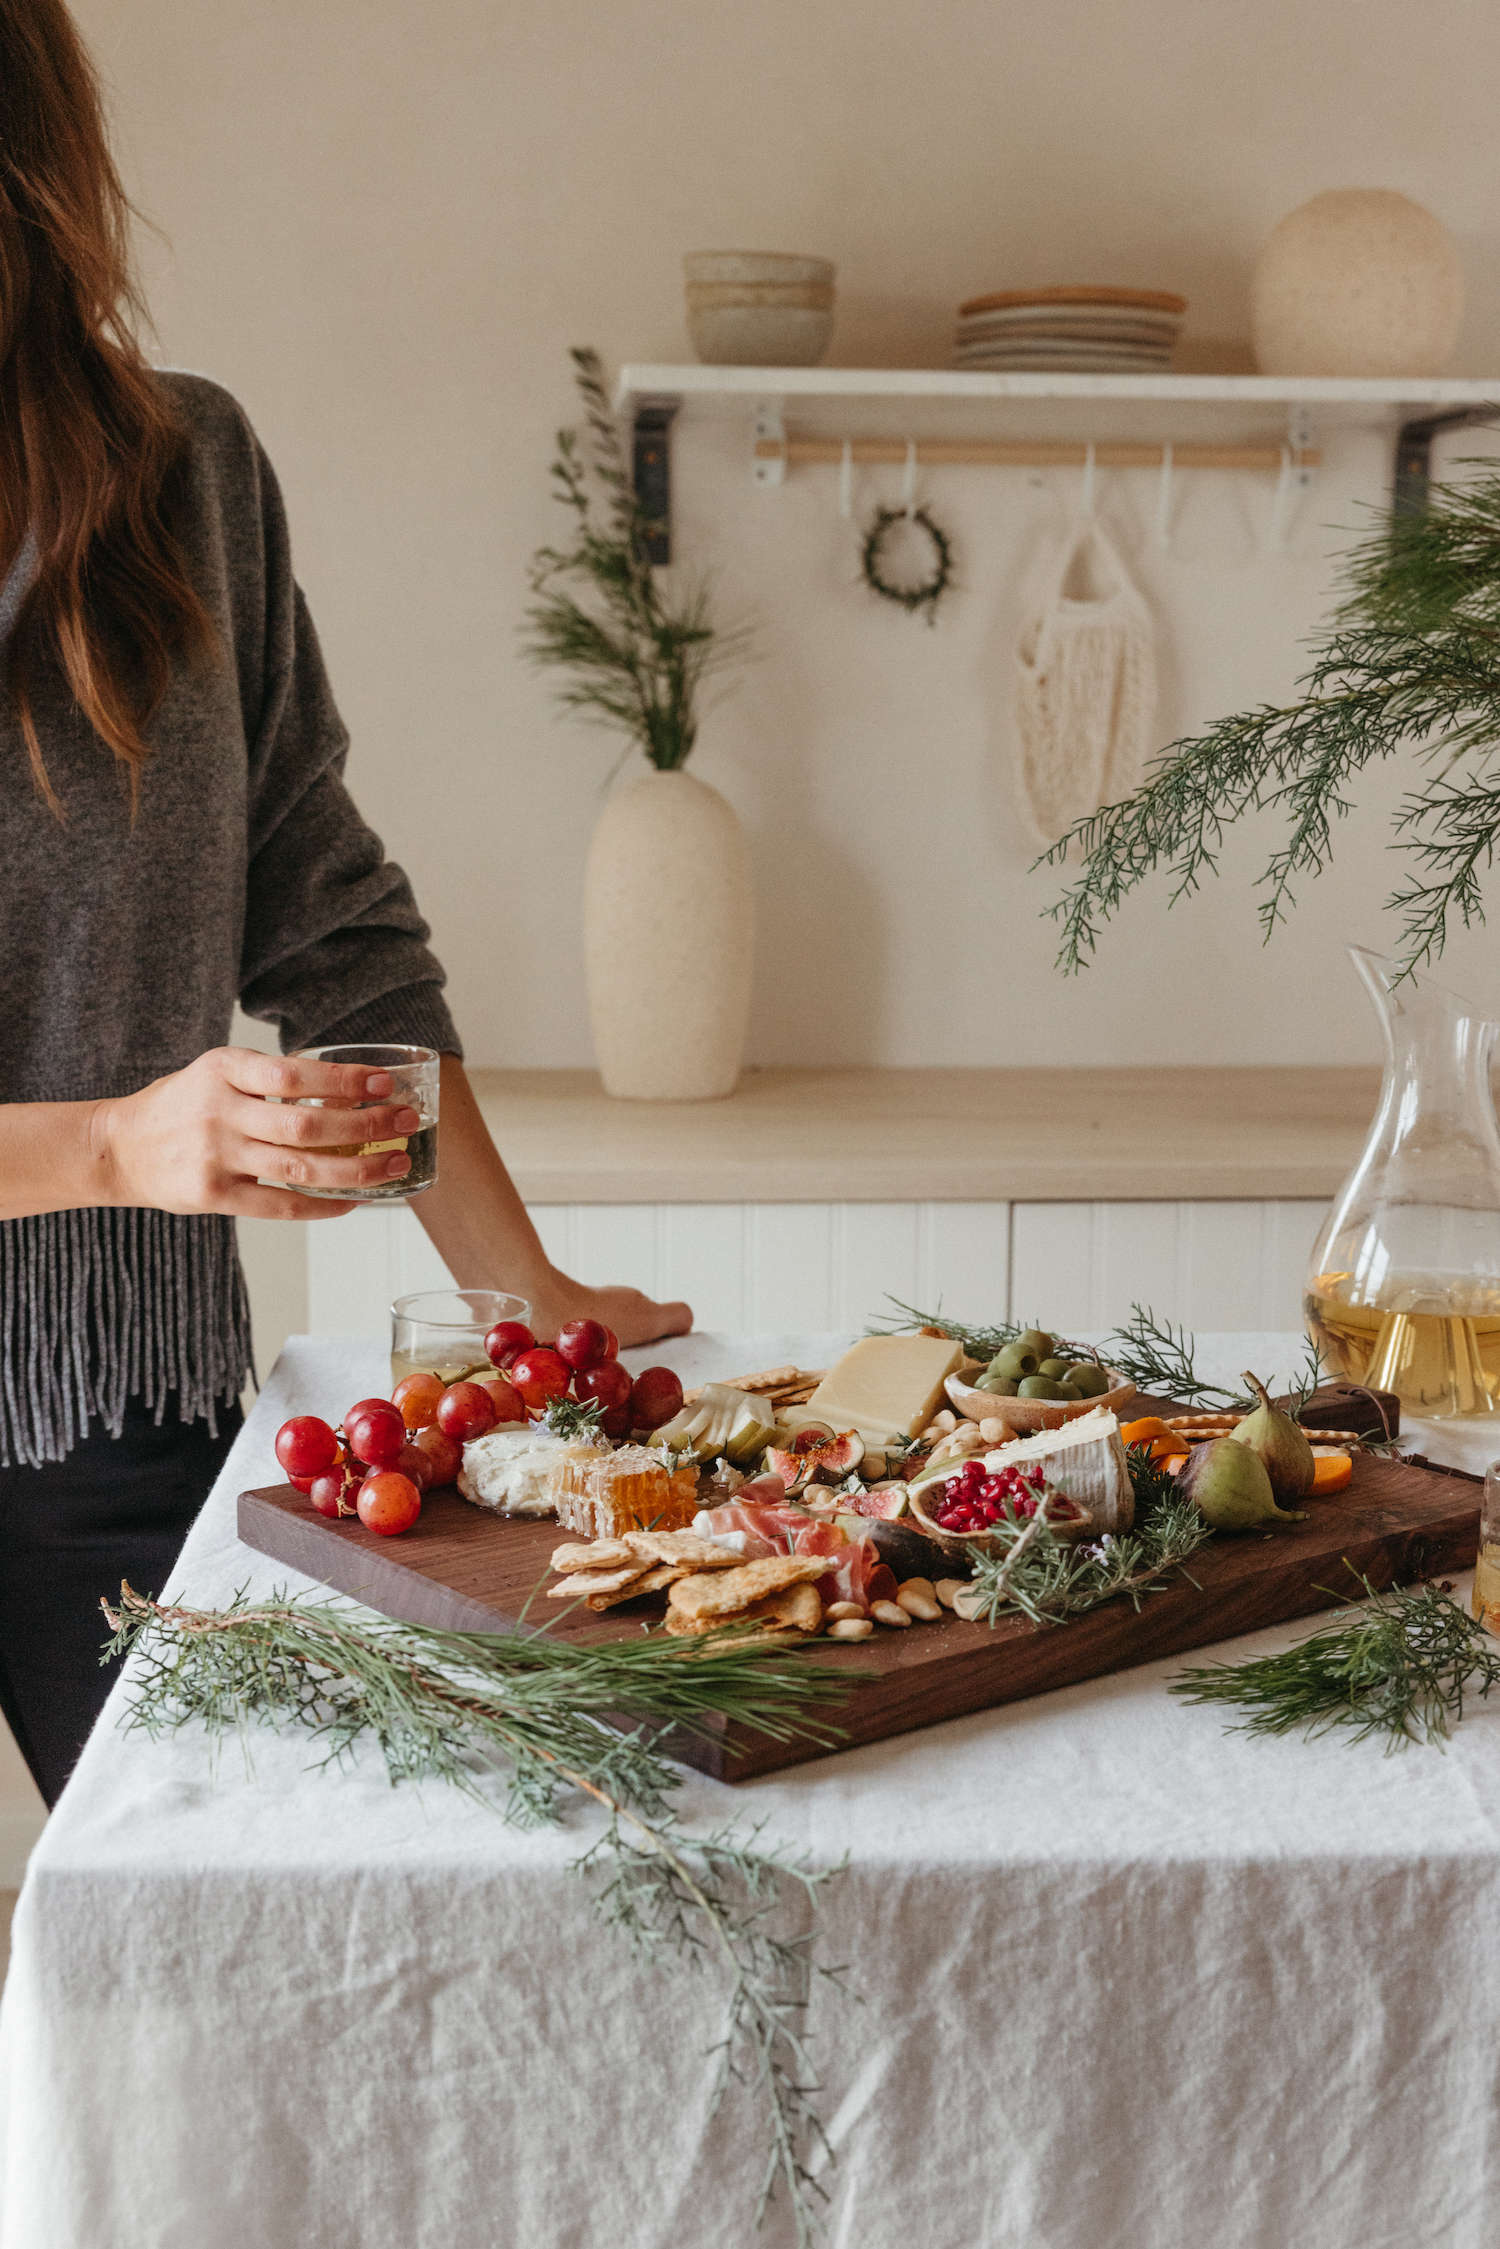
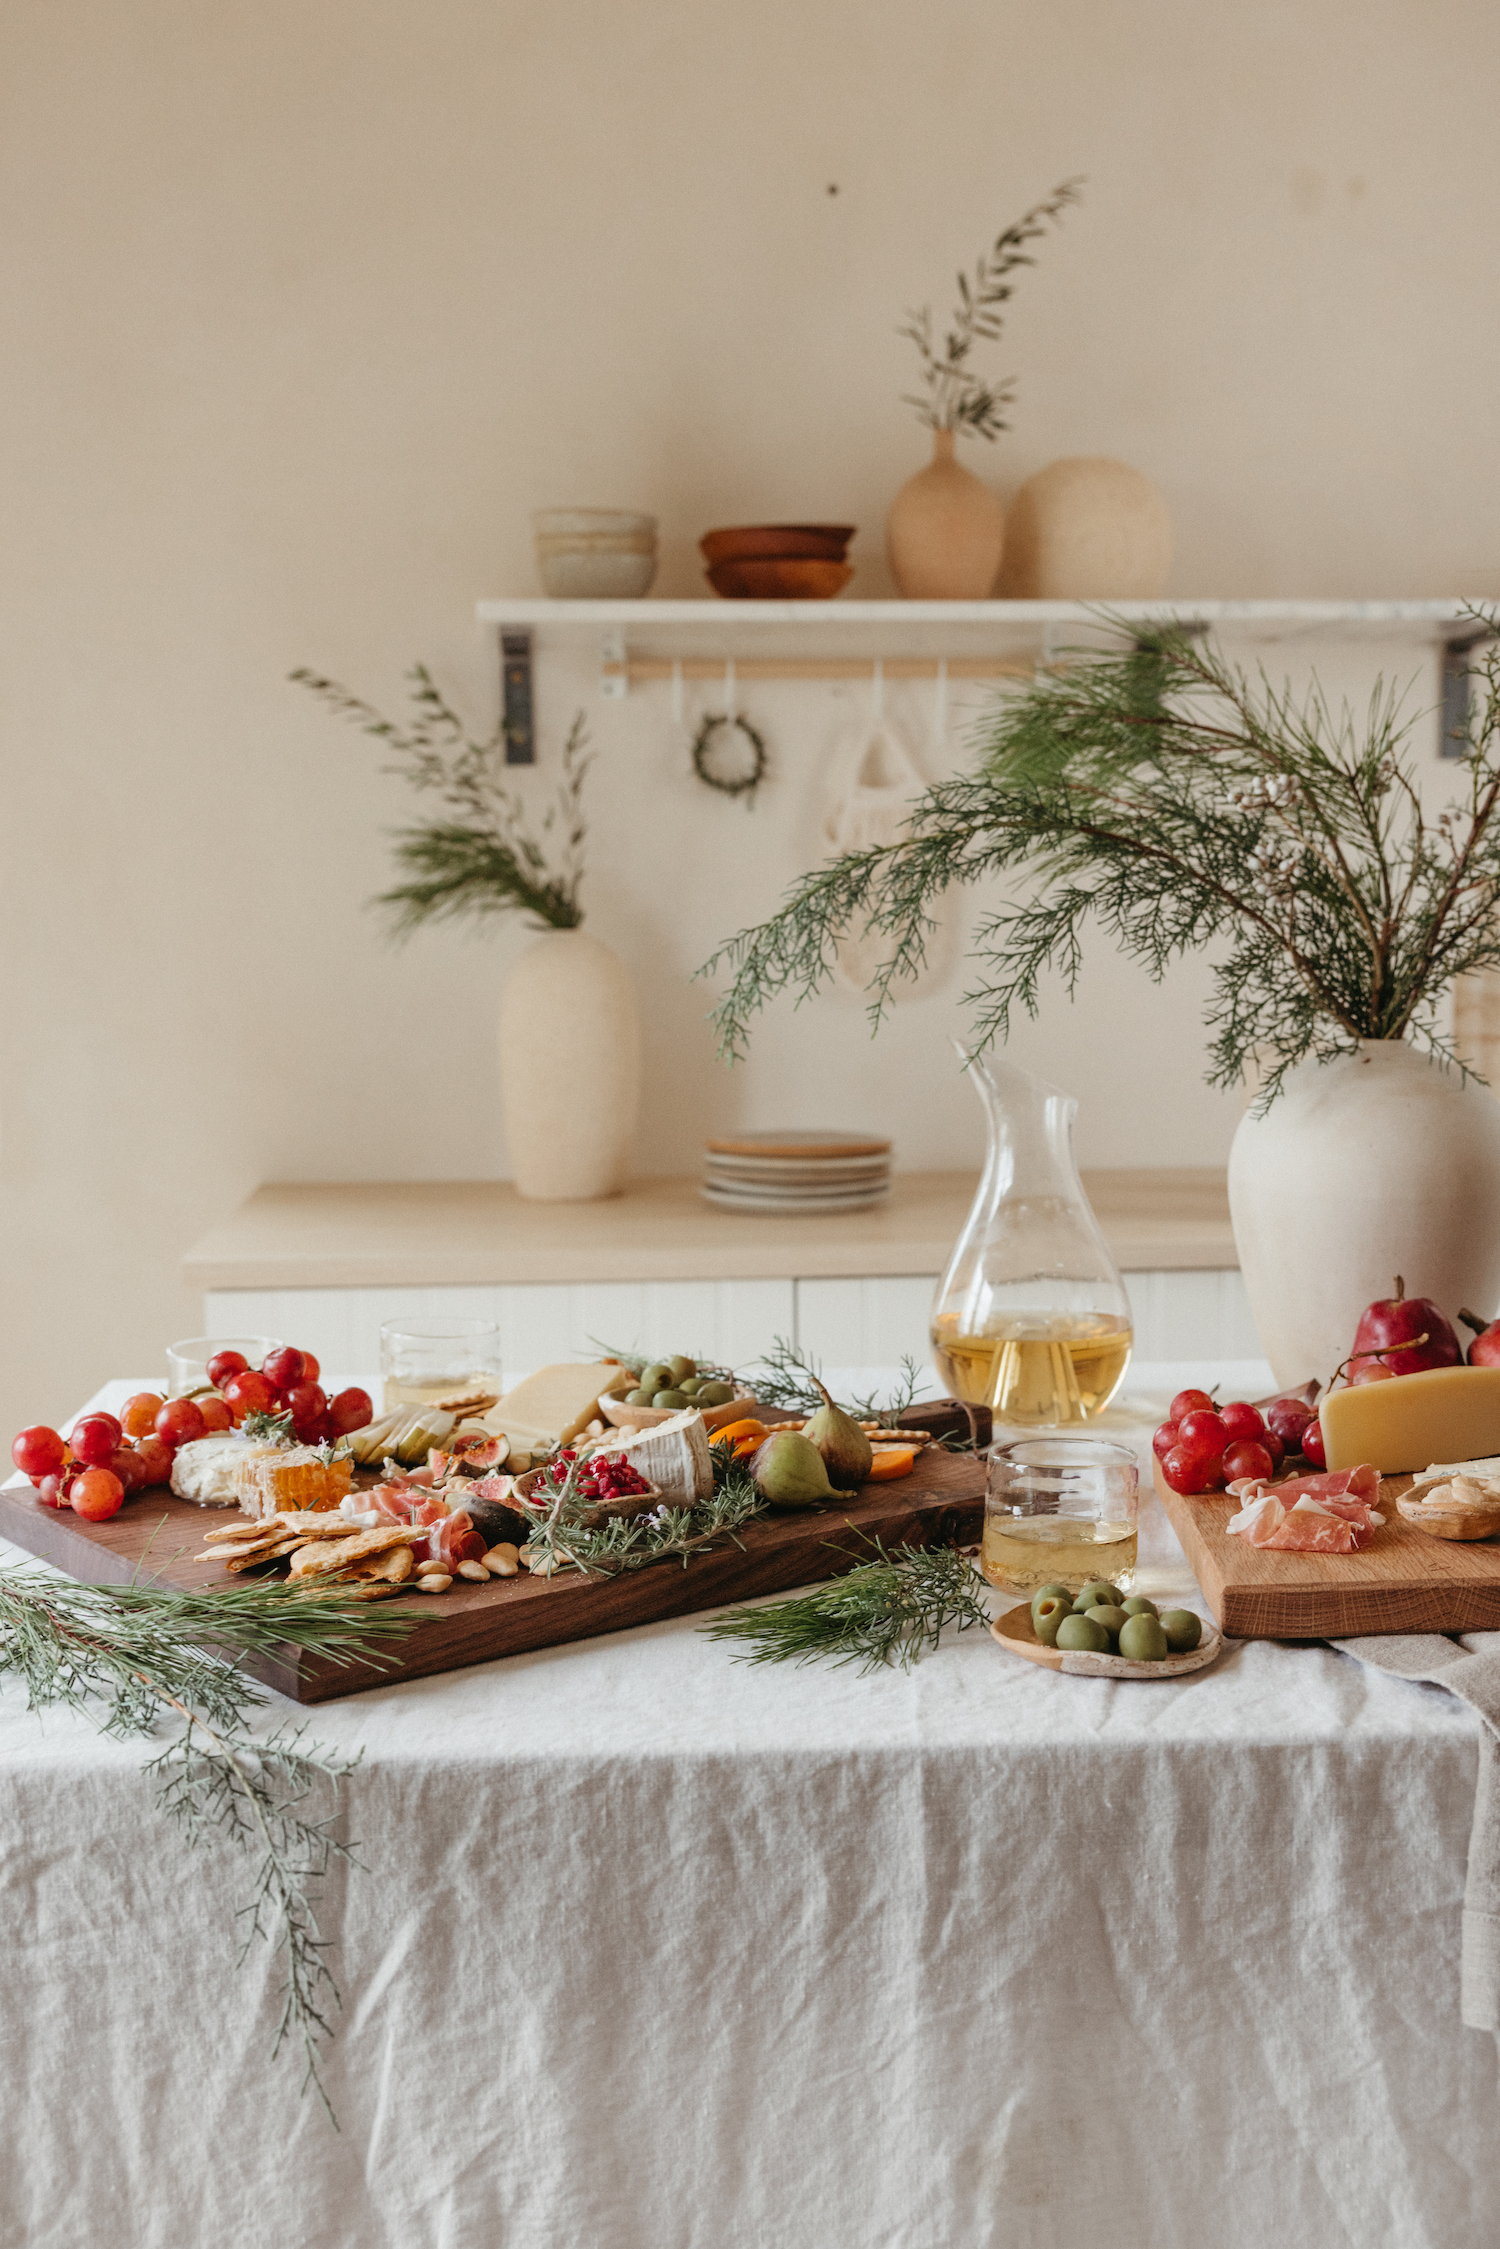
‘Tis the season for hors d’oeuvres and happy hours, grazing and gathering, and bringing together the people you love around abundant platters of food. For me, that means making my fair share of cheese and charcuterie boards, and I must say—with years of practice, I’ve nailed a tried-and-true formula for building the perfect holiday charcuterie board that’s gorgeous, delicious, and won’t blow your budget.
Today’s post definitely falls into the no-recipe recipe category, but since I get so many questions from you guys whenever I share my cheese boards on Instagram, I thought it might be helpful to kickoff this season of hosting with a quintessential guide to creating a holiday charcuterie board that’s perfect for any Christmas gathering. Scroll on for all my tips on how to choose meats and cheeses to buy at the grocery, how to arrange, and the finishing touches that make it feel super festive.
First, choose the best board for charcuterie
Choosing the right board to arrange your cheese and charcuterie on is step number one. Think about material (wood, marble, or ceramic), shape (do you want it to be round or rectangular?) and perhaps most importantly, the size.
I may be biased, but Casa Zuma’s Gathering Board is my number one pick for a beautiful board for holiday charcuterie (or snacking boards of any kind). Its substantial 1″ thickness makes it feel so sturdy no matter how much I load it up, and the walnut and oak boards have a beautiful grain that reflects their handmade quality. They just feel special.
Choose the size of board based on the number of people you’re feeding. Our large board is sized perfectly for a larger group, and the small board is just right for 1 – 4 people.
Add your holiday charcuterie board ingredients
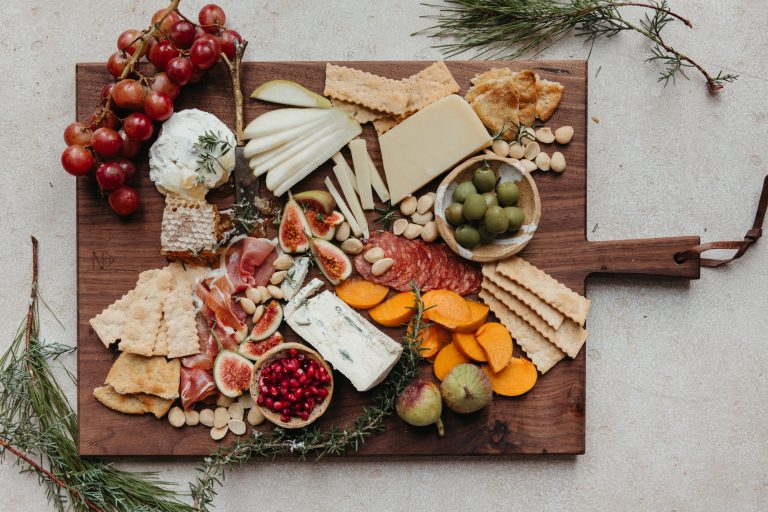
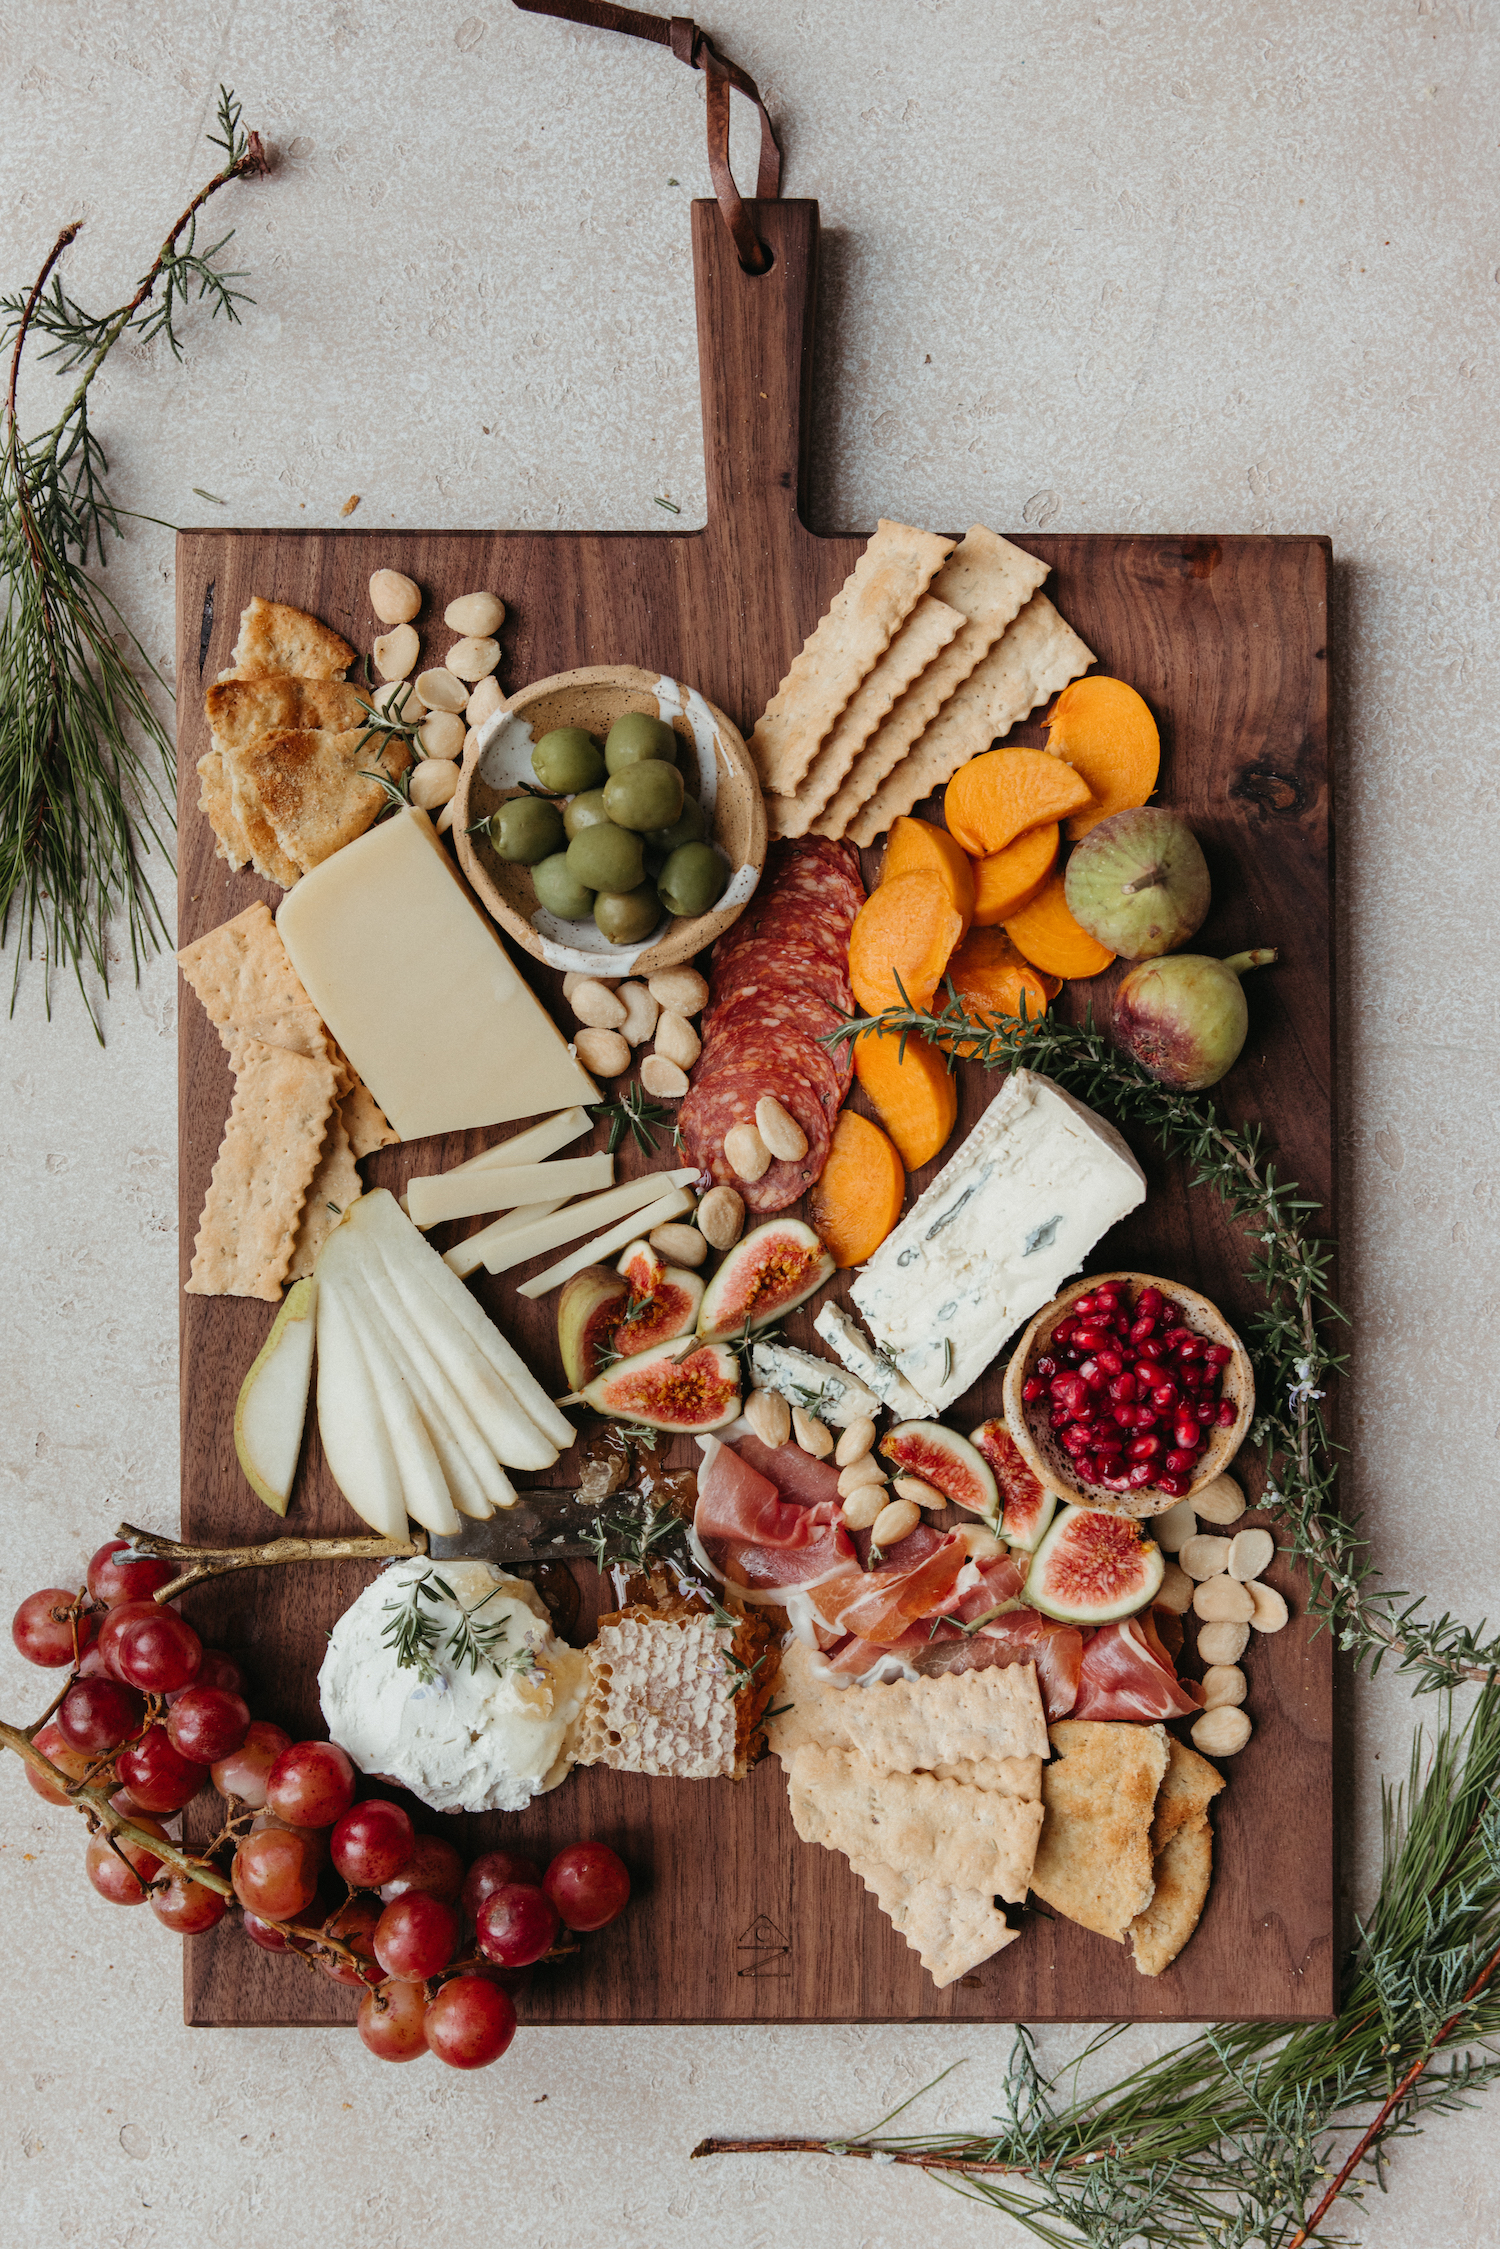
Building a great cheese board is all about the variety—you want texture, color, and interest. Here’s everything you need to make a great holiday charcuterie board:
Cheeses
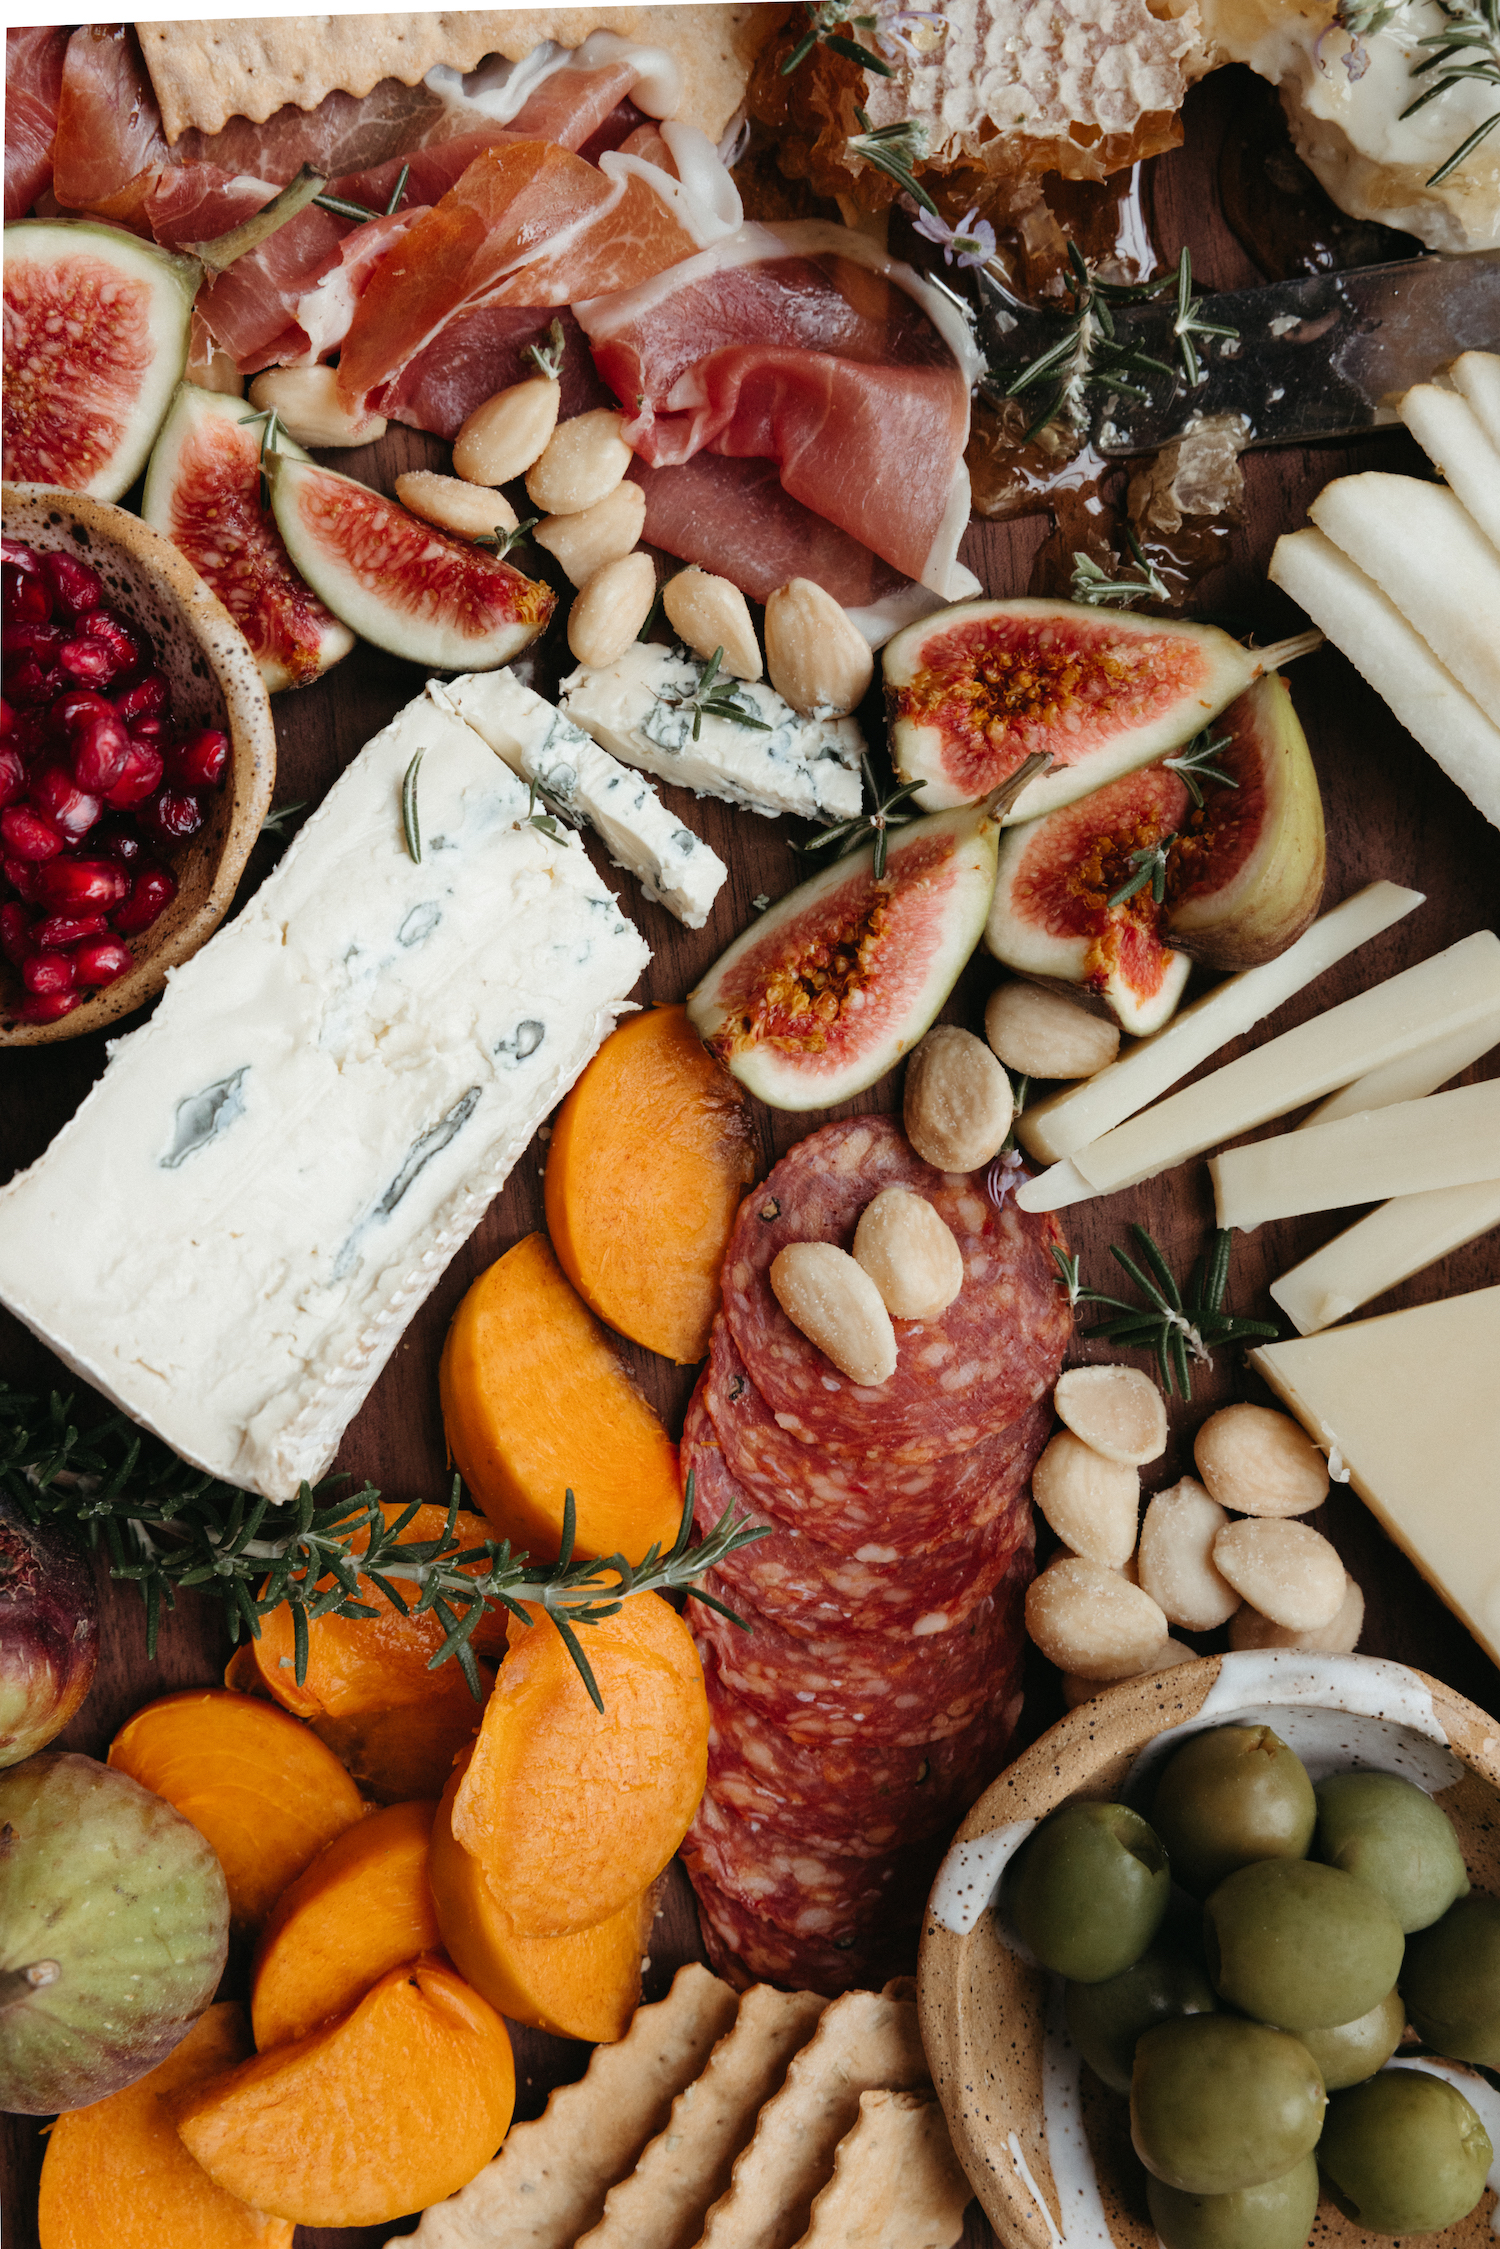
What are the best cheeses to include on a holiday charcuterie board? Typically, you want a mix of hard and soft cheeses, as well as mixing up the varieties. For this board serving 5 or more people, we’ve got some of my favorite cheeses: a wedge of creamy blue cheese, a sharp cheddar, and a creamy goat cheese. You could add a sheep’s milk manchego, a creamy brie, fresh mozzarella, or an aged gouda or gruyere, if you wanted to amp up the numbers. For a smaller group, you can totally get away with 2 types of cheeses (typically a creamy cheese and a hard cheese) and call it a day.
Meats
I like to offer 2 types of meat on most of my charcuterie boards: a sliced salami and paper thin slices of prosciutto, both of which can likely be found at any local grocery store.
Crackers and bread
This is the vessel for serving all those cheeses and spreads. I usually have a toasted baguette, simple water cracker, and then a seeded gluten-free cracker like Mary’s Gone Crackers.
Fruit
Adding one or two types of fruit to your holiday charcuterie board is a great way to make it feel seasonal. In the winter, I love to add persimmons, pears, cranberries, pomegranates, and dates to my board, whereas a summer board might include fresh berries and cherries. I also love dried fruit, like cranberries or apricots, for a chewy texture.
Pro tip: Italian chef Erind Halilaj told us, “Parmigiana happens to pair really well with grapes.”
Nuts
You’ve gotta have that salty crunch on any cheese board, and marcona almonds, toasted pistachios, salted cashews, or candied pecans are elevated ways to add it.
Spreads
I always include one slightly sweet spread to my boards that allows guests to create their “perfect bite.” Fig chutney pairs really well with blue cheese, and I love a tart citrus marmalade with parmesan. When in doubt, set out a little bowl of honey that’s delicious drizzled over anything.
Olives
My pick? A rich green olive with the pit (and a small bowl for discarding.) I love castelvetrano or cerignola olives for the meatiest, most satisfying flavor.
Extras
I like to think of one “wow factor” item that makes a charcuterie board memorable. Edible flowers sprinkled over the top, or in this case, a special wedge of honeycomb that becomes the pièce de résistance. It could even be an unexpected way of serving, like a whole wheel of brie slathered with beautiful jam.
Tips for assembling a holiday charcuterie board
Here’s my simple formula for building a beautiful board every time:
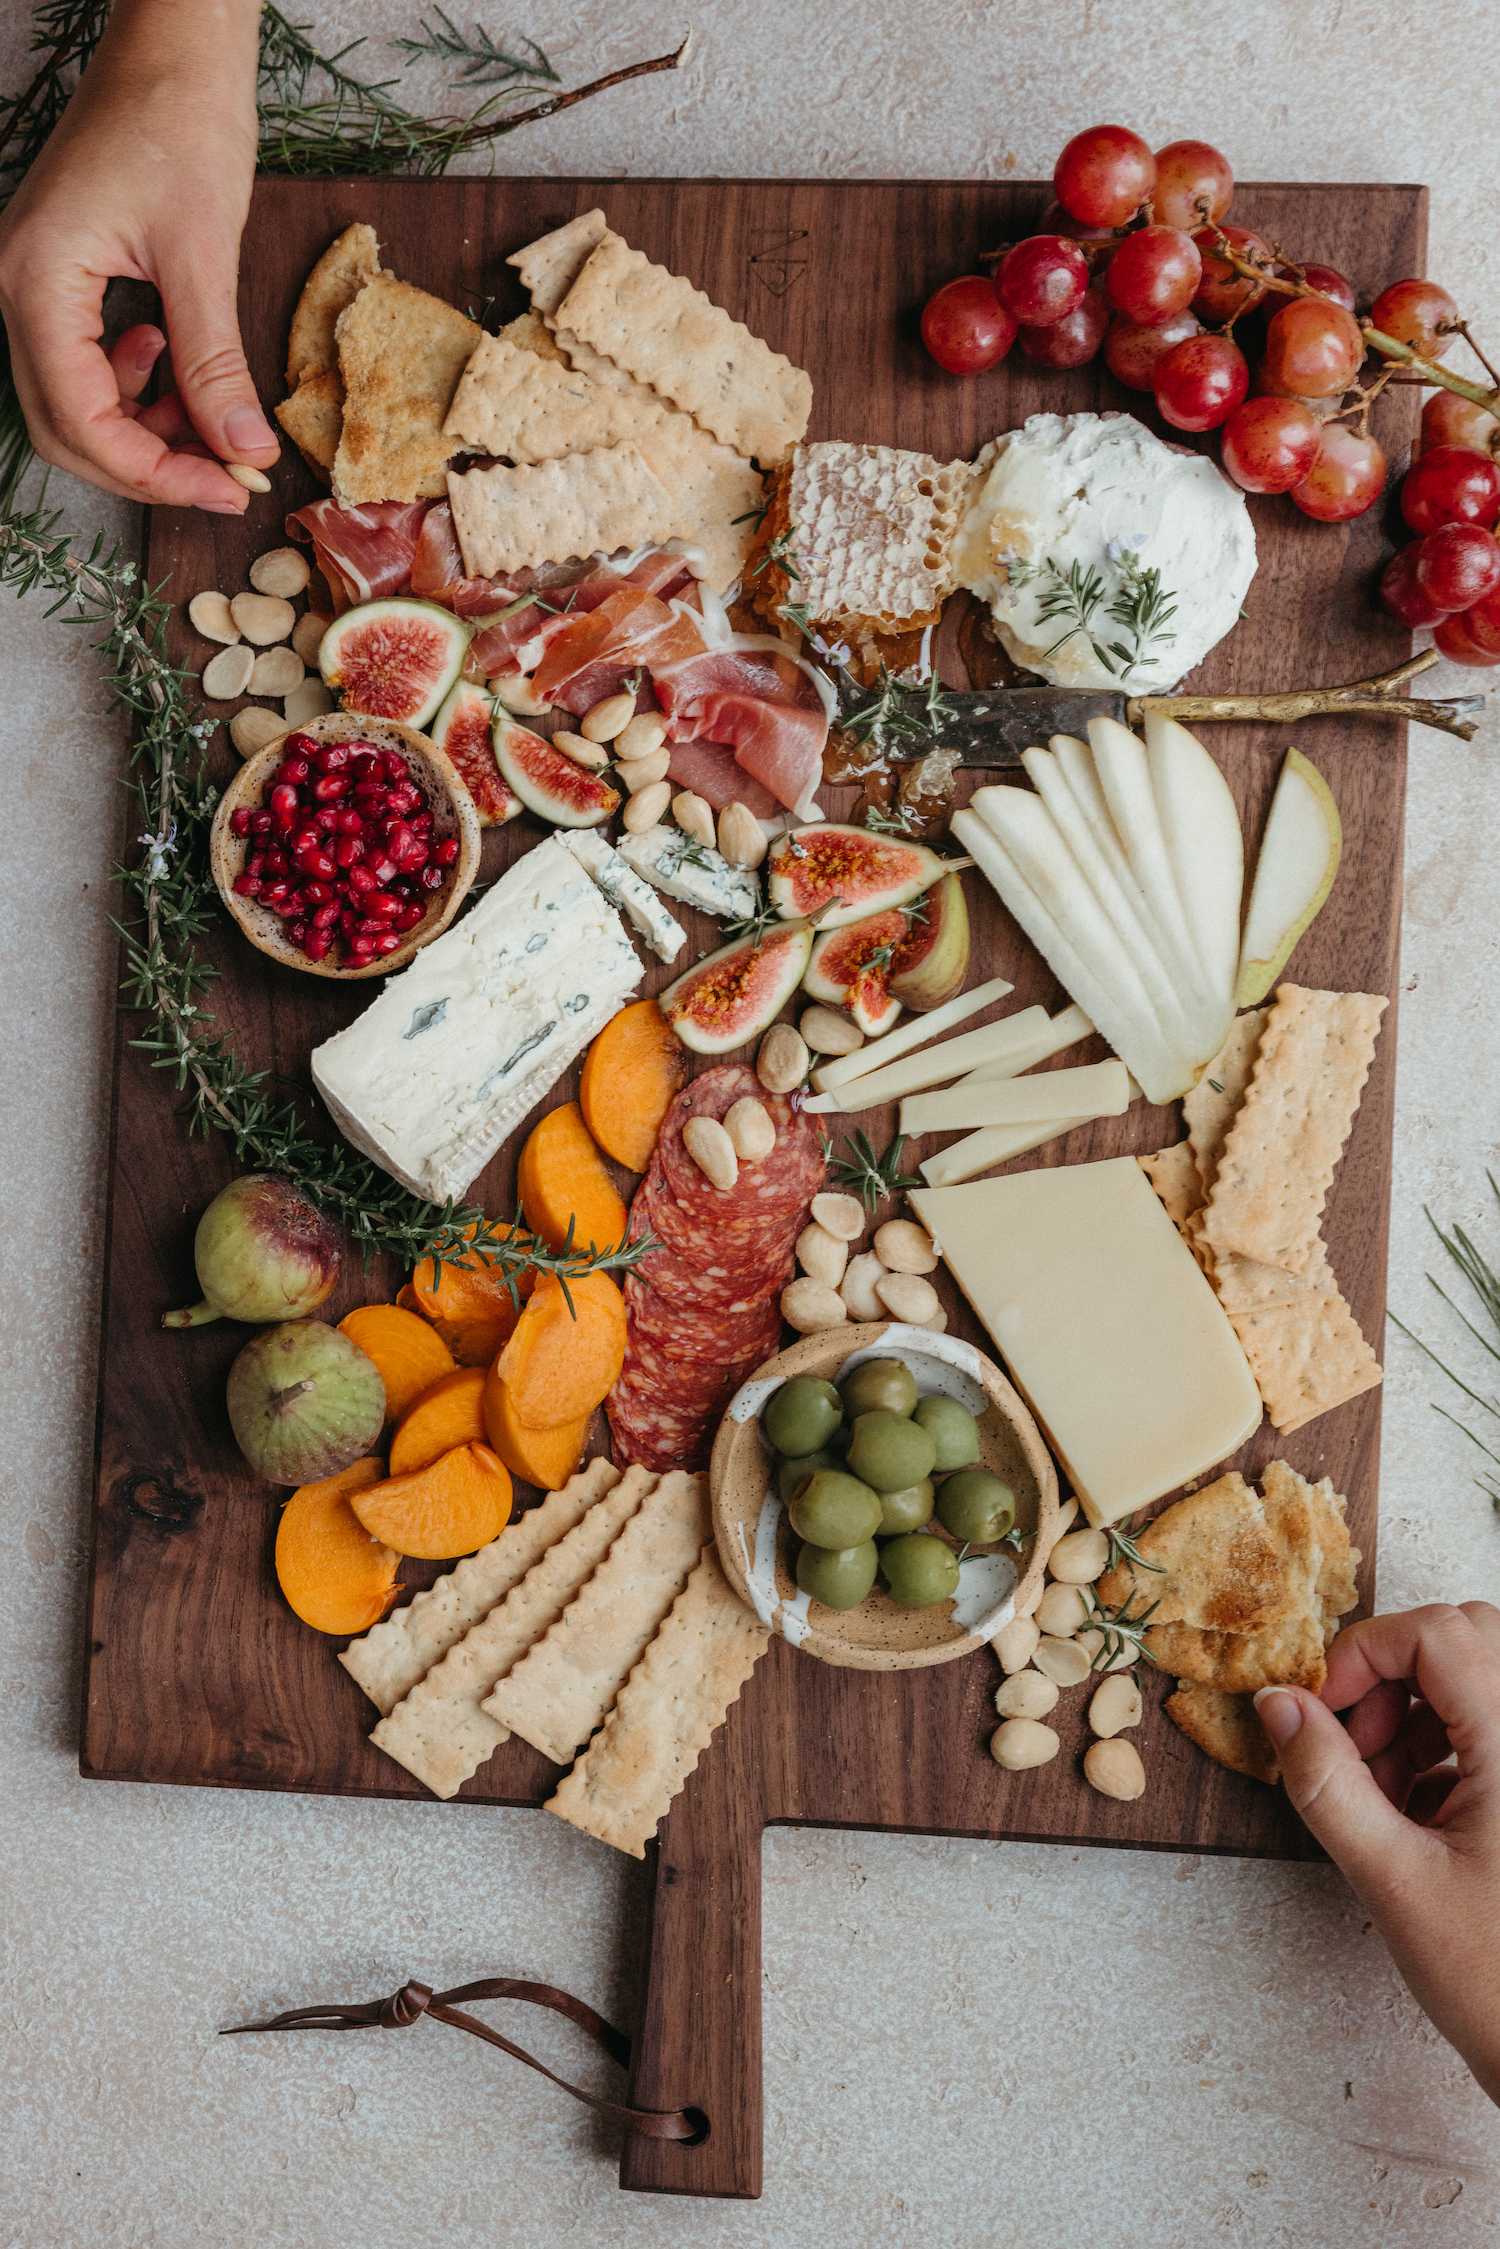
Step 1 – Start with the cheeses
They’ll anchor the board and guide the rest of your composition. I like to spread the cheeses out into different corners of the board so it feels balanced.
Step 2 – Add the meats
This is the other “rich” element on the board, and I like to keep the meats a little separate from the cheeses. I pile up prosciutto in pretty little stacks and fan out salami in overlapping lines.
Step 3 – Pop in the fruit
This is where all that gorgeous seasonal color comes in, so treat it like an art project adding visual interest where needed. I usually place fruit next to the cheeses that it tastes best yet, so I’ve taken the guesswork out of pairings for my guests.
Step 4 – Fill in with final touches
Now comes the fun part. Fill in the gaps with all the fixings that will make the board look really abundant. Incorporating mini bowls and ramekins keeps things organized and interesting, and they’re a great vessel for some of the smaller snacks and any dips or spreads you choose to display. I add crackers and breads, then olives, nuts, chutneys, and even some fresh herbs like these sprigs of rosemary as my final touches.
How to keep it budget-friendly
Yes, it really is possible to make a beautiful charcuterie board that won’t break the bank (key during the holidays!) Here are my top tips for keeping a charcuterie board budget-friendly:
Include just one expensive type of cheese
I always choose one cheese to be my “splurge” and make sure that everyone has a chance to try it–everyone will be so wowed by that one unforgettable cheese that they won’t notice if the others are a little less standout.
Slice strategically
This is a tricky technique that I learned back in my catering days! The way that you present a certain cheese can make it feel fancier and more substantial. Serve parmesan in a long skinny wedge that takes up a lot of real estate on the platter. Cut a more affordable cheddar into long thin slices that can be stacked up or fanned out (and keep it from looking like a grocery store block of cheese.) And as mentioned, I like to serve brie in a whole wheel and surround it with pear slices and drizzle the top with honey.
Go crazy with garnishes.
This is the most effective secret to creating an affordable charcuterie board since your garnishes are usually the most affordable elements. Slice up a baguette, scatter a few toasted walnuts, fan out some apple slices, place a little bowl of olives, and nestle a few pieces of affordable salami into any empty spots on the board. When in doubt, pile up lots of grapes!
See this post for lots more tips on creating a budget-friendly cheese board.
How much meat and cheese per person
When I was creating cheese and charcuterie trays for holiday parties as an event planner, I learned to factor between 1 – 2 ounces of cheese, and 1 – 2 ounces of meat per person. This is a perfect appetizer portion, knowing that guests will also be snacking on fruit, nuts, bread, and olives. If you’re serving a charcuterie board as a main meal, bump it up to 2 – 3 ounces of each.
Scroll on for the recipe card, and if you make a holiday charcuterie board this season, be sure to tag us on Instagram so we can see your version!