
Hi everyone! It’s been a while since my last post, and a lot has has happened in that time.
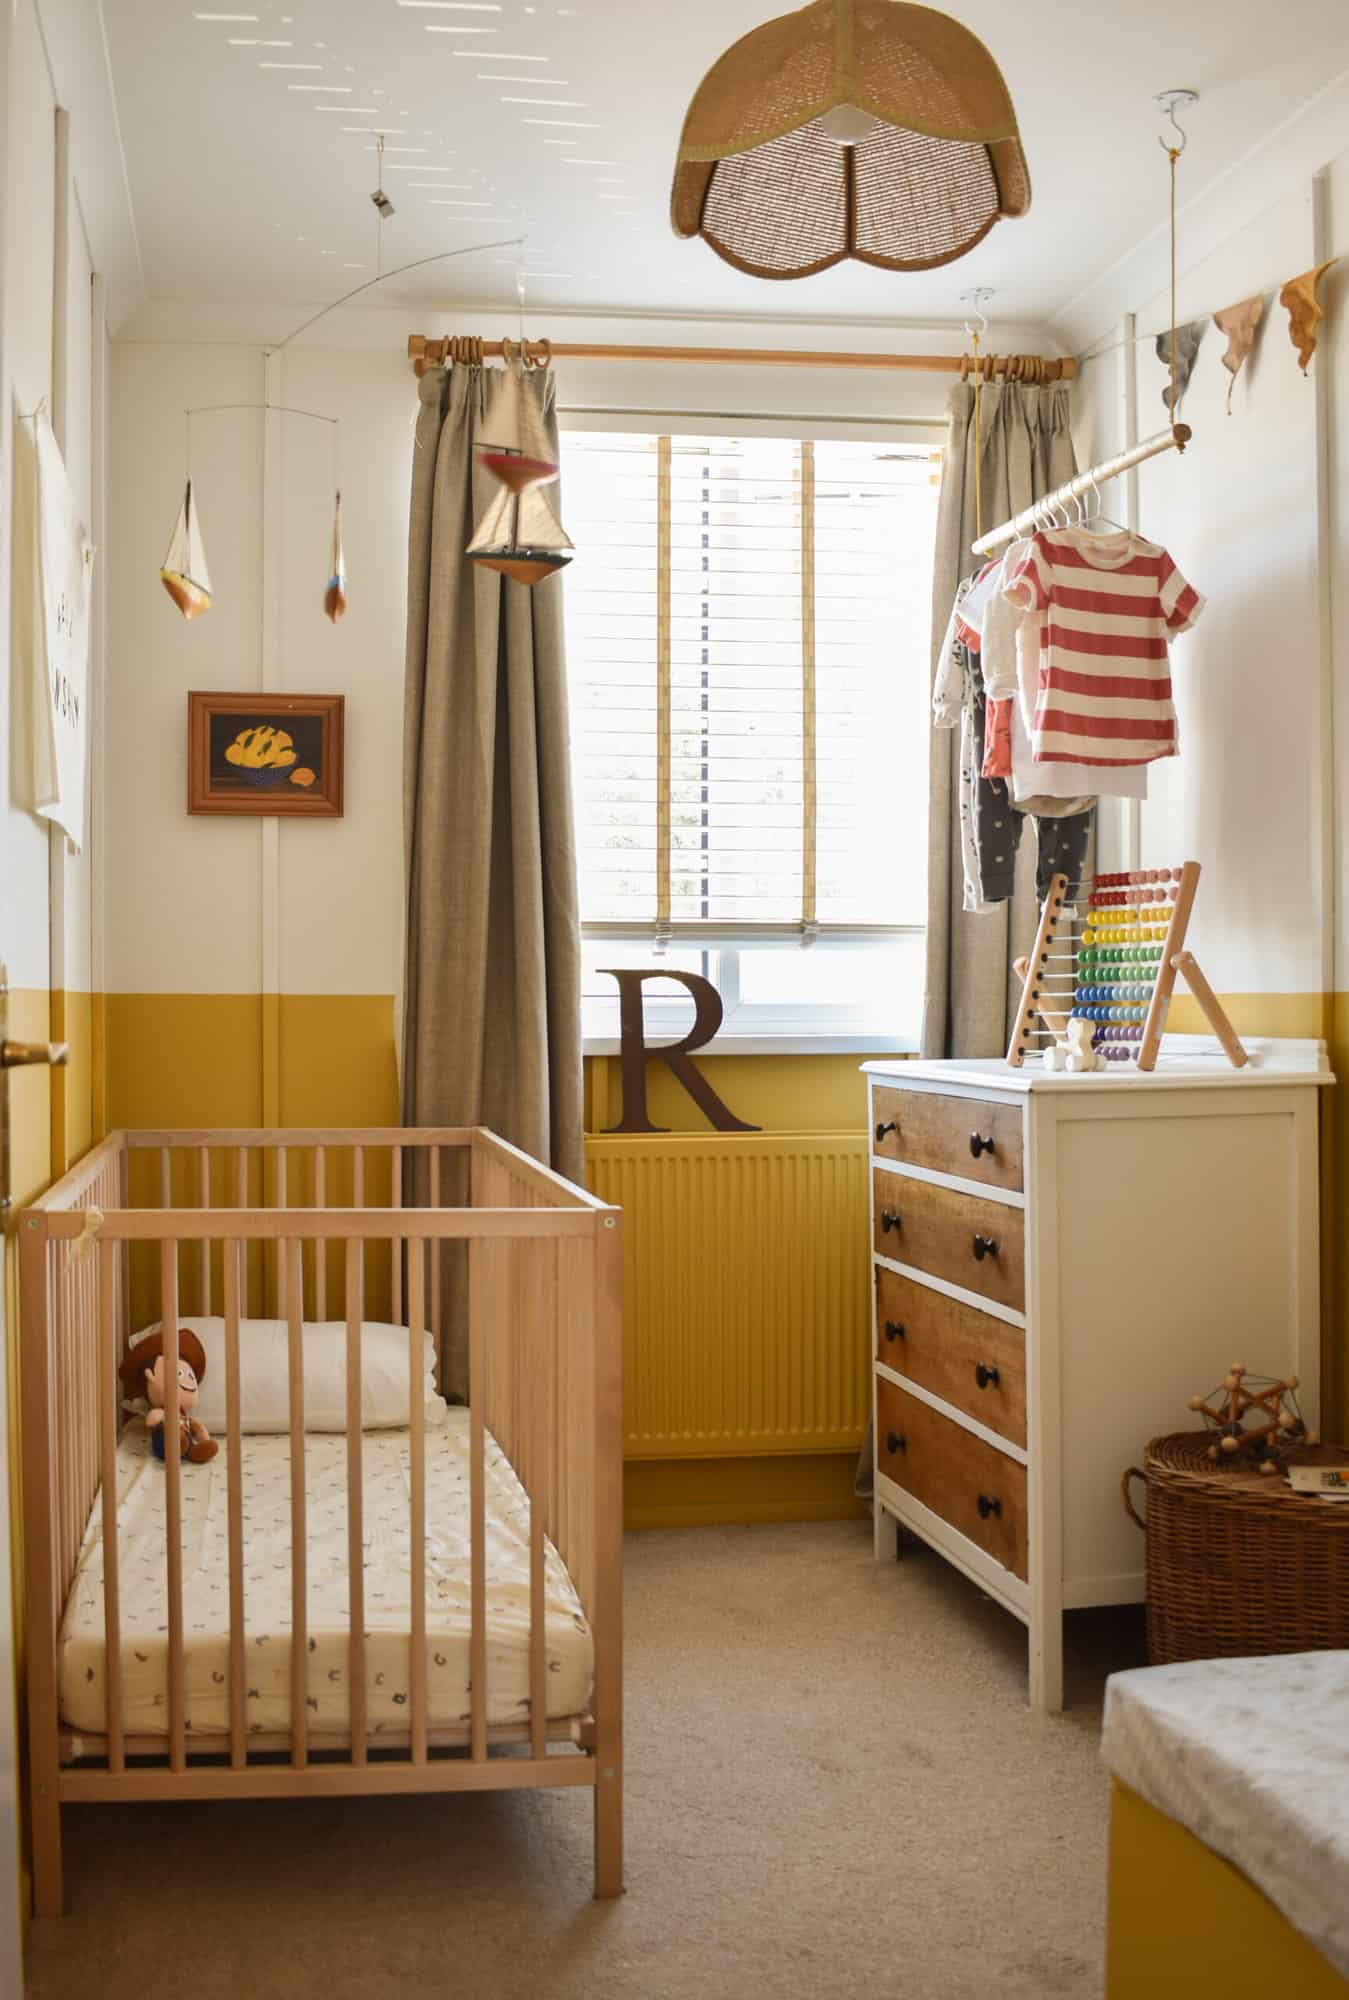
The biggest news of all has got to be the conversion of our man cave into a nursery for my 1-year-old son!
Much to my husband’s dismay, of course … he did love that man cave, but sacrifices have to be made when you have kids! You can see my nursery reveal here.
Related: Find more DIY home decor projects here.

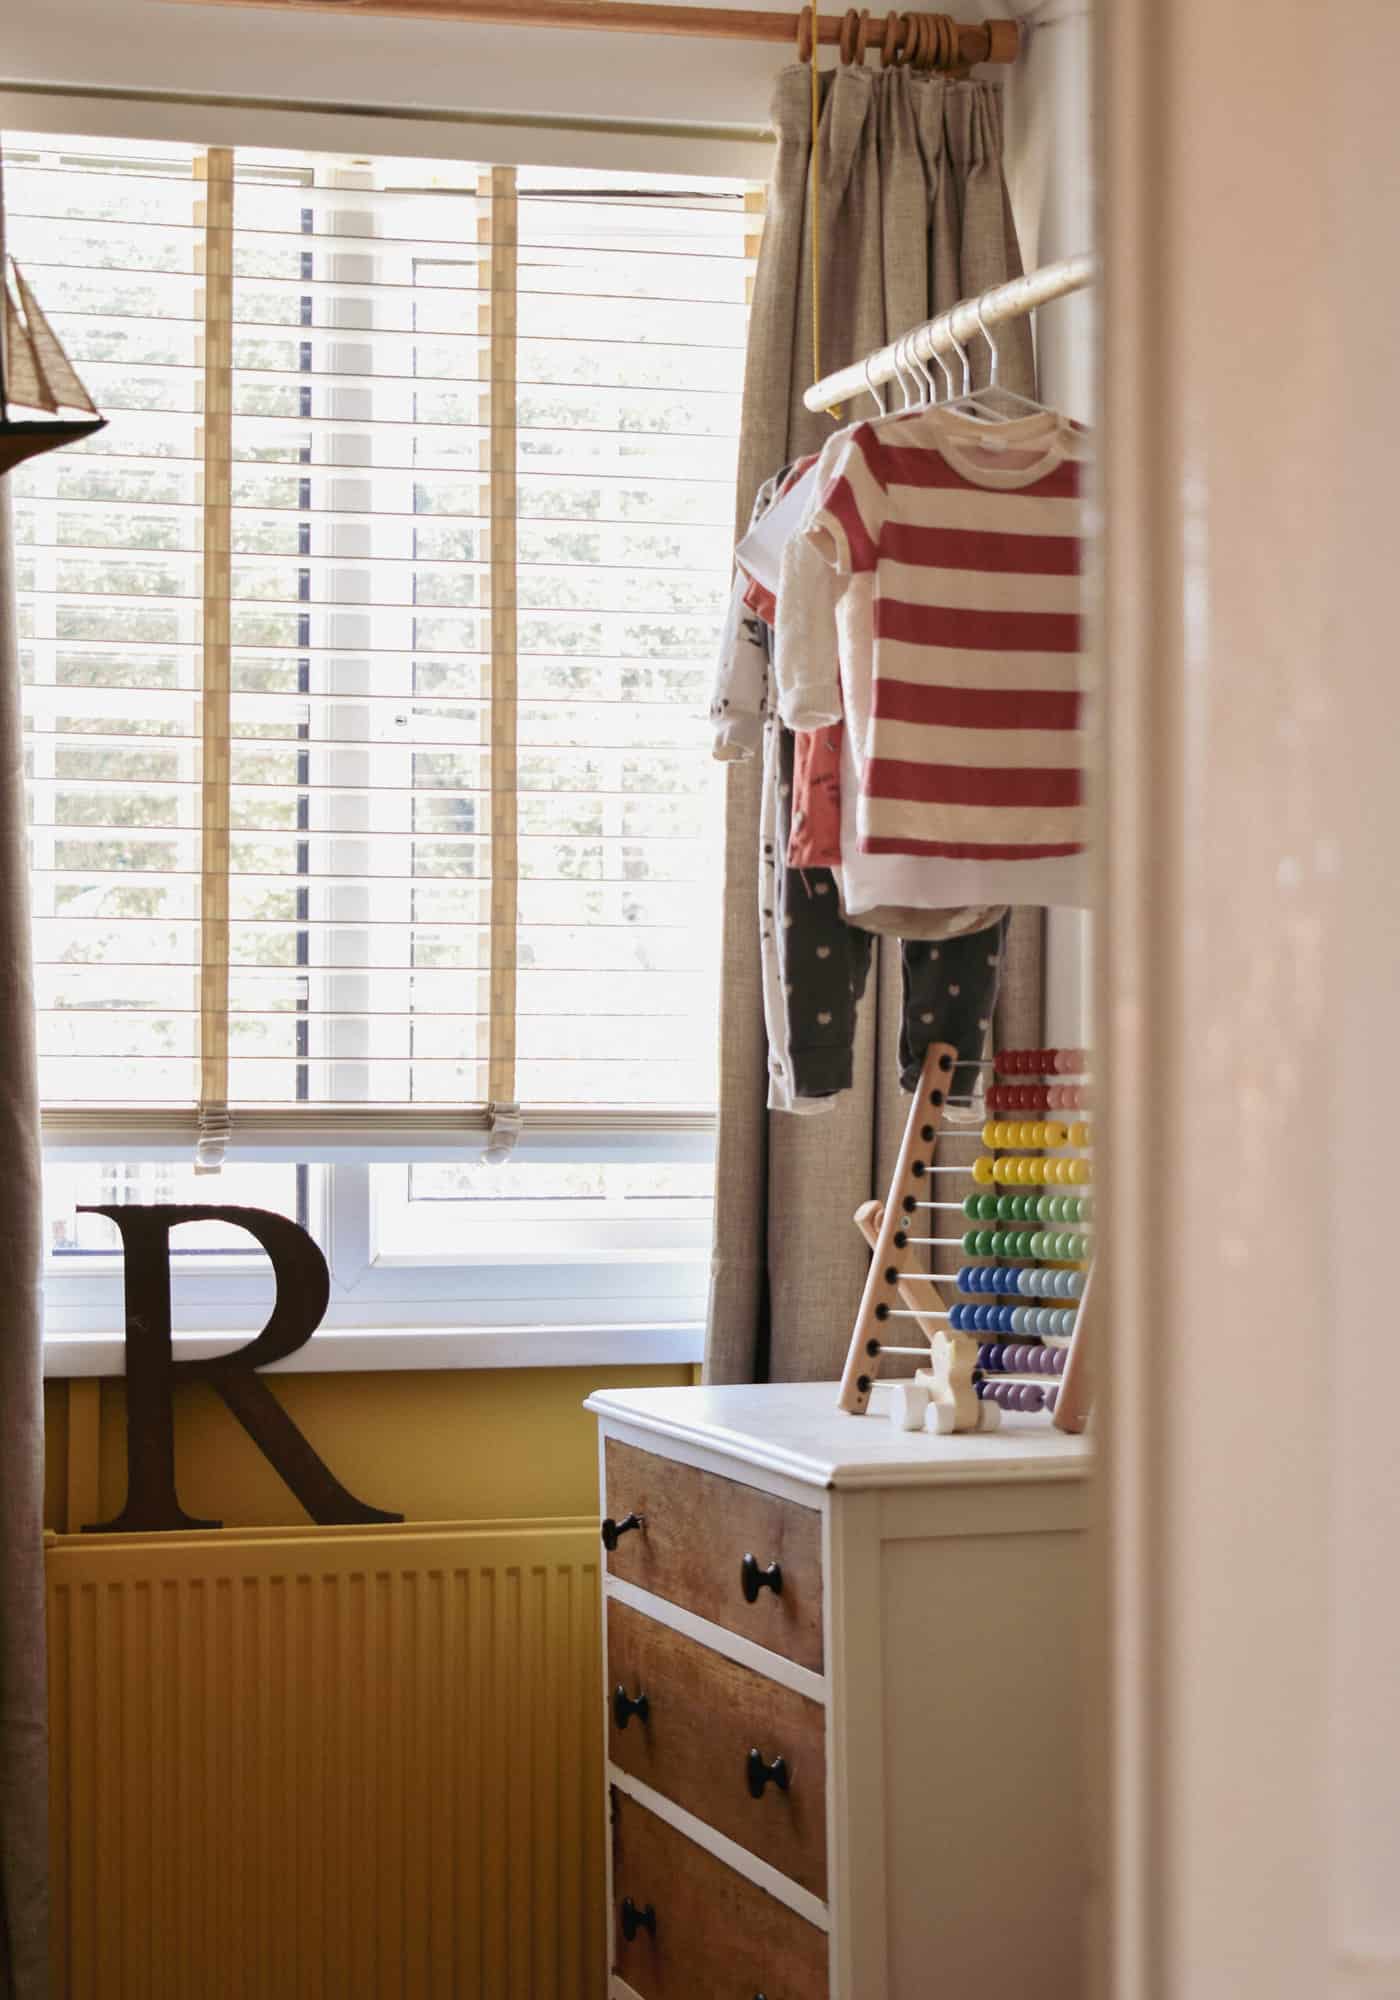
As you can see, the room is quite small (in the UK, the third bedroom is usually quite small and we often jokingly refer to it as a “box room”), which meant there wasn’t much space for the bigger essentials like a wardrobe.
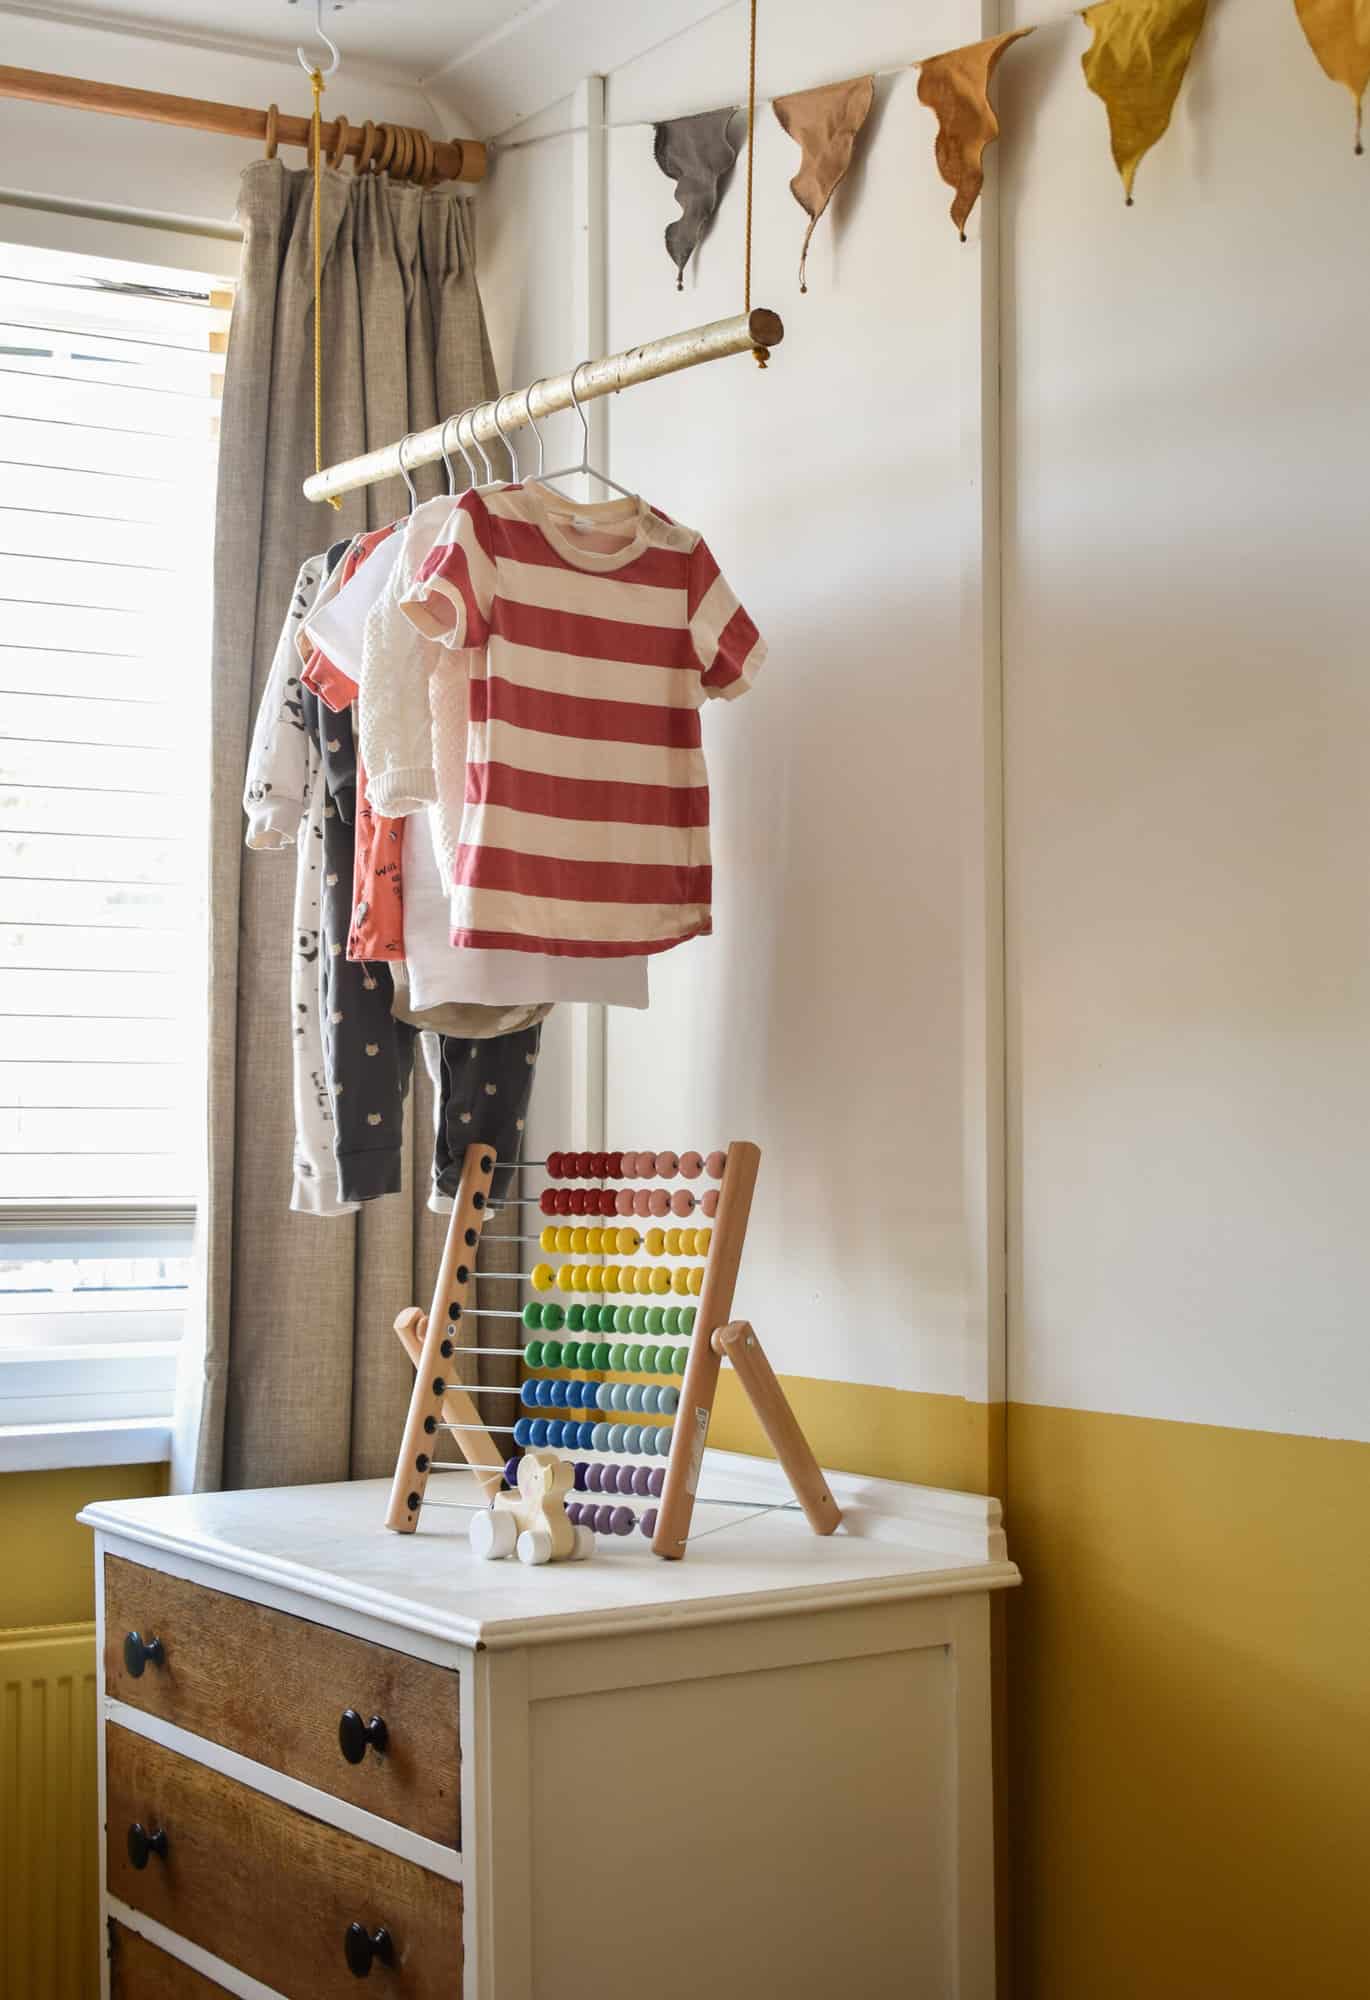
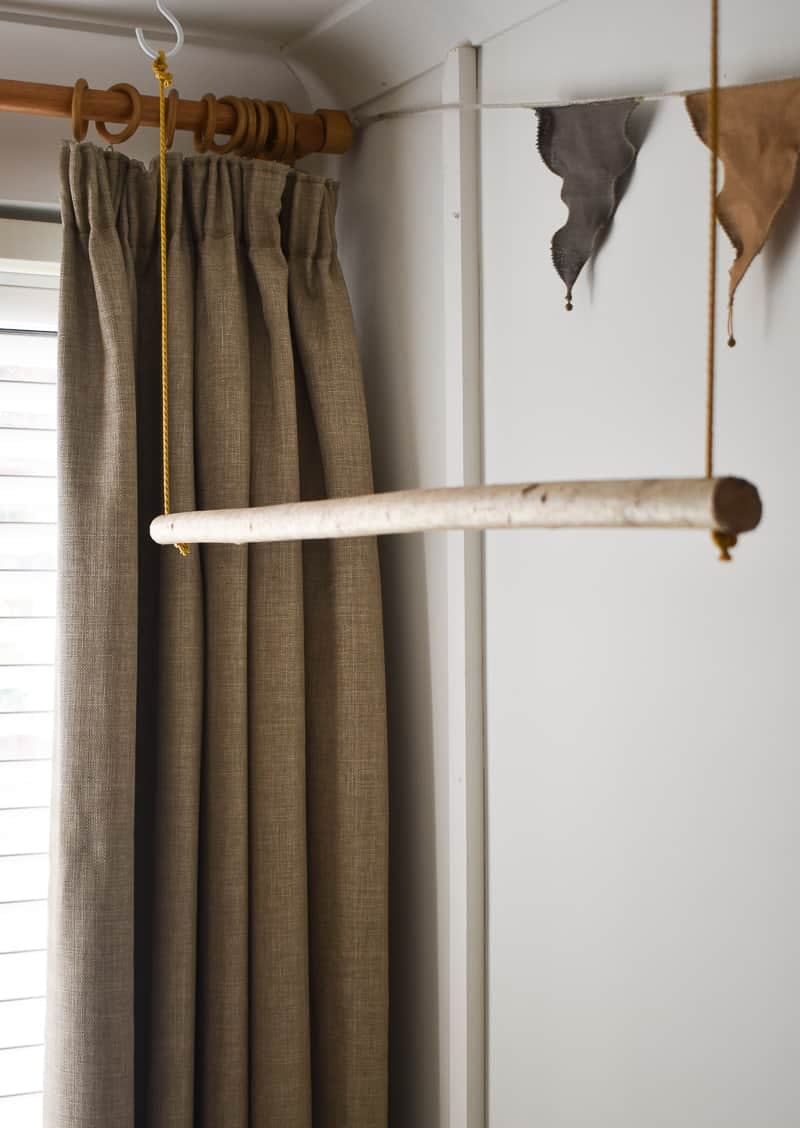
Not that I minded—I find wardrobes to be like bulky oversized boxes. So, I decided to create a DIY hanging rail from the ceiling!
It looks so light and minimal but still holds plenty of clothes. And, of course, baby clothes are *the* cutest, so this DIY rail ended up looking aesthetically pleasing, too!
Supplies Needed:
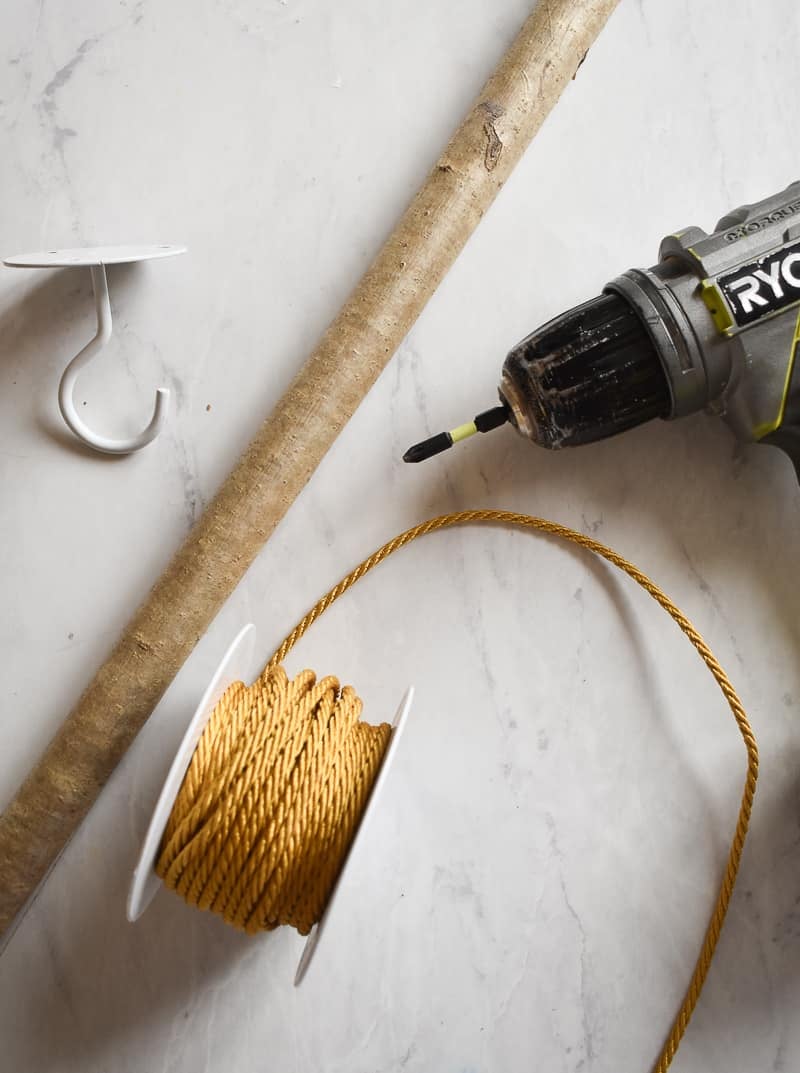
–branch/driftwood or dowel rod
–strong cord/rope
–ceiling hooks
-scissors
-drill
-sandpaper (optional)
Tutorial:
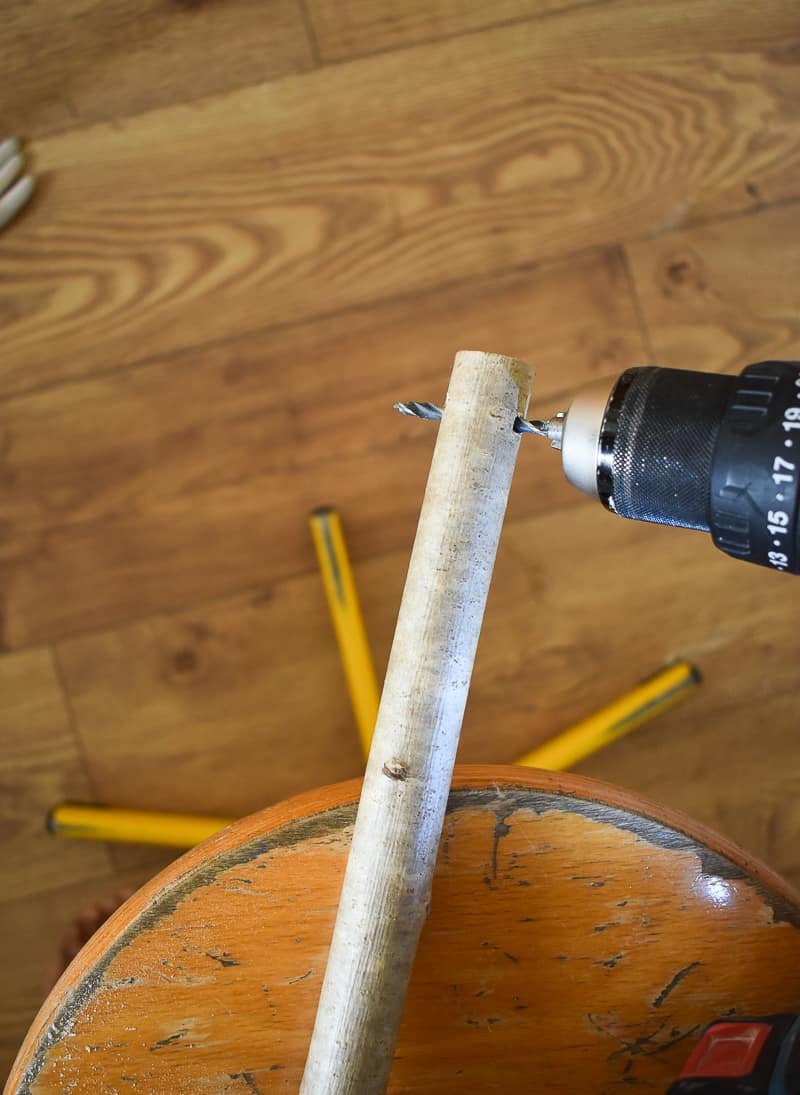
Decide how long you want your clothing rack to be and cut your branch/dowel rod down to this size. I cut mine to the length of the drawers so that the rail would be suspended above and line up nicely.
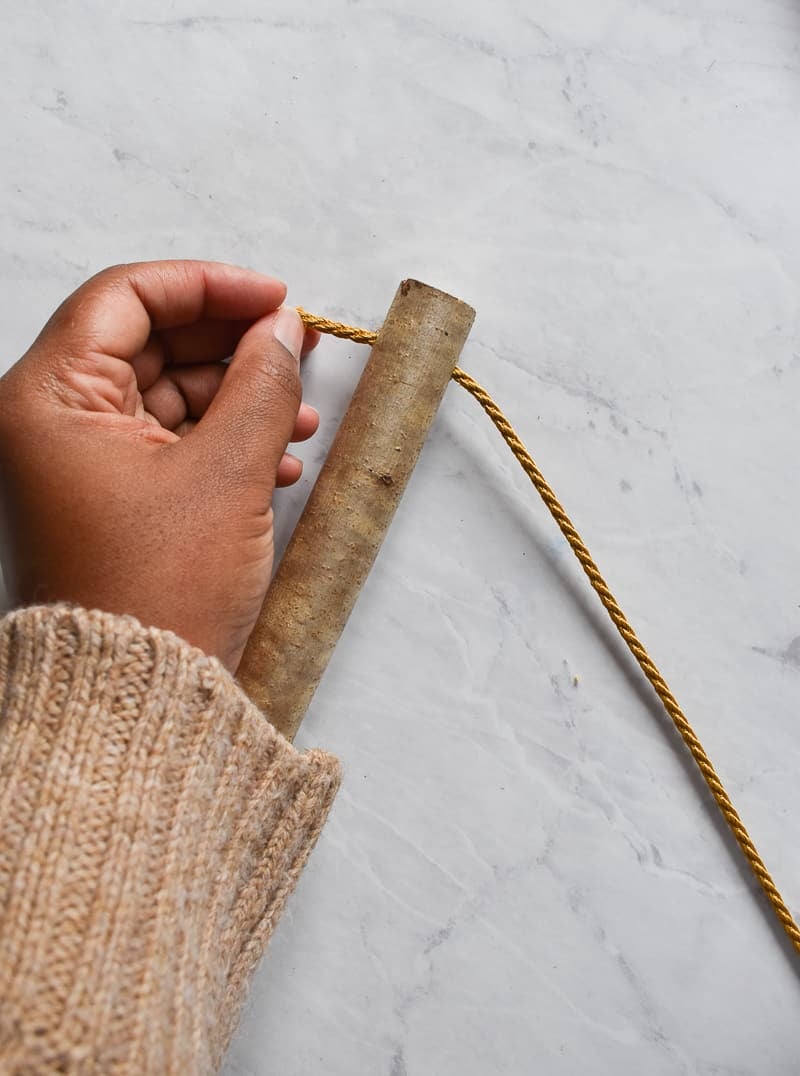
Drill a hole into both the ends of the branch that’s big enough for your rope/cord to fit through. Sand around the holes if needed to smooth things out and make it easier to pass the rope/cord to go through.
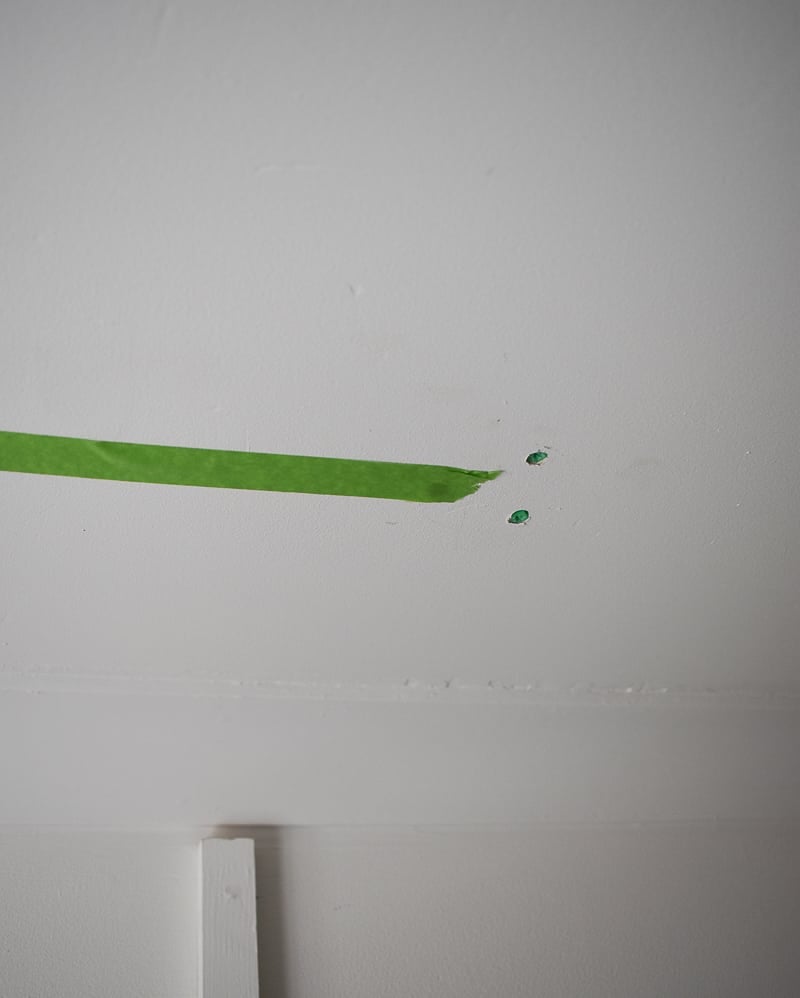
Now, fix your ceiling hooks in using wall plugs (wall anchors). Remember to mark precisely where the holes are in your branch/dowel rod and space the ceiling hooks at exactly the same distance.
Again, I used the dresser as my marker for spacing! But I also used some masking/Frog Tape to mark where the holes would need to be drilled in. It’s a simple but useful way of ensuring precision.
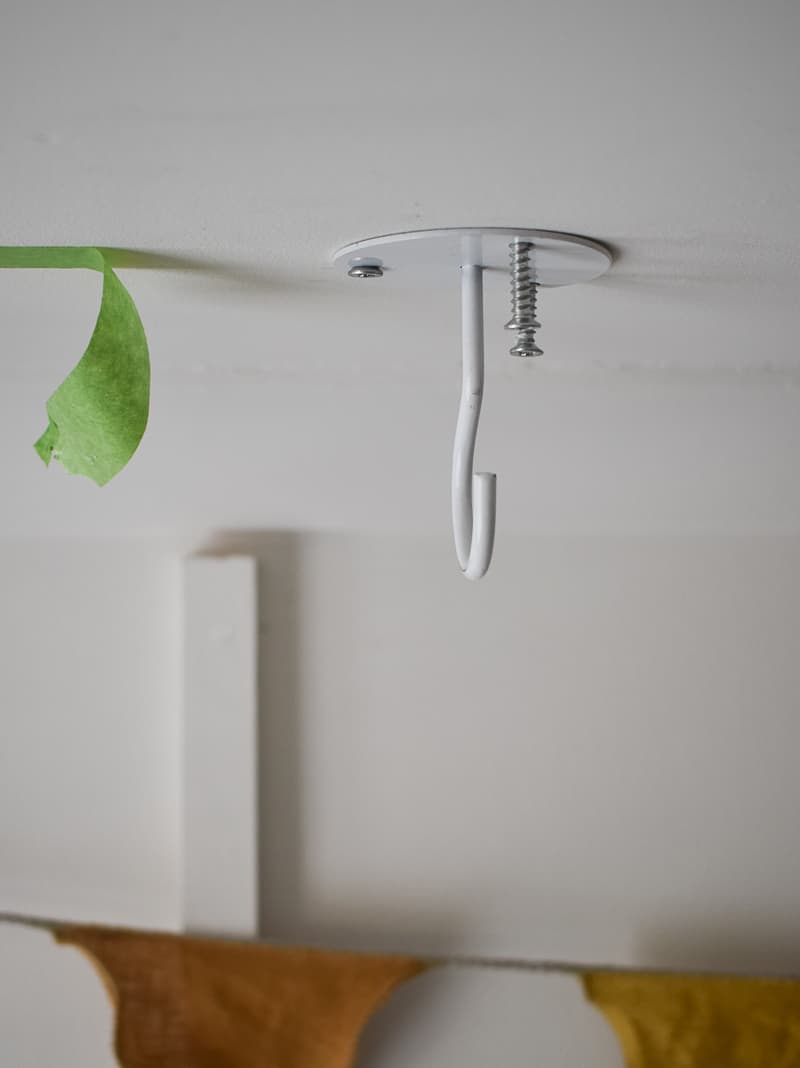
Please note if you’re in a rental where you aren’t allow to draw holes, this branch could be hung with heavy duty self adhesive hooks.
However, It would greatly limit how much you could hang on the rail and would be more for aesthetic purposes rather than function.
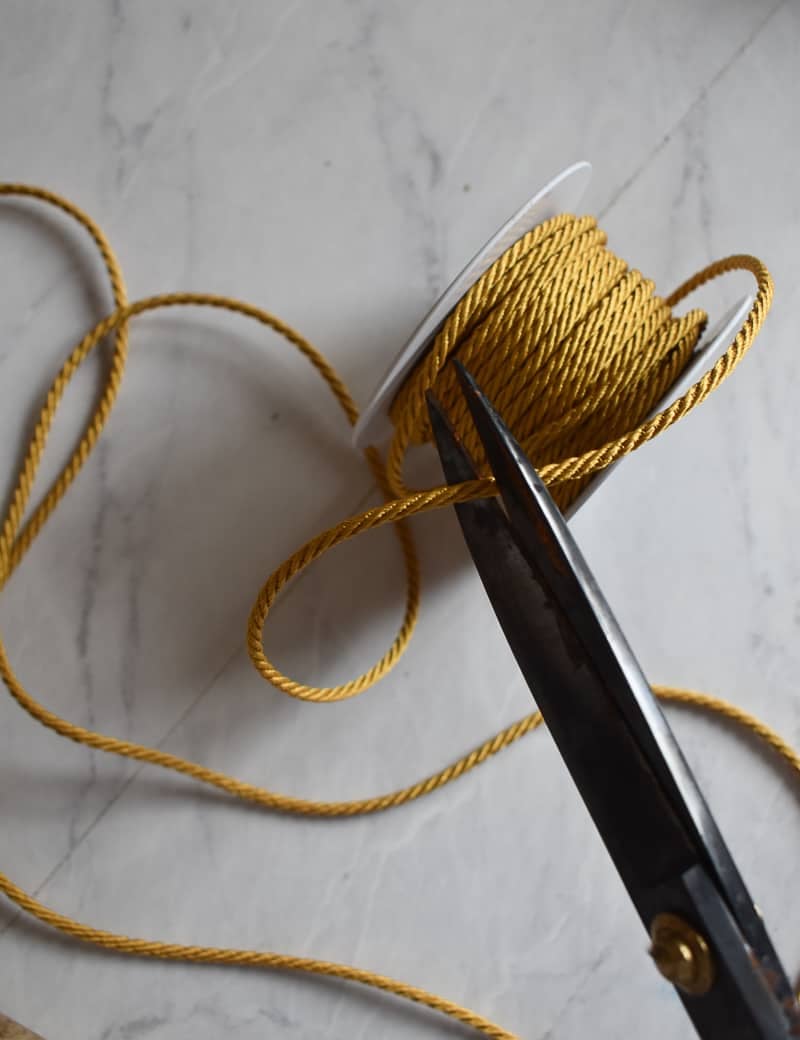
Next, cut two pieces of rope to the desired length. Make sure you have a little extra rope to make room for any errors. The extra can always be trimmed later!
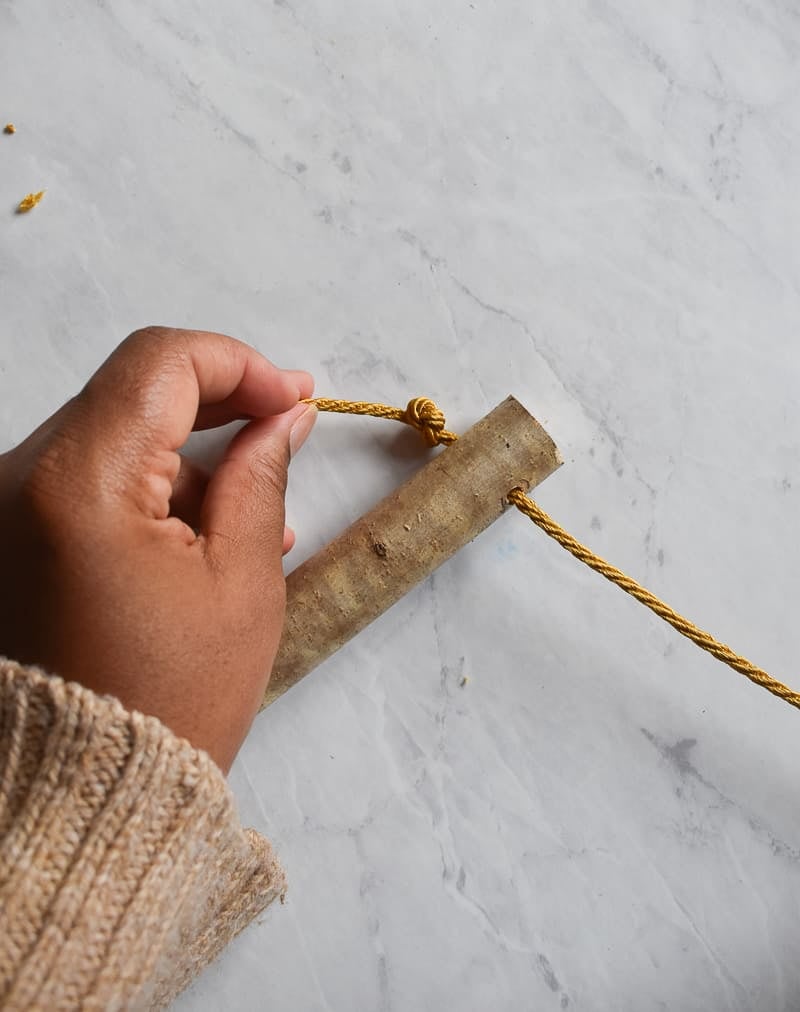
Thread your rope through one end of the the branch and make a knot. Do the same with the other side.
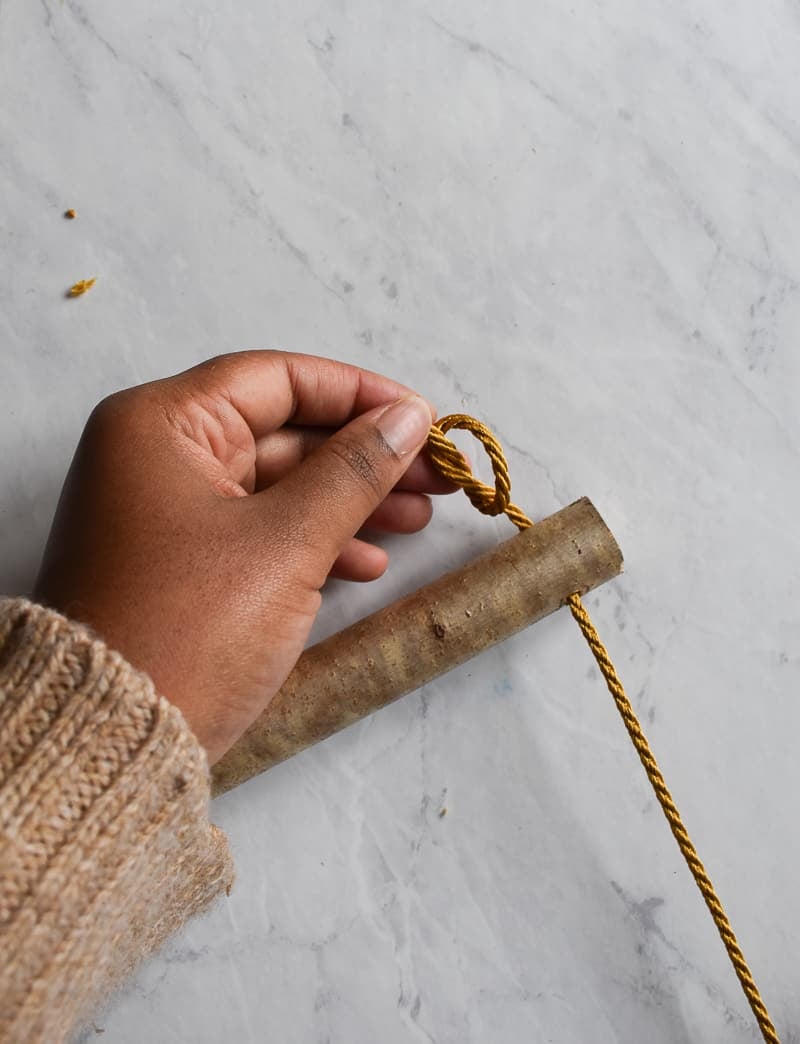
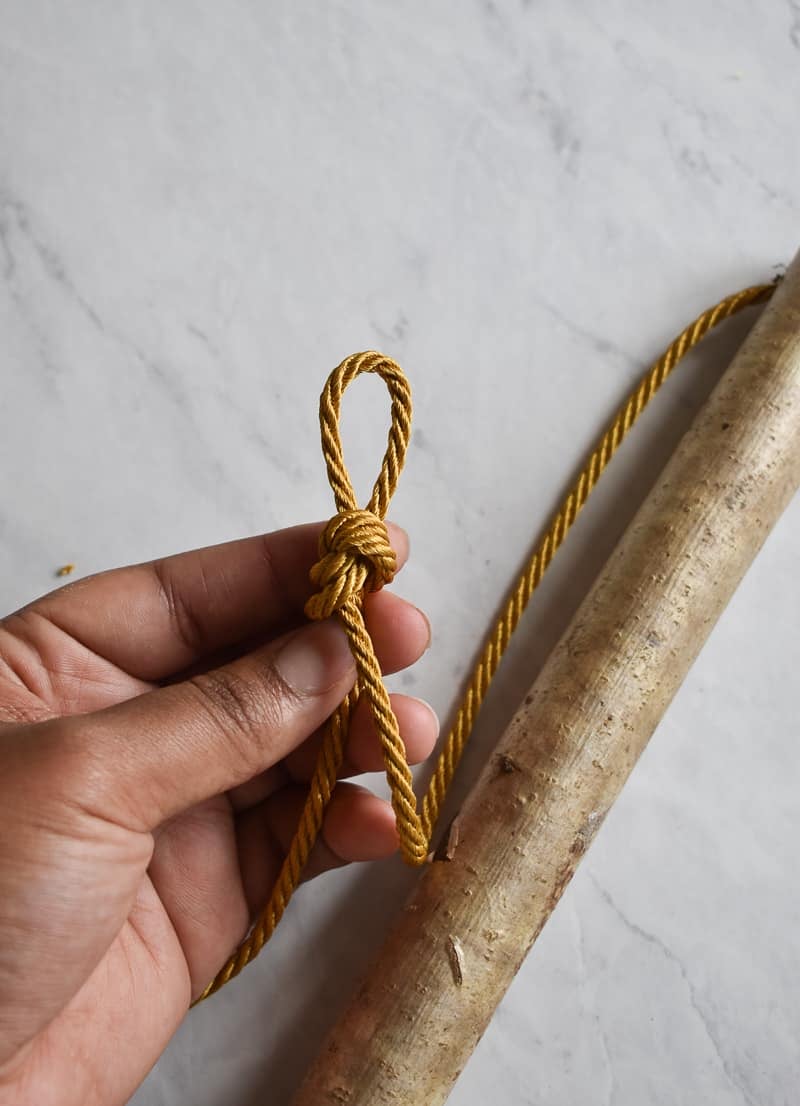
At the top of the rope, make a loop knot.
Hang it up on one of the ceiling hooks and trim any excess rope.
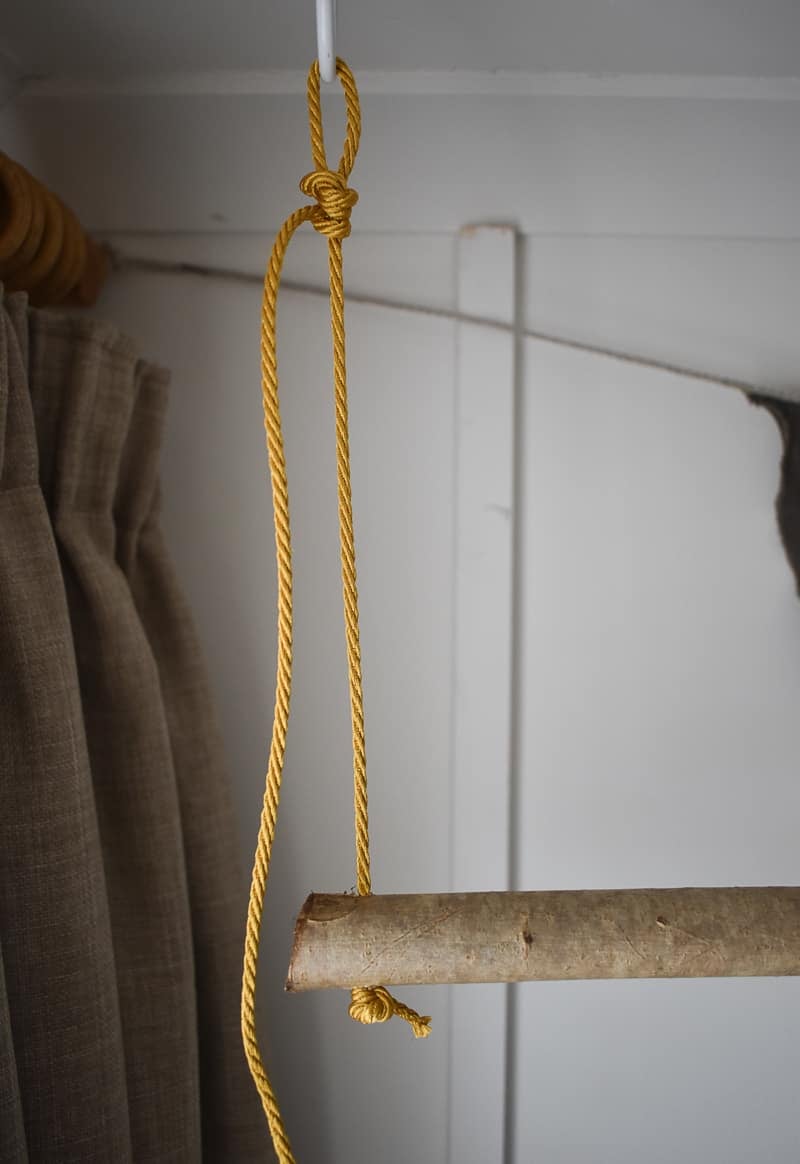
Now, hang the other end of the branch on the other hook and tie a loop knot at the end of the rope. This can be a little tricky, as you need to make sure the branch itself hangs level.
And you’re done! I’ve put mine up high enough so that there’s room to hold my son’s longer clothing, like his bedtime onesies. And although I haven’t got many clothes hanging up in the pictures, it can actually hold 2-3 times more!
What do you think? Is this something you think you’ll try? xo, Medina
You can follow me on my blog, Instagram, and TikTok!
P.S. Love this post? Check out Hanging Copper Pipe Clothing Rack DIY.
For more crafts like this one, don’t forget to subscribe!

Get creative ideas for recipes, crafts, decor, and more in your inbox!

Get the How-To
How to make a DIY hanging rail from the ceiling!
Instructions
-
Decide how long you want your clothing rack to be and cut your branch/dowel rod down to this size. I cut mine to the length of the drawers so that the rail would be suspended above and line up nicely.
-
Drill a hole into both the ends of the branch that’s big enough for your rope/cord to fit through. Sand around the holes if needed to smooth things out and make it easier to pass the rope/cord to go through.
-
Now, fix your ceiling hooks in using wall plugs (wall anchors). Remember to mark precisely where the holes are in your branch/dowel rod and space the ceiling hooks at exactly the same distance.
-
Again, I used the dresser as my marker for spacing! But I also used some masking/Frog Tape to mark where the holes would need to be drilled in. It’s a simple but useful way of ensuring precision.
-
Next, cut two pieces of rope to the desired length. Make sure you have a little extra rope to make room for any errors. The extra can always be trimmed later!
-
Thread your rope through one end of the the branch and make a knot. Do the same with the other side.
-
At the top of the rope, make a loop knot.
-
Hang it up on one of the ceiling hooks and trim any excess rope.
-
Now, hang the other end of the branch on the other hook and tie a loop knot at the end of the rope. This can be a little tricky, as you need to make sure the branch itself hangs level.
Notes
- I put mine up high enough so that there’s room to hold my son’s longer clothing, like his bedtime onesies. And although I haven’t got many clothes hanging up in the pictures, it can actually hold 2-3 times more!