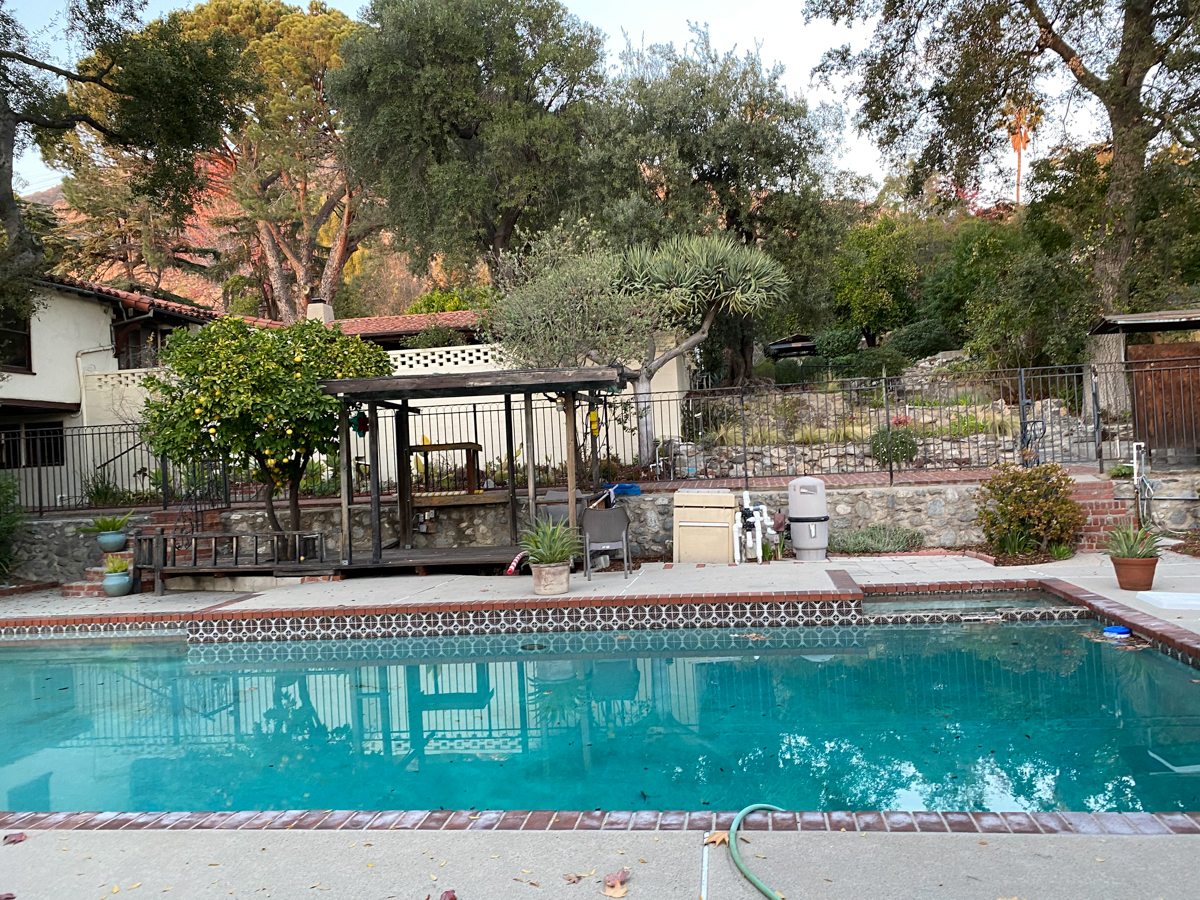
 This is the story of a pool transformation. But, I want to start off by saying that the “before” photos of this pool are not some wretched hole-in-the-ground swampy “before” photos that make the “after” photos all the more enticing. The “before” photos of this pool are, in my opinion, really beautiful. In fact, the pool and the yard surrounding it were what sold us on this house. I am a water person. In my family, we are all water people. We could spend all day in the water. And this pool is large enough to do laps in! And surrounded by trees! We loved the pool! We loved the brick coping (the bricks around the pool’s edge) and the original waterline tile–hello sun shape (couldn’t be more perfect for us!)! Hell, even the little homemade pergola situation had its charm. If we could have left the pool as-is, believe me, we would have.
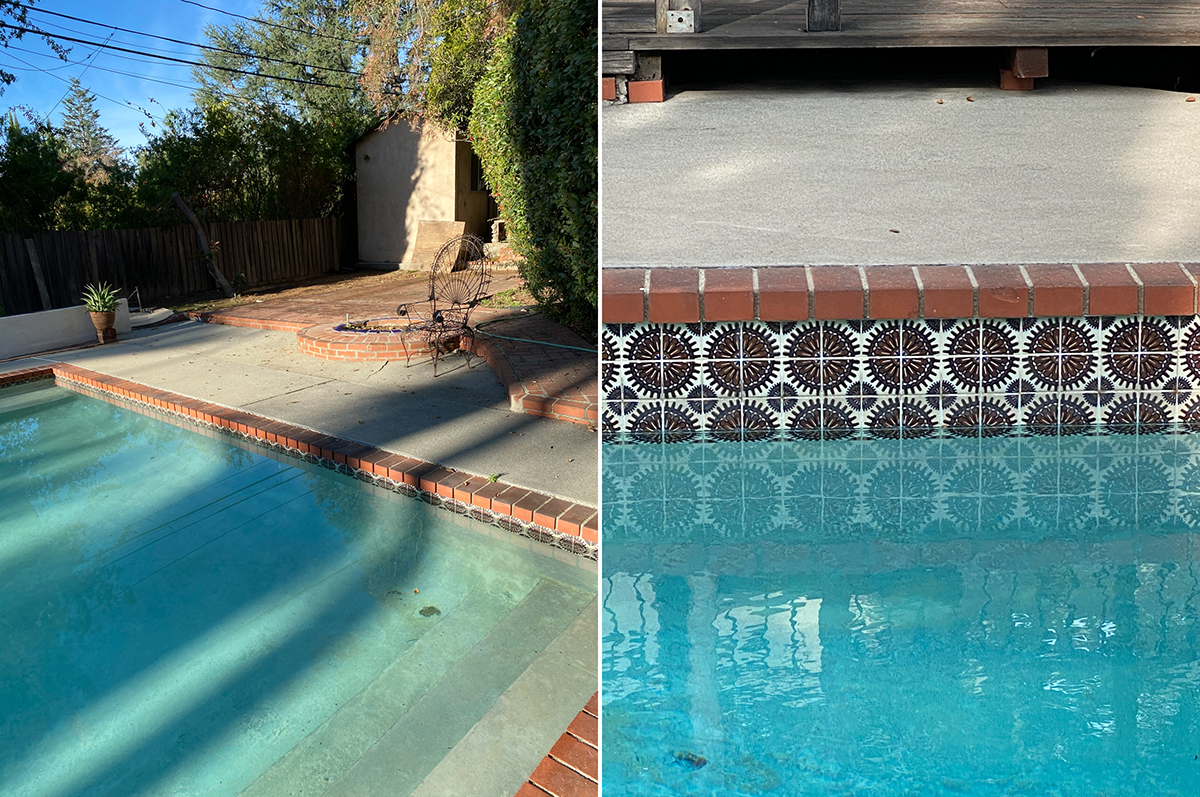
We loved the original coping and waterline tile of the pool
When we bought the home we knew that the pool needed new equipment and replastering. What we found out after buying the house was that the pool also needed new electrical and new plumbing. In fact, multiple tradespeople warned us: “the electrical work in this pool is so old, I’d be afraid to swim in it for fear of being electrocuted” (yikes). Well, that was enough for us to re-allocate funds for a bathroom remodel and add it to the pool budget in order to make it safe and swimmable. The bathroom remodel could wait — after all, there was no real danger of being electrocuted in the old bathtub.
This was our first time ever working on a pool, so I was coming at it from a place of total ignorance. After interviewing half a dozen contractors, we hired a licensed pool contractor to guide us through the process. What I quickly learned is that the plumbing and electric work were all located around the pool, meaning that we would need to break up and remove all the cement in the surrounding area, including the coping and the waterline tile in order to get to the electrical wires and piping.
I don’t know where I was expecting the pipes and electrical wiring to be located in a pool — I suppose I had never given in too much thought!?! But I was shocked once I realized that we had to demo the entire pool and surrounding area in order to make the pool safe to swim in. The first thing that we asked is if it was going to be possible to salvage the tile and brick coping. The answer was a “maybe.” We went into demo day hoping for the best.
It’s always hard to watch something be demolished, especially something beautiful and something that you’ve just spent a healthy portion of your life savings on, but hey, sometimes you just have to dive in, huh? So we took a deep breath, paid the deposit and began to drain the pool — which took three hoses and three days.
Once the pool was drained the demolition crew came through and demoed the surface area of the pool and the surrounding areas. Unfortunately, the coping and waterline tile crumbled during the demolition and were unsalvageable.

Now that the process was underway it was time to make some design decisions. We would keep the shape and size of the pool the same, only take it from nine feet deep, to six feet deep in the deep end. Making the pool more shallow would make it cheaper/faster to heat and make it a bit safer, too. Also, since we were removing the existing diving board for safety reasons, there was no reason to have the pool stay that deep. Other big decisions to make were:
1.) The pool was previously surrounded by a cement ground, what did we want to replace the cement with?
2.) What type of coping did we want?
3.) What did we want to use for waterline tile?
4.) What type of finish did we want the pool to have?
We began to think about the overall vibe and how we wanted the space to feel. We all agreed that we loved the look of the old pool, so we decided to aim for a design that would make the space feel kind of like it had always been there, so creating a design that fit with the overall vibe of the entire property drove our design decisions. Timing also guided many decisions. Determined to finish the pool in time for the hot L.A. summer months, everything that we were looking for needed to be IN STOCK. This proved to be very challenging, especially during COVID since there have been a lot of shortages, shipping delays, and items from overseas stuck at the docks.
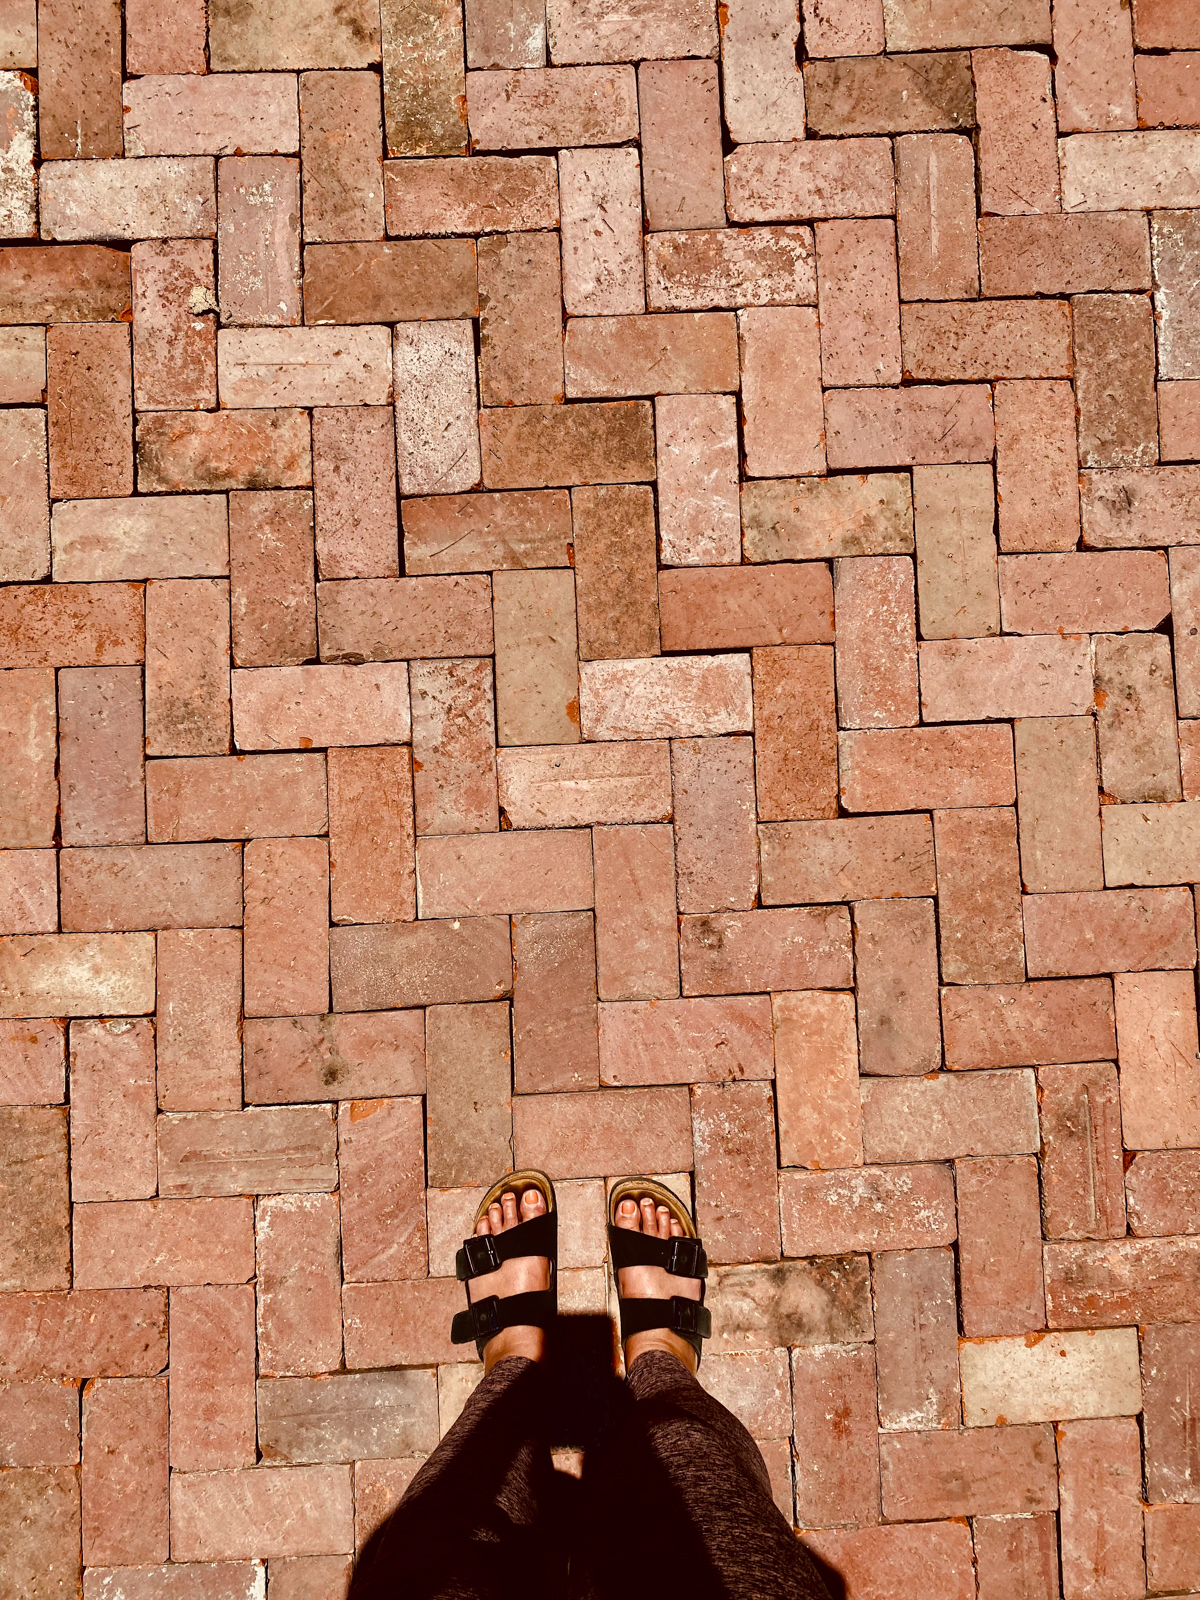
Reclaimed brick laid out in a chevron pattern
1.) The Pool Surround
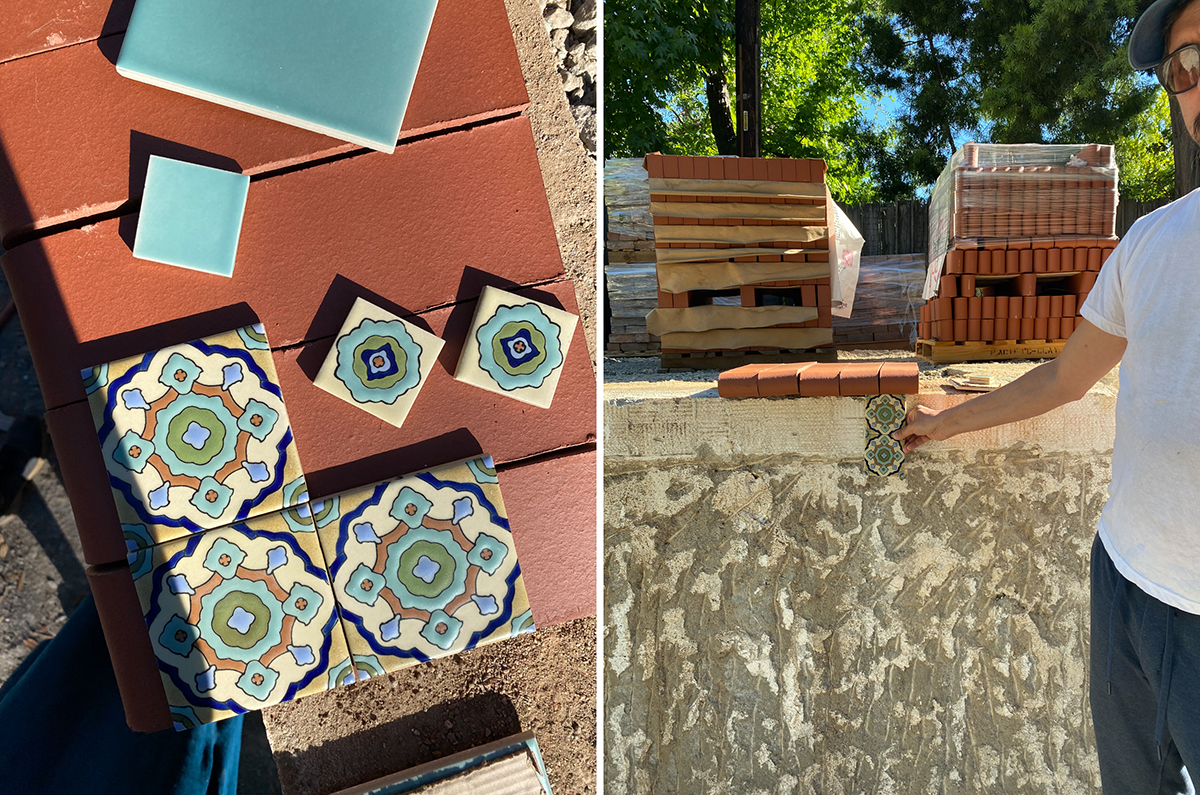
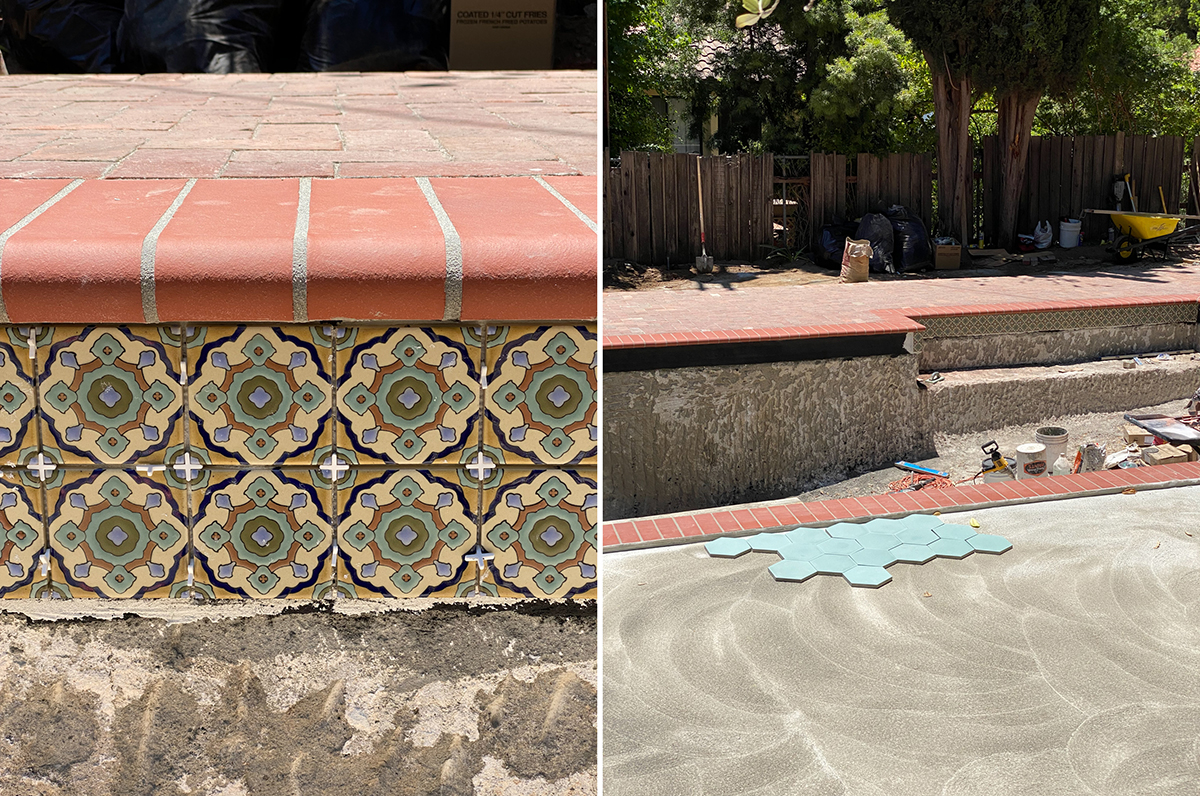
After a lot of research and throwing ideas around, we decided to replace the cement around the pool with brick pavers. We landed on the pavers because tiling the entire space would have been prohibitively expensive. We didn’t love the look of the cement that had been there before but DID love the look of the brick floor on the upper patio, and so we decided to try and emulate that look. Sand-setting the bricks would be cheaper than grouting them in. Once we settled on the brick look, we cast a wide net looking for the perfect brick — but that actually ended up being a problem — the brick that we were finding was too perfect — it looked too new and therefore didn’t really fit with the vibe of the rest of the property. So we decided to go on the hunt for old brick. Not only would it look like the rest of the house, but it would be more sustainable as well. We ended up finding 800 sq. ft. worth of BEAUTIFUL, reclaimed brick at a local stone yard and snatched it all up. The only issue was, the surface area of the yard is 1200 sq. ft. So we had 400 sq. ft. of space that would still need hardscaping. We thought about looking for more reclaimed brick, carving out areas for plants, or cementing small “zones” for, say the outdoor dining area, but landed on the idea of tiling a 400 sq. ft. area of the yard that, due to the architecture of the yard, was raised. We call the raised area “the stage.” We spent a few weeks sourcing cement tile for the stage too — and entertained lots of different colors and motifs, but could not find anything that was “in-stock” that felt right for the space. We wanted it to feel like a modern backdrop that could look good with multiple different finishes. Instead, we ended up deciding to use a sage-colored, hexagon cement tile from Zia Tile that we had ordered months earlier for our kitchen remodel. Since we were still waiting on permits for our kitchen remodel, we knew it would be months before we’d need the tile for the kitchen, so we decided to tile the stage with cement tile that was originally allocated for our kitchen, and use brick on the rest of the surrounding area. (And ordered more of the same tile for the kitchen floor!)

The brick and the sage would drive the color decisions for the rest of the area.
When the brick was finally being installed, we had plans to install it in a cross-hatch motif like the rest of the property, but that’s when we learned that unlike the brick on the rest of the property if you put two of these bricks side-by-side, the width of two bricks did not equal the length of one brick #oops! So we had to think fast, and decided on a chevron pattern instead. You live, you learn, you pivot!
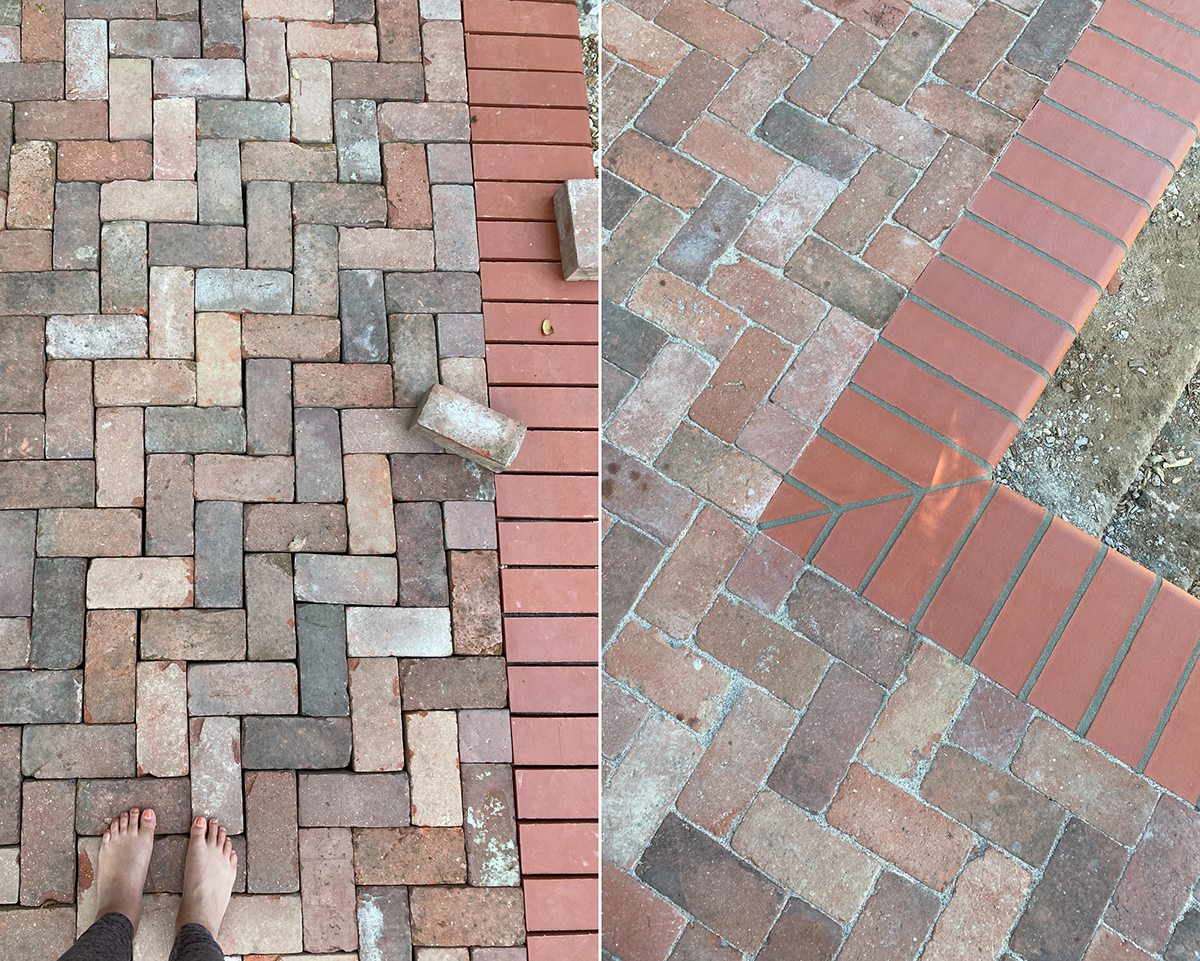
On the left, the reclaimed brick pavers before sand-setting and grout, on the right the pavers and coping fully installed.
2.) The Coping
Full disclosure, I had never heard the word “coping” before Feb. 2021, but now I feel I’ve explored every type of coping known to mankind! Ha! Inspired by the original brick coping that the original pool had, we liked the idea of using a brick coping. But, I didn’t love how sharp the edges were around the pool. After all, my dreams of sipping a mojito on the edge of the pool with my feet in the water didn’t include scraping my tush on the sharp edge of the pool, so Jason suggested bullnose brick coping that ended in a round edge and I loved that idea. And bullnose brick coping was in stock and easy to find at most stone yards, so that’s what we chose.
3.) The Waterline Tile
Waterline tile is used on the pool to prevent a yellow ring from forming around the pool’s edge. Yes, I had dreams of using gorgeously uneven Moroccan zellige clay tile around the perimeter of the pool after having seen it used in so many fountains and pools in Morocco (and after using it in my kitchen at #JungalowByTheRiver). But, after talking to quite a few experts at tile shops, I was advised against using a clay tile. The consensus was that “pool-grade porcelain tile” was the way to go for the pool surround. I was told that it would last much, much longer than clay tile and resist the wear and tear that pool chemicals can have on tile. Our contractor also made it very clear that the tile install would be much faster, cheaper and easier with a porcelain tile. He didn’t flat out refuse to install the zellige — but didn’t want to be held responsible if it didn’t hold up. So, albeit a bit dismayed, we went on a hunt for the perfect *in stock* porcelain tile. This was a real challenge. Porcelain tile that felt vibey proved difficult to find. We saw a lot of tile with pretty patterns, but the patterns looked like they were printed on the tile, not part of the tile itself. A lot of it looked too retro (not in a good way). So much of what we saw and liked was only available by special order, oftentimes with 12-20 week lead times, and we couldn’t afford to wait that long. After searching high and low, we finally found some porcelain tiles that really loved at Mission Tile West in Pasadena who has a gigantic tile assortment. The tile we landed on, the 4X4 Sant Gervasi tile from Latin Accents *was* in stock, pricey, but in stock. But, much like the reclaimed brick — there wasn’t quite enough of it to make it around the entire pool. So, never one to shy away from mixing it up, we found a solid, 6×6 celadon colored square that recalled the color of the sage hexagon cement tile, and we also found a small 2X2 accent tile that coordinated back to the larger Sant Gervasi motif, and we ordered enough of those to cover the “stage” portion of the pool’s edge and the hot tub surround. This was also a nice fix because these other tiles were significantly cheaper so we saves a few coins, too.
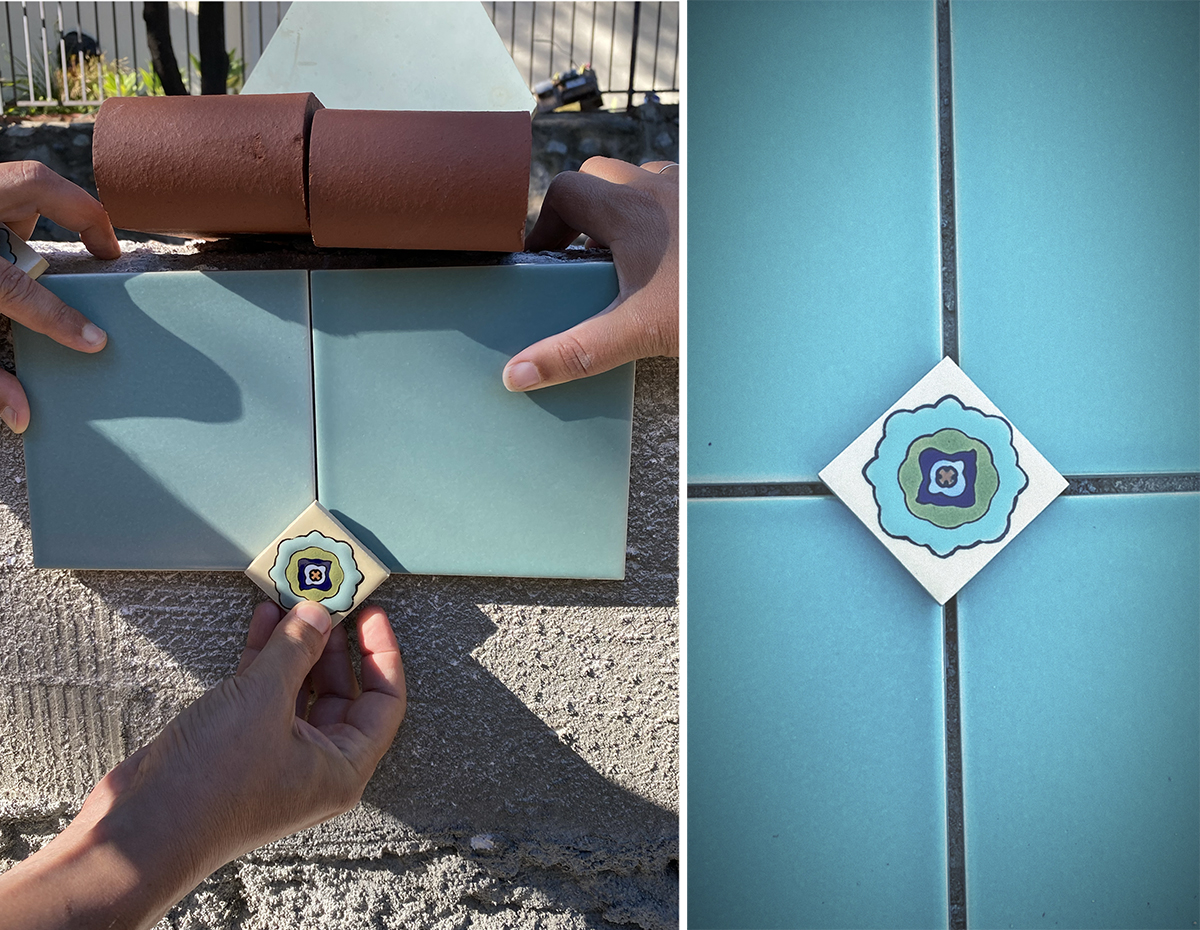
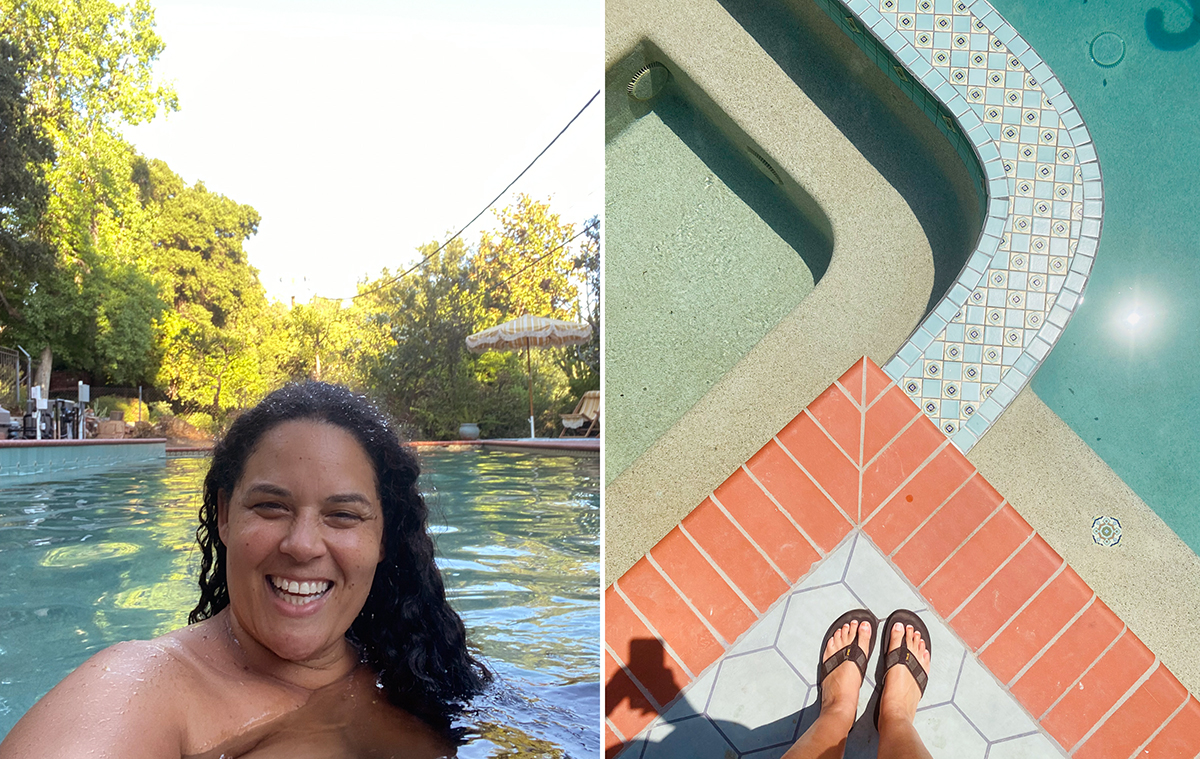
Once we got the tile back to the pool, and placed the solid celadon tile on the pool’s edge we got worried. It looked like bathroom tile and didn’t feel fun or special or old or anything that we had wanted it to feel. So, Jason had the brilliant idea to insert the small 2X2 tile at a diagonal in the corner of four solid, 6X6 tiles and immediately the vibes came pouring back in. Crisis averted! The tile installer, Eugenio did an amazing job at meticulously cutting the corners off of the solid tile to create the pattern and we are really, really happy with the final result.
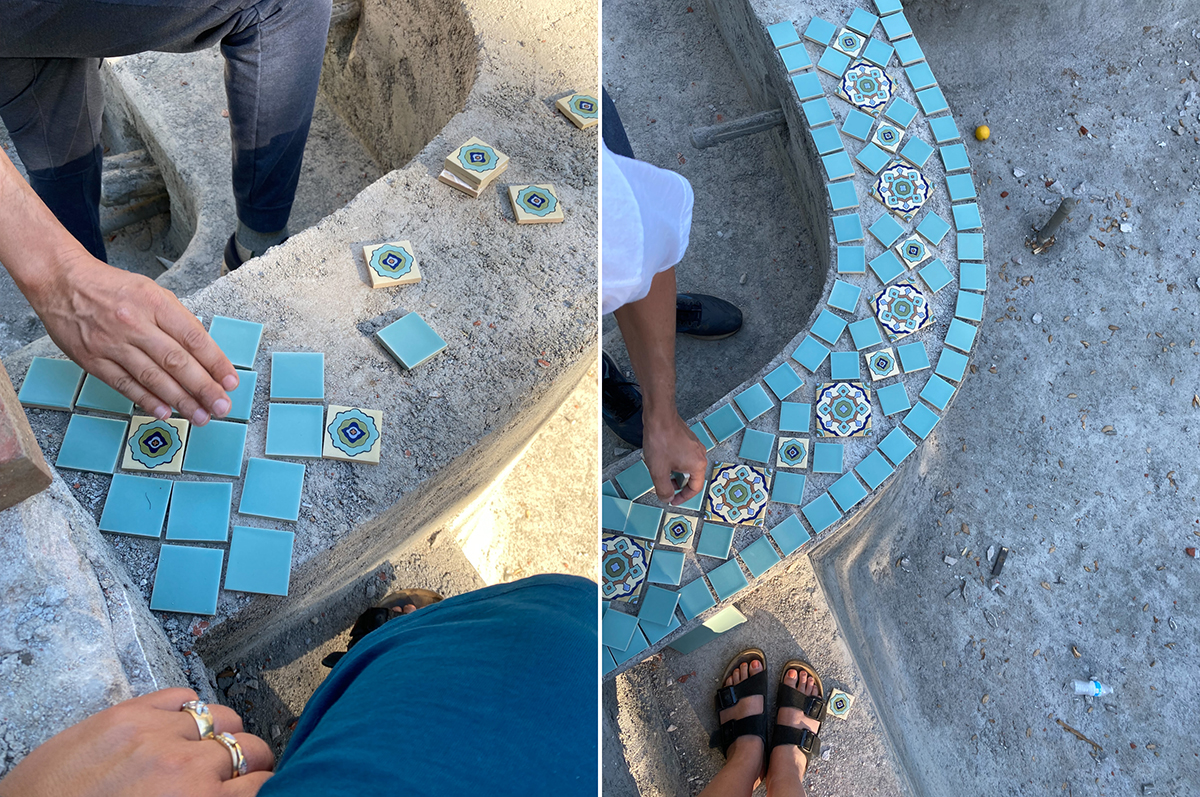
We also had lots of crazy pattern ideas for the spa spillway into the pool. We played a lot with the patterns here and ended up with a checker pattern that uses the small 2×2 flower tiles, which I’m obsessed with. Because of the curved line here, it’s best to use smaller tiles for the spillway so that there aren’t too many gaps.
We also dotted tiles along the pool steps and the pool benches and saved the extra tile for an eventual outdoor shower that we plan to install down the road.
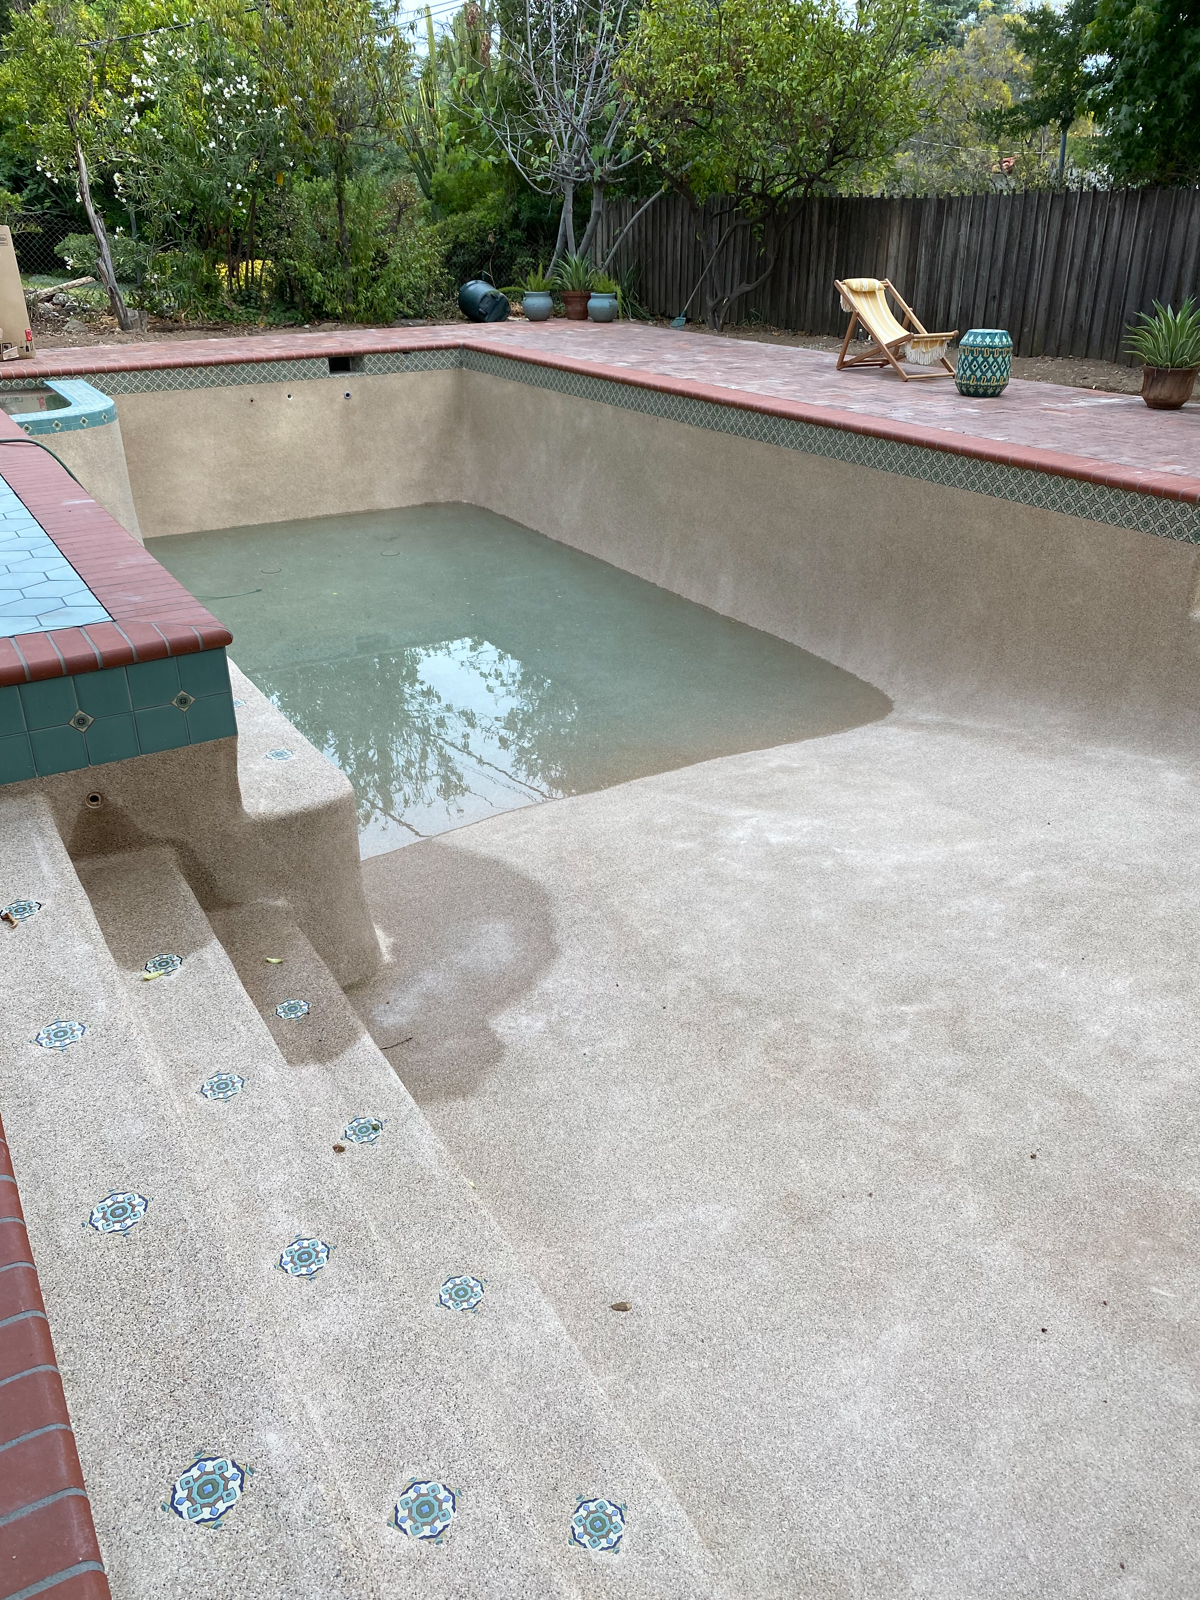
4.) The Pool Finish
The pool finish options were pretty limited. We could have gone with standard plaster, but we were told (and research confirmed) that Pebble Tec products last a lot longer than traditional plaster, and after five months of dealing with this pool renovation, we didn’t want to have to replaster the pool any time soon. Pebble Fina in the Egyptian Sands finish was our first choice. We liked how the warmer tone of the finish cast a warm green color on the pool, but, alas, that product was stuck at the dock and so we had to pivot again, going with Pebble Sheen in Desert Gold instead. The color was similar, but the Pebble Sheen has a rougher texture than the Pebble Fina. In the end, it looks a lot like real sand, which is very cool because it gives us a beachy feel that I welcome wholeheartedly.
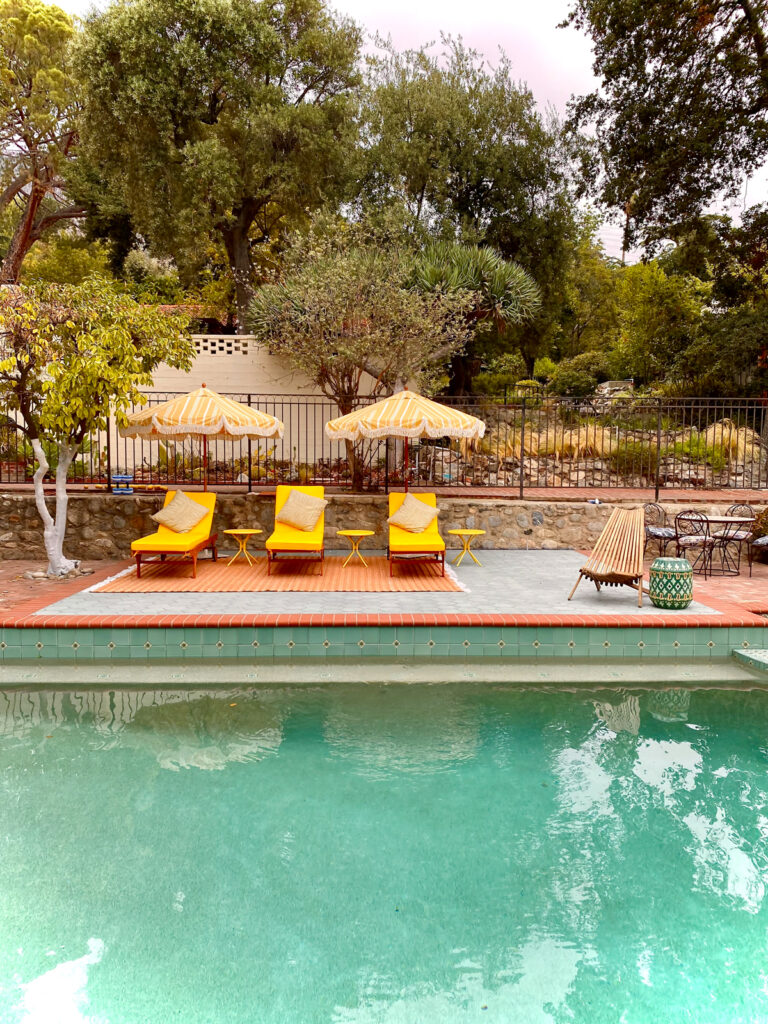
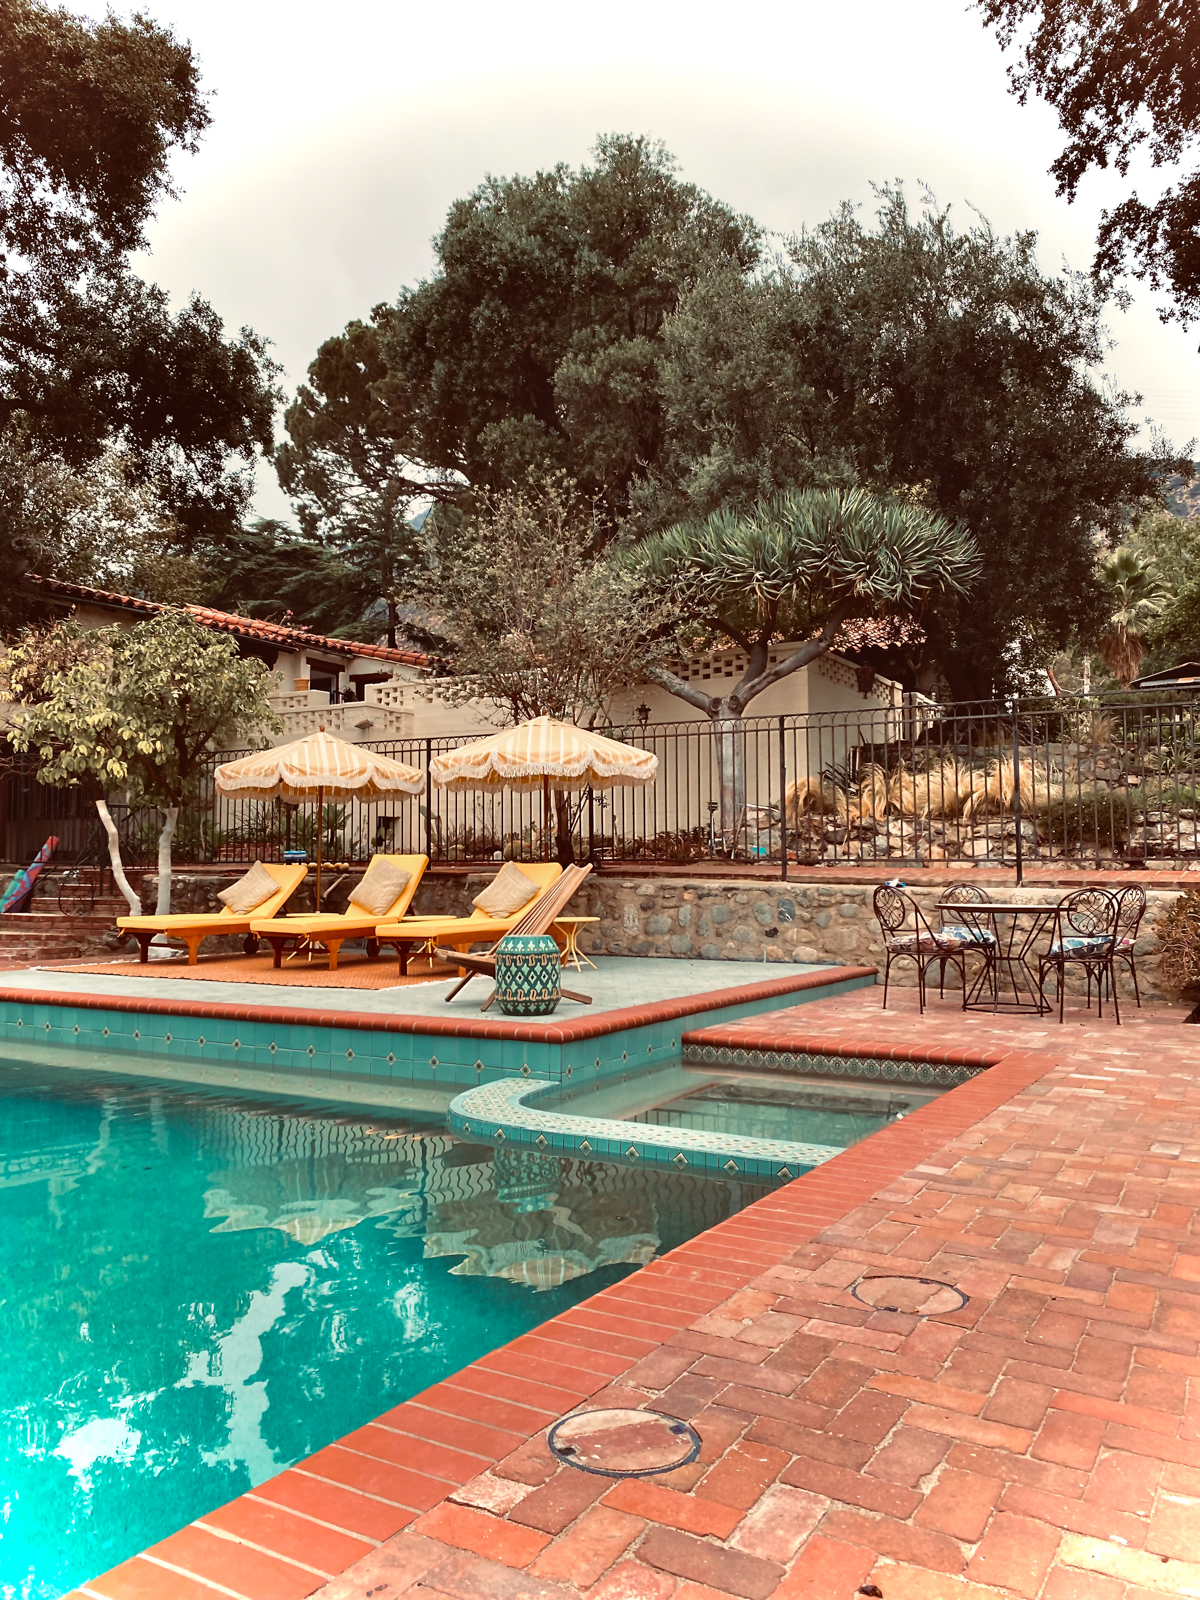
Once the pool finish was done, it was time to fill the pool, which took about two days. The anticipation was killing us. The whole project took about twice as long (almost six months) and twice as much money as we had anticipated (about the cost of an expensive wedding) but in the few weeks since the pool has been basically done we have been swimming every single day and every day that I’m in there, I just look around in awe and gratitude that we were able to make this place ours.


We still have some things to check off the to-do list — we need to build a cover for the pool equipment, finish furnishing the pool surround, do landscaping, fix the fence that surrounds the entire yard, and wait another couple of weeks until the Pebble Sheen cures before we can heat the pool or the spa, but as with all projects, the paint will always be a bit wet, and I’m sure as time goes on we will continue to hone in on this place and continue to make it our own.
Sources: