
On the surface, selling digital products with WooCommerce doesn’t seem much different than selling physical goods. You need to create a website detailing your products, drive relevant traffic to said site, and convert the visitors into customers.
However, there are some key distinctions that require consideration. Whether you sell software, audio files, NFTs, or written content, you must take these into account if you want to sell your digital products successfully.
In this post, we will look at how to set up digital products on WooCommerce and the steps you can take to optimize their sales while reducing performance and security issues.
Why sell digital products through your ecommerce site?
High margins
Digital products can offer incredibly high margins. The cost to produce one digital good is the same as producing 100. This means that once your sales ramp up, your margins progressively increase as revenue rises while your costs remain the same. At a certain level of sales, the marginal costs for your digital goods can approach a value of almost zero.
Simpler logistics
With digital products, you don’t need to manage any inventory. This means your logistics are simplified as you don’t have to worry about shipping items to customers or ensuring that you have enough stock on hand to satisfy your customers’ demand. Given that logistics is often the most complex aspect of ecommerce, this can serve as a tremendous boost to your business’ health.
Low overhead
When you sell digital products, you are free from the most of the overhead costs typically incurred by brick-and-mortar stores and online stores selling physical goods. For example, raw materials, office rent, warehouse fees, utilities, and staff wages are common costs to procure, store, process, and deliver goods.
None of these are necessary when selling digital goods. The core of the business revolves around creating and marketing the product and maintaining your website.
More time
The simplified business model helps ecommerce sellers maximize the value of their time. With digital products, most of the work is done upfront. Upon launching your product, getting visitors to your site, and managing your business are the only areas you need to work on for the business to operate.
This leaves you more time to work on other parts of your business whether that’s researching new products or engaging customers to boost loyalty.
Sell digital products with WooCommerce
WooCommerce defines digital products as virtual products. These products can either be downloadable or not. Because of this, you can add both shipping and download details to the same product, enabling you to sell downloadable and physical products from the same product listing.
For instance, you could sell an album that comes with both a physical CD and digital MP3 files.
This also means that you can sell digital products that don’t need to be downloaded. Common examples are memberships, services, or coaching sessions.
Downloadable products settings
Before you create digital products, you want to define your settings for downloadable products. Go to WooCommerce > Settings > Products and select Downloadable products.

The file download method will determine how customers can access their orders. This is an important setting as protecting file access is crucial to having a profitable digital downloads store.
If anyone can access your downloads, you run the risk of someone distributing the files or links to people that didn’t buy the product.
With the Force Downloads option, your server will force downloads after the purchase using PHP. This method prevents direct linking but can place strain on your server.
With X-Accel-Redirect/X-Sendfile, downloads are handled by the server, and files are protected by a .htaccess file. To use this method, you need to have the X-Accel-Redirect/X-Sendfile module installed on your server.
The third option is to use redirect links to the file. This method is less secure as the files are unprotected and anyone with the upload link can access them.
Below the file download method, are settings to determine access restriction. There, you have the choice to grant access to downloads immediately after payment. This means that downloads will be available to customers even if their orders still have a “Processing” status.
You also have the option to restrict downloads to users that are logged in to their accounts. This can provide an extra layer of protection to ensure that only registered buyers can see your products.

Creating downloadable products
To create a digital product go to Products > Add New. Enter the product details such as name, description, and images, then scroll to the Product data tab and check the boxes for Virtual and Downloadable.

This will open new fields in the Product data tab. There you can add the downloadable files, set the download limit and the download expiry. If you want the download link to never expire, leave the expiry field blank.

Digital products with variations
In some cases, you may want to create multiple variations of your digital products. For example, you could sell photos with different types of licenses specifying how customers can use the visual assets. Or, you could sell music in which both physical and digital versions are available.
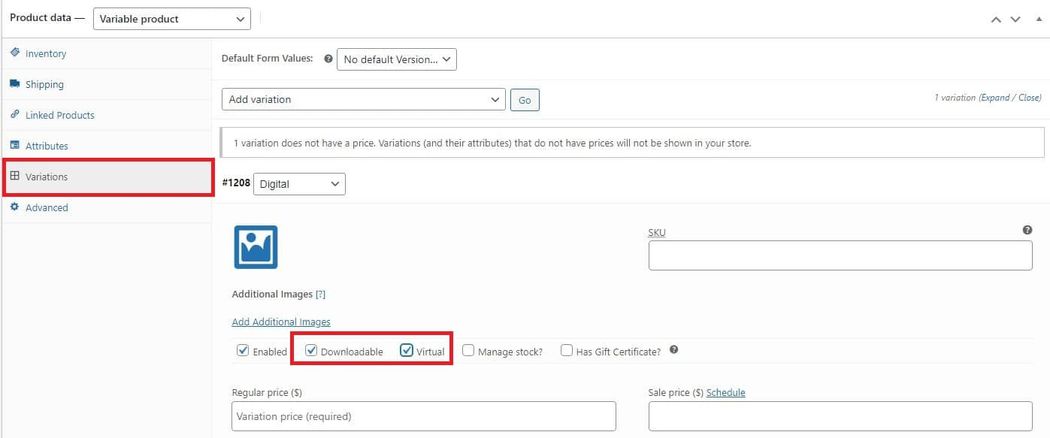
To create a product with multiple versions, go to the Product Data tab and select Variable product.

You then need to select the attributes to use for the variations. Attributes that you have already added to your product database will appear for you to select. If you need to use new attributes, you can add them from the product page by selecting Add Custom product attribute.

With the attributes in place, go to the Variations section to create a variant. From there, you will be able to define the variant as a Downloadable product.
Download limits
What to set as the download limit will depend largely on the type of products. For example, if you sell ebooks or audio files, a high download limit is ideal as it will allow customers to come back and easily access the files again if needed.
If you sell video games, you will likely want to limit customers to a single (or a few) downloads. These and other products may also warrant an expiration date.
Protecting your download directory
WooCommerce uses a .htaccess file to protect your wp-content/uploads/woocommerce_uploads directory. However, this does not guarantee complete protection of the folder as how you configure your server will ultimately determine how secure the directory is.
If you are using the X-Accel-Redirect/X-Sendfile or Force Downloads download method combined with NGINX for your server, you need to add an extra configuration for better security.
In such case, you should place the following config at the end of the “server” block in the NGINX configuration:
location ~* /wp-content/uploads/woocommerce_uploads/ { if ( $upstream_http_x_accel_redirect = "" ) { return 403; internal;}
If you are using NGINX along with the Redirect only method, adding an extra configuration is also necessary. In this case, add the following config at the end of “server” block in NGINX configuration.
location ~* /wp-content/uploads/woocommerce_uploads/ {autoindex off;}
Extensions to boost digital sales
WooCommerce gives you the essentials for listing and selling digital products but you can take your sales to the next level with the help of some useful extensions. Let’s take a look at some of the best options for growing your digital store.
Subscription downloads
The WooCommerce Subscription Downloads extension gives you the ability to offer digital products to customers that have enrolled in subscriptions while still maintaining individual listings for the digital product. This allows you to provide the product to people that have already subscribed while giving new customers the option to buy the product by itself.
For Subscription Downloads to work, you need to have subscriptions products created through the WooCommerce Subscriptions extension. Both WooCommerce Subscriptions and Subscription Downloads are included for free in our Managed WordPress Ecommerce Hosting plan.
When you activate the Subscriptions Downloads plugin, it adds a new field in the Product Data tab for downloadable products. You can use this field to search for the subscription product to link to the downloadable item.

Once the digital product is linked to a subscription, people enrolled in the subscription will see the file on their My Account page. From there, they can download the file as often as your settings permit.
Offload file storage with Amazon S3
As your store grows it may be prudent to offload your downloadable files to a different server. This will reduce the load on your origin server, helping to prevent unwanted performance issues. There are plenty of quality storage options that work well with WooCommerce. One such storage platform is Amazon S3.
With the Amazon S3 Storage extension for WooCommerce, you can easily serve digital products that are hosted through the S3 Storage service. To get started, need to create an AWS account by going to aws.amazon.com and completing the sign-up process.
After your account is set up, go to the Management Console to get the credentials needed to connect your AWS account to the WooCommerce plugin. Select Your username > Security Credentials.

Go to Access keys (access key ID and secret access key) and select Create New Access Key.
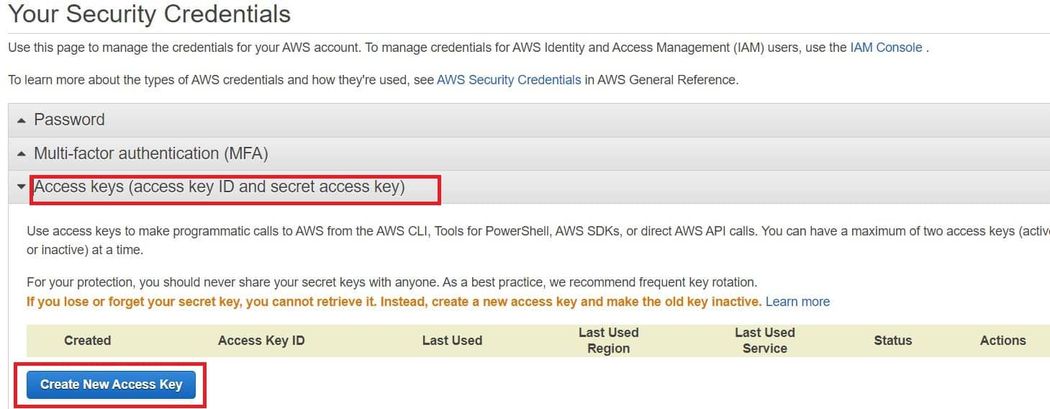
Copy the Access Key ID and Secret Access Key as you will need them when completing the setup in WooCommerce. Return to your site and go to WooCommerce > Amazon S3 Storage. Paste the Access Key ID and Secret Access Key and save the changes.
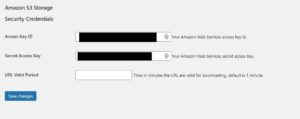
In the settings, you will also see a field for URL Valid Period. This period defines how long the download URLs will work for accessing the file. It helps to keep your files hidden from non-buyers when using the Redirect only download method. The default is one minute. You can change the value to suit your needs.
Create S3 Bucket
After you connect your WooCommerce store to Amazon S3, you can start uploading your files. From your AWS account, go to Services > Storage > S3.
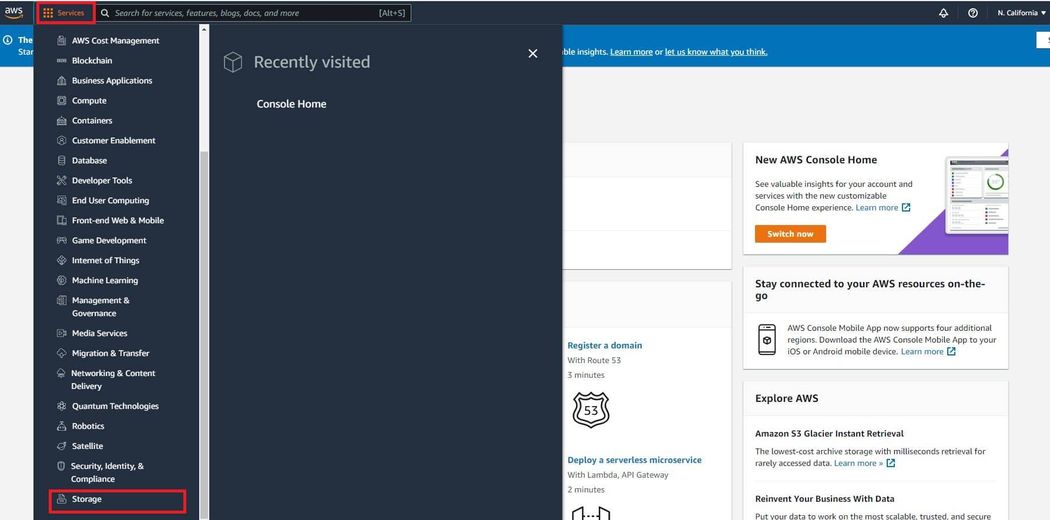
If you are new to S3, you will need to create a bucket. This is a unique identifier that is set to a specific region. Amazon uses regional buckets to lower costs and provide better latencies. Select Buckets from the left-hand menu, and then click Create Bucket. Give the bucket a name and choose a region for where it will be hosted.
Next, you will have the option to block public access to the bucket. It is recommended to block all public access as this will keep others from uploading unwanted files to your storage account.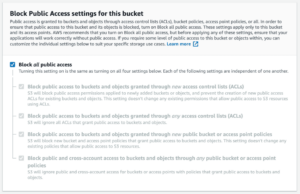
Once this is complete, you can start adding files to the bucket. To seamlessly add the file links for your downloadable products, you need to add the following shortcode to the product’s File URL field: [amazon_s3 bucket=MyBucketName object=MyFileName.ext].
Streamline downloads with WooCommerce Bulk downloads
Customers that purchase several digital items in the same order need an efficient way to download their products. With the WooCommerce Bulk Downloads extension, customers have the ability to quickly create and download a ZIP file that includes all the items.
When you activate the plugin, the My Account page will now feature checkboxes and download ZIP button in the Available Downloads section. Users simply need to select the files to include the ZIP and click the button. The plugin also adds the option to create a ZIP for bulk downloads on the order confirmation page.
The download file is generated in the custom wcbd_zips folder, created in the /wp-content/uploads/ directory on plugin installation. The files are automatically deleted every hour.
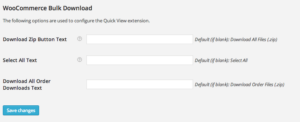
If you want to customize the display, go to WooCommerce > Settings > Products > Downloadable Products. Under WooCommerce Bulk Download, you will see the options to change the button text as well as the select all text.
Ready to sell digital products with WooCommerce?
Selling digital products is an effective way to grow ecommerce revenue — all without the challenges of traditional order fulfillment. That said, an effective strategy and a product that solves customer needs is still required if you hope to find success. Take note of the steps in this guide so that your downloadable shop offers the same quality and convenience as any other ecommerce site.