")
We are currently working on our third home that we have updated/renovated since Todd and I have been married, but it is by no means the first home I have worked on in my life.
My parents were also avid renovators and I spent lots of time with my parents helping them as they made charming older homes into a warm inviting place for our family to live.
My mom always tells the story of how I, as a young teenager, wouldn’t stop sanding our weathered staircase one very late night and go to bed until she went to bed, so I just kept sanding and sanding alongside her until she finally gave in and retired. I guess it’s in my DNA!
That being said, while there’s a lot that I don’t know, and some jobs I do need to call in a professional for, I do know quite a bit from my past experiences. But this current house has so many issues that it’s really forced me to branch out and learn new skills and acquire some new tools along the way.
Some of the best home improvement tools on my list are ones that I’ve known about but haven’t used in a long time (and can’t believe I haven’t been using them in the meantime!). Others are totally new to me, but so helpful that I don’t know how I made it to this point without them!
There are some smaller, inexpensive items and there are some larger investment pieces, but I hope some of them are helpful for you as well!
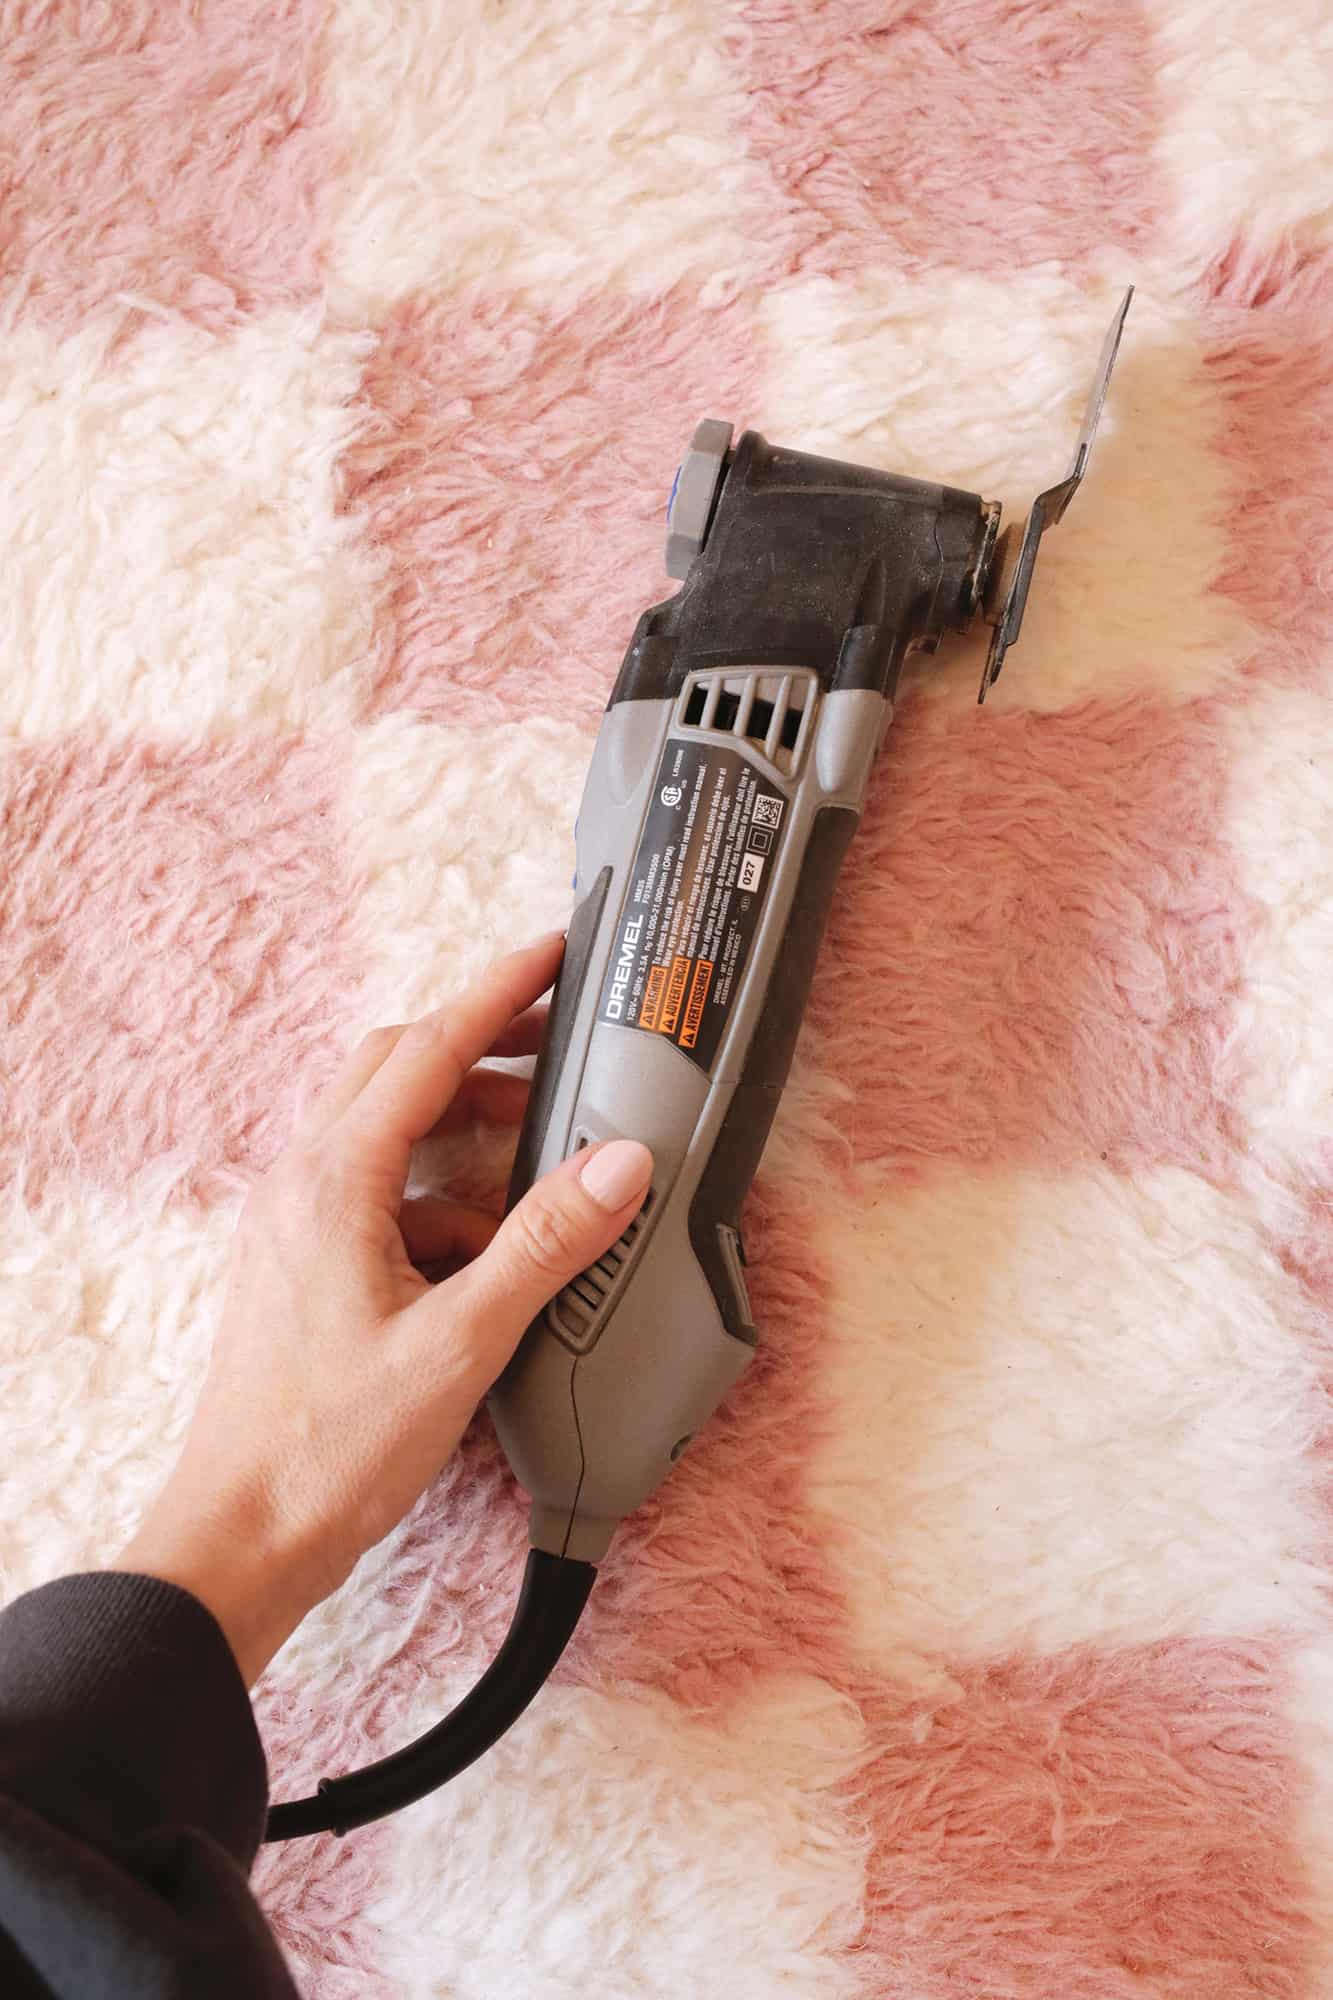
Dremel Multi Tool: This is a tool that’s new to me, but I really can’t believe we’ve done two houses without one! There are different blades/attachments that you can use with this tool (hence the “multi” tool name), but we’ve used the saw blade the most by far.
It’s perfect for cutting things that would be difficult for any other kind of saw to get to (like cutting our baseboards just a little bit to fit updated heat registers) and it’s super helpful for cutting nails and screws in lots of demo and install situations.
It has a sanding attachment to get into corners and little areas that are hard to sand, and you can buy other attachments like this blade, which is super helpful as well. Like all saws and sanders, make sure to use safety goggles when using the tool (and I would pop in a pair of earplugs to protect your ears).
Ratcheting Screwdriver: Probably the most used tool in our home (whether renovating or not) is a screwdriver! Having one that has different bits for different sizes and types of screws is incredibly helpful (like several Phillips head bits and several flat head bits at a minimum).
But, having one that is also a ratcheting screwdriver is amazing. It’s like a punishment to use anything else and I get mad when Todd brings me a “regular” one when I ask him to grab me a screwdriver.
Corner Brush or Rounded Spindle Brush: I’m not usually much of a specialty brush gal, but I’ve always been curious about those triangle corner brushes, and the rounded spindle brushes and wondered if they were worth the extra money to get a specialty brush for a particular job. It turns out they are!!
I had to do six coats of paint on the elaborate woodwork around our entryway (I hated the first color and had to repaint it) and it was a nightmare to try and get my regular brush into all those crevasses each time. On about the fourth coat, I decided to try a corner brush and it made such a difference to get into all those different angles!
For the spindle brush, I was painting a piece of furniture that I had attached a ton of half round molding strips to the front and sides and the rounded end of that brush made that process so much easier than it would have been.
So, if you are painting rounded edges or something with a lot of corners and angles, get a specialty brush and you’ll be so glad you did!
Paint Edger: While I’m pretty good at edging with a brush, my least favorite thing about it is that a brush makes a thinner line of paint than a roller does, so I always have to edge a few more times than where I rollered (especially when you are painting walls white).
I have used these paint edger pads in the past, but for some reason I got away from them for a while and I tried them again—they just cover so much better than a brush does, and you don’t have to do as many passes overall, which saves time and effort. They also make smaller edgers for smaller areas which are helpful.
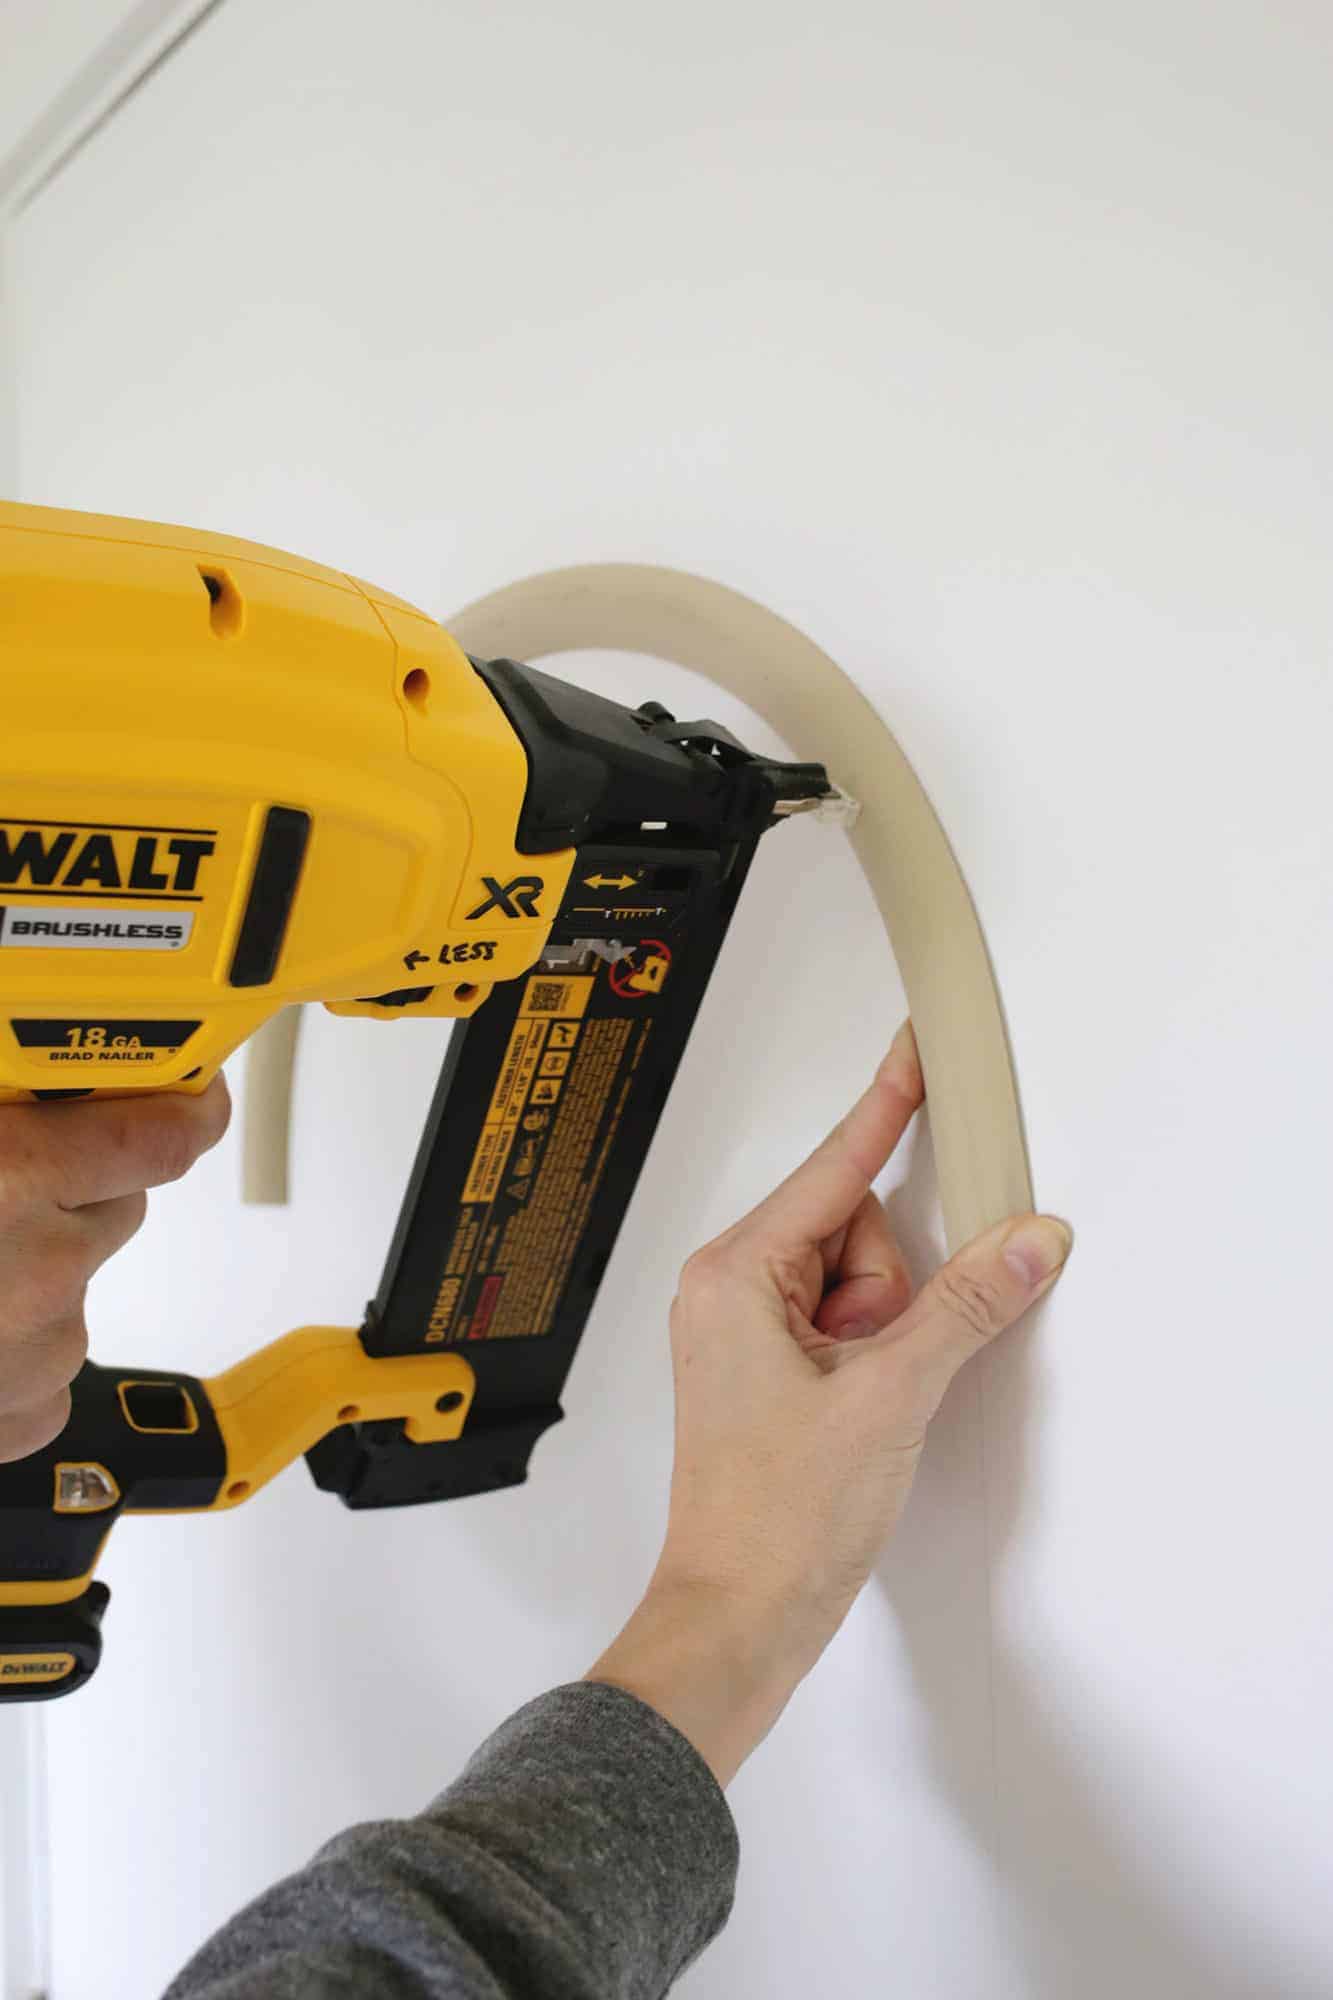
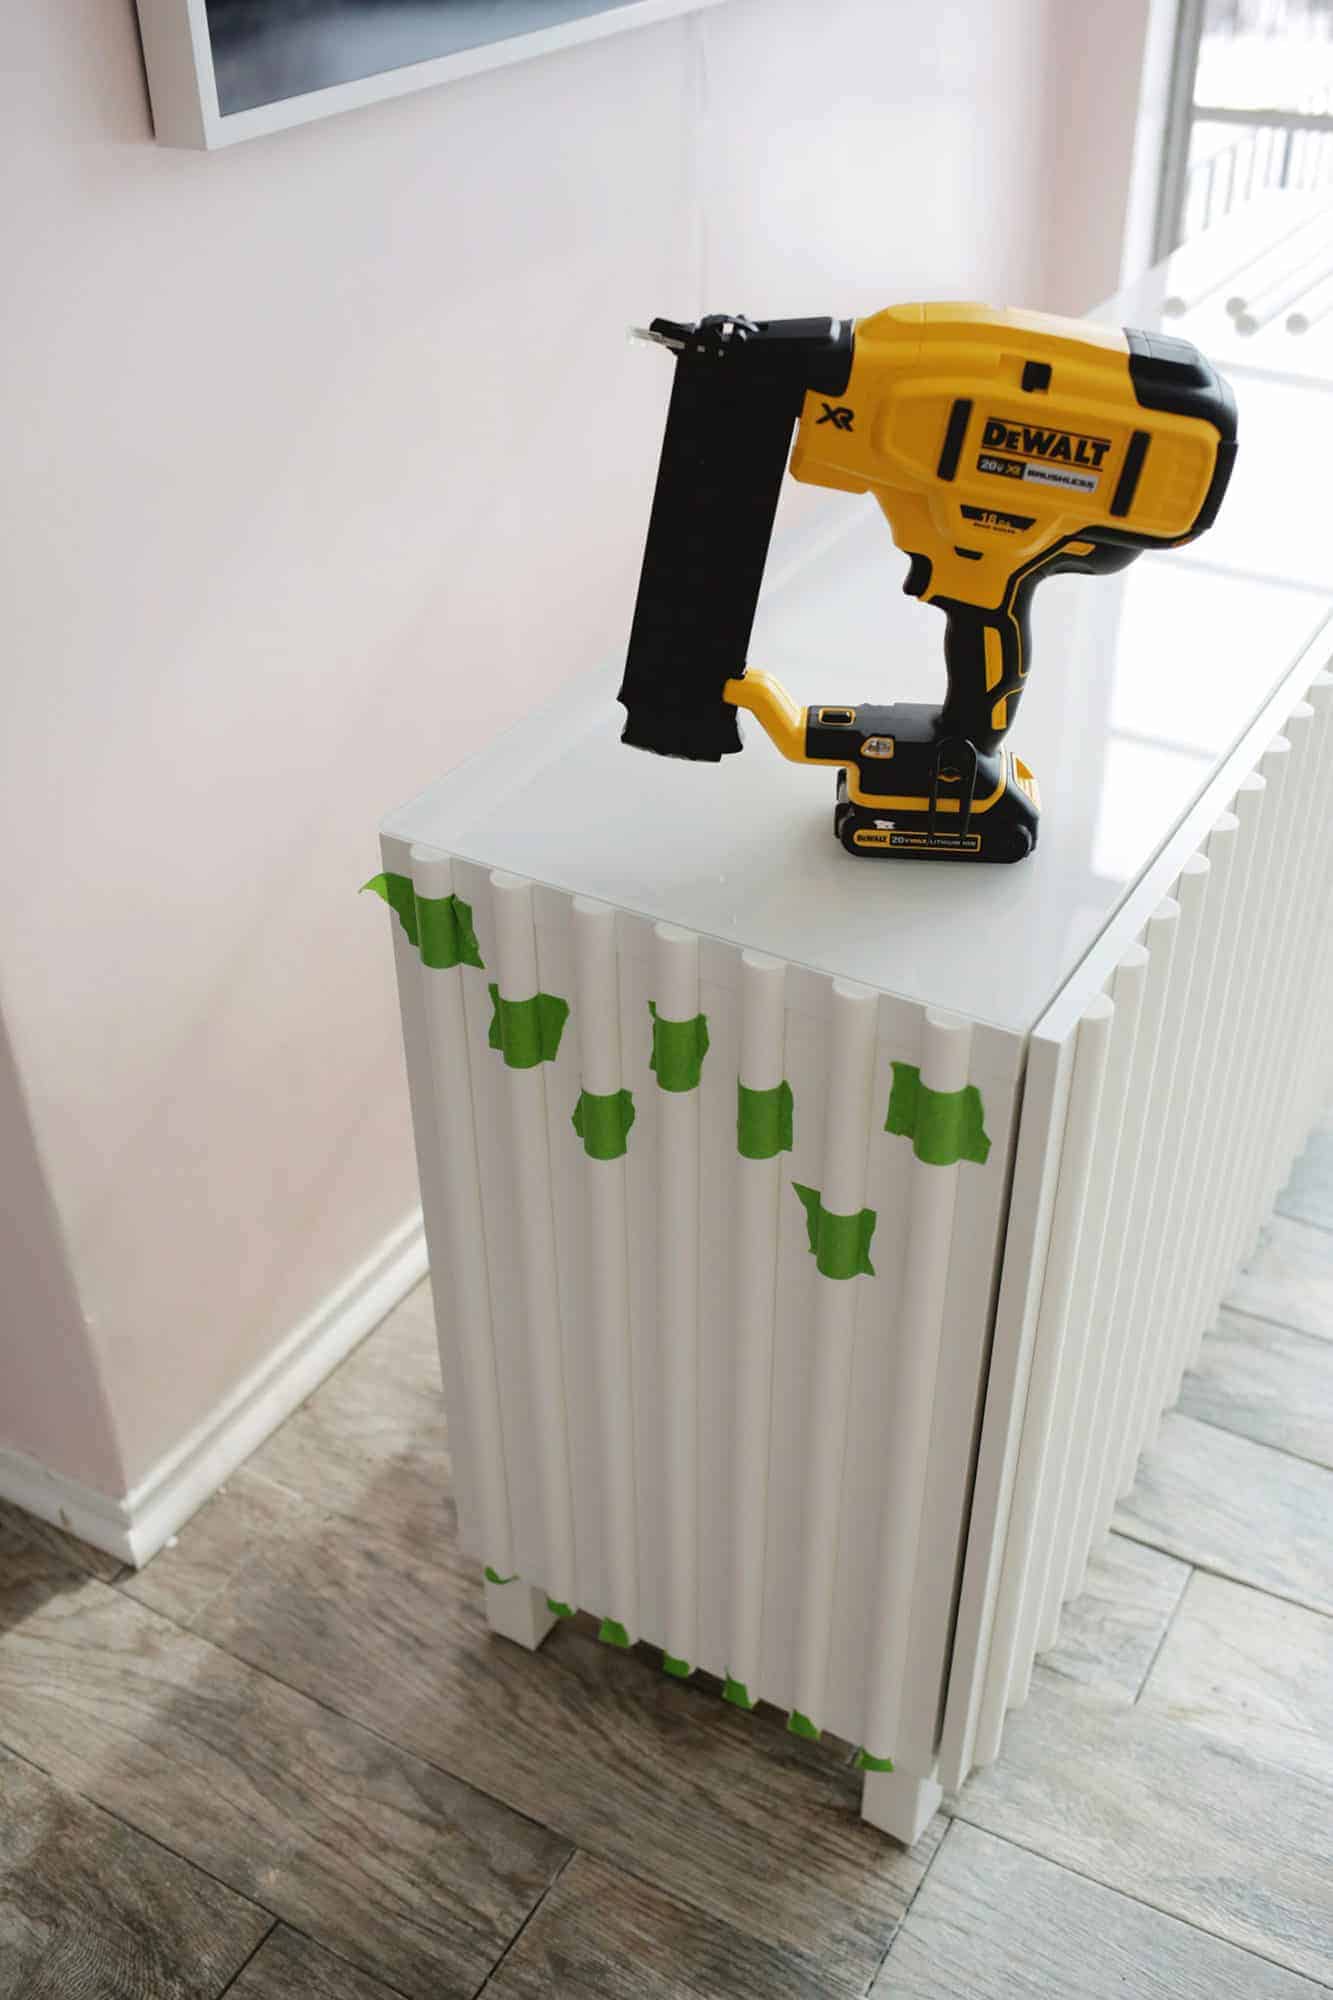
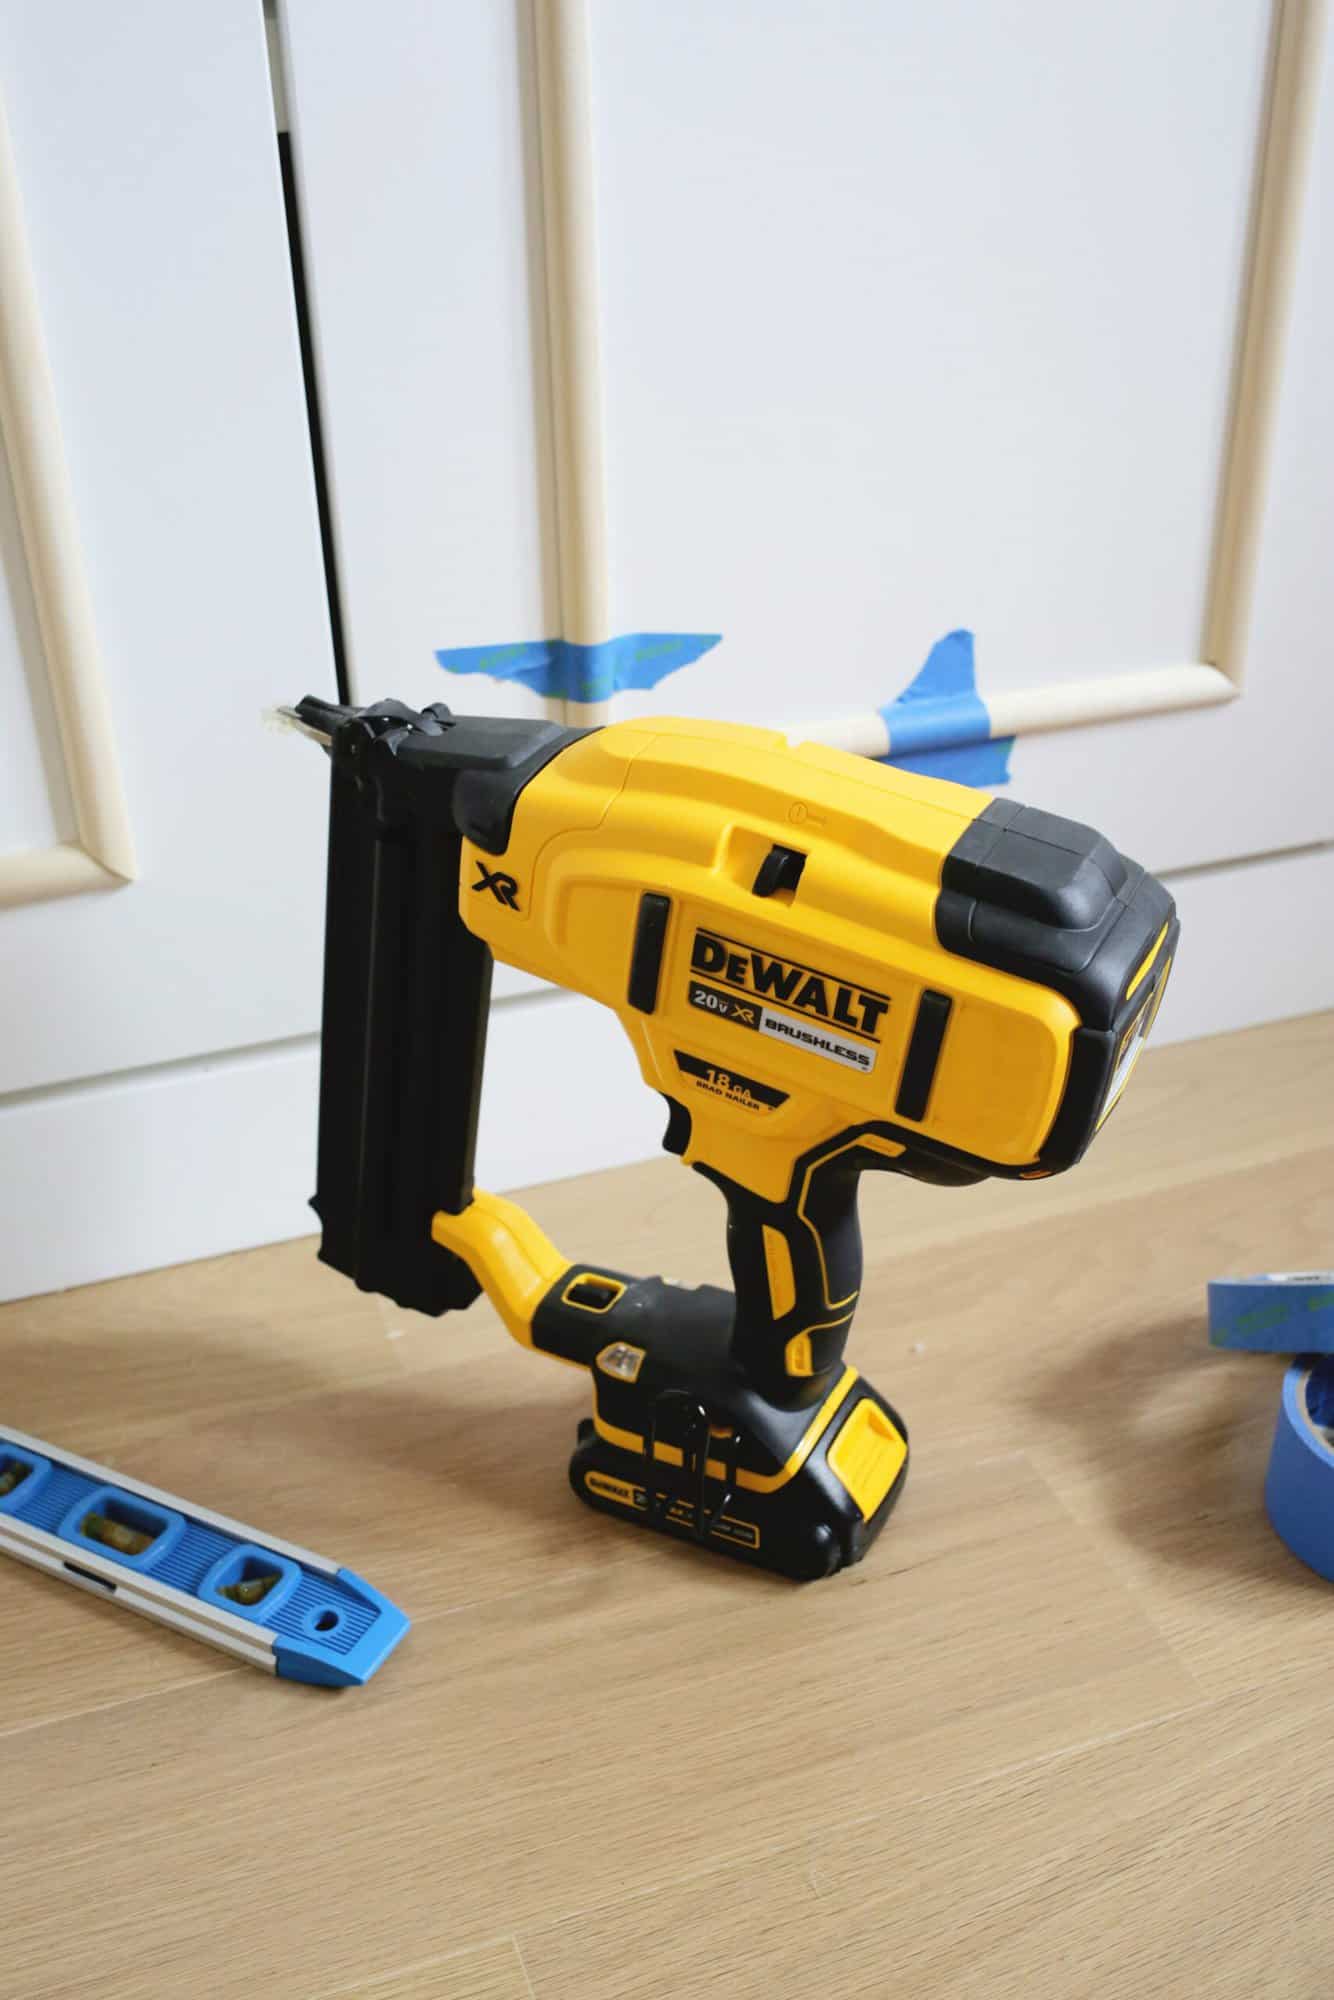
Battery-Powered Nail Gun: I’ve had an air gun with a compressor tank for a few years, and while that was a total game changer in and of itself, this battery powered nail gun is really what I should have gotten instead.
It’s so much easier to use and faster to set up (just one button to turn it on rather than setting up the whole air tank) and you don’t have the air hose in the way as you work or have to drag the heavy tank around with you.
Also, when the air compressor tank fills back up with air, the extremely loud (and sudden!) noise it makes causes me to leap out of my skin … every … single … time. The battery powered one has none of that.
The only downside is that it is heavier to hold than the gun of the air compressor model. So if you are not very strong when it comes to your arms and are doing a lot of overhead nailing, it will get heavy after a bit, but other than that it’s amazing.
It’s a lifesaver for doing jobs like custom closet doors or building shelves and I’ve used it for lots of smaller DIYs as well. If that price point is too high and you just want one for smaller projects, this combo staple gun/nail gun is very inexpensive and able to do small nails, too.
Table Saw: So, this is higher on the end of cost and “scary factor” if you aren’t used to power tools, but this one is still much less than most table saws while still being foldable and compact when not in use, and it’s great because you can rip a board up to 27″ wide (which is much wider than most little table saws can do).
I get that table saws seem scary and you do need to be very careful with them (this one comes with a push stick so you don’t get your hands close to the blade when you push the wood through), but they make so many projects possible that would be impossible or way slower without it, so it’s totally worth it in my book.
Door Lock Installation Kit: If you’ve ever had to drill a doorknob or latch hole into a door, then you know what a be a big pain that can be. It’s especially tough when you need to drill one juuust a little bigger than the one that’s there if the doors are older and the holes aren’t current standard size (that’s the problem we had in our house).
If there’s already a hole there using a hole saw without some sort of guide is almost impossible so this jig clamps to your door so you have a guide for the exact spot you need the correct size hole—so helpful!!
Before I knew this existed, we did two different doors with a complication series of clamps and wood pieces to hack it into working, but I definitely wish I had known about this before all of that!
There you go!! The best home improvement tools I wish I’d had in our toolkit a long time ago that would have made lots of jobs so much easier up until this point.
If you are also in the midst of a renovation right now, hang in there, and if you’re just noting this for future reference, you can do it and I hope some of these tools will be helpful for you too! xo. Laura
Renovating a home? Check out these for more tips!
–What Low Budget Renovations Make the Biggest Impact?
–Episode #82: How to Plan, Budget For, and Execute a Renovation Without Losing Your Mind
–Our Best Room Renovations!
–Episode #106: (MINI) How We Survive Major Renovations