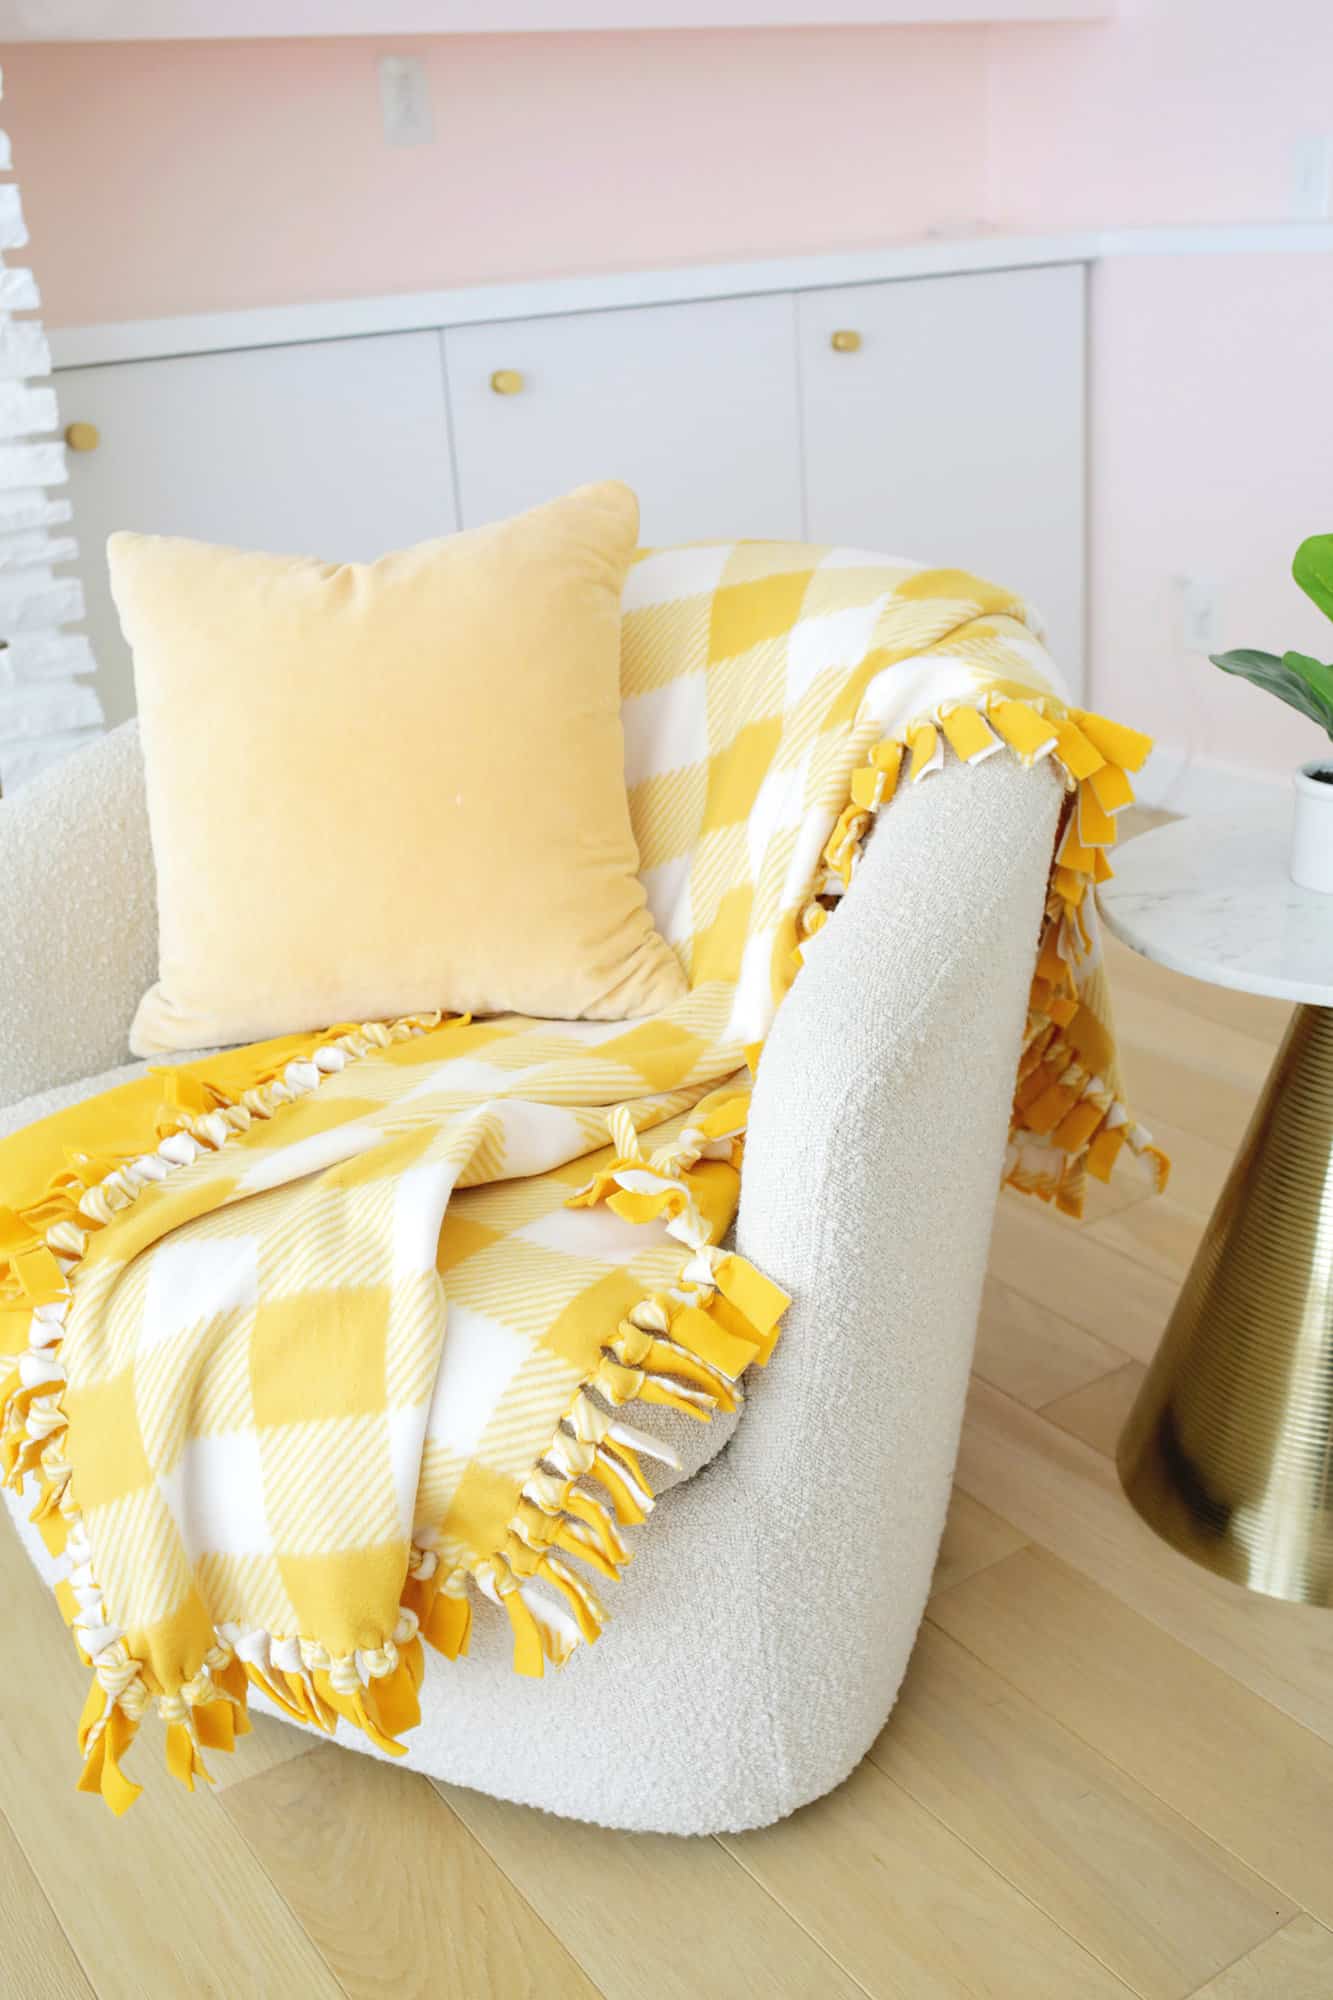
When the temperature starts to drop, a cozy blanket is the thing I reach for first. With the seasons changing, I thought making an easy no-sew fleece blanket would be just the thing to start off the chilly season right.
And this no-sew fleece tie blanket is easy and fun to create. It would make a great gift as well, and you could use fun holiday fabrics!
It only takes four steps to go from a pile of fabric to a finished blanket, and I’ll show you how! For this cozy post, we are partnering with Fiskars—our go-to brand for fabric crafting and sewing projects.
They provide quality products and great crafting tools that you can use in your crafting supplies for years to come. We also love that they are convenient to grab since their supplies are available at Walmart!
What is a no-sew fleece tie blanket?
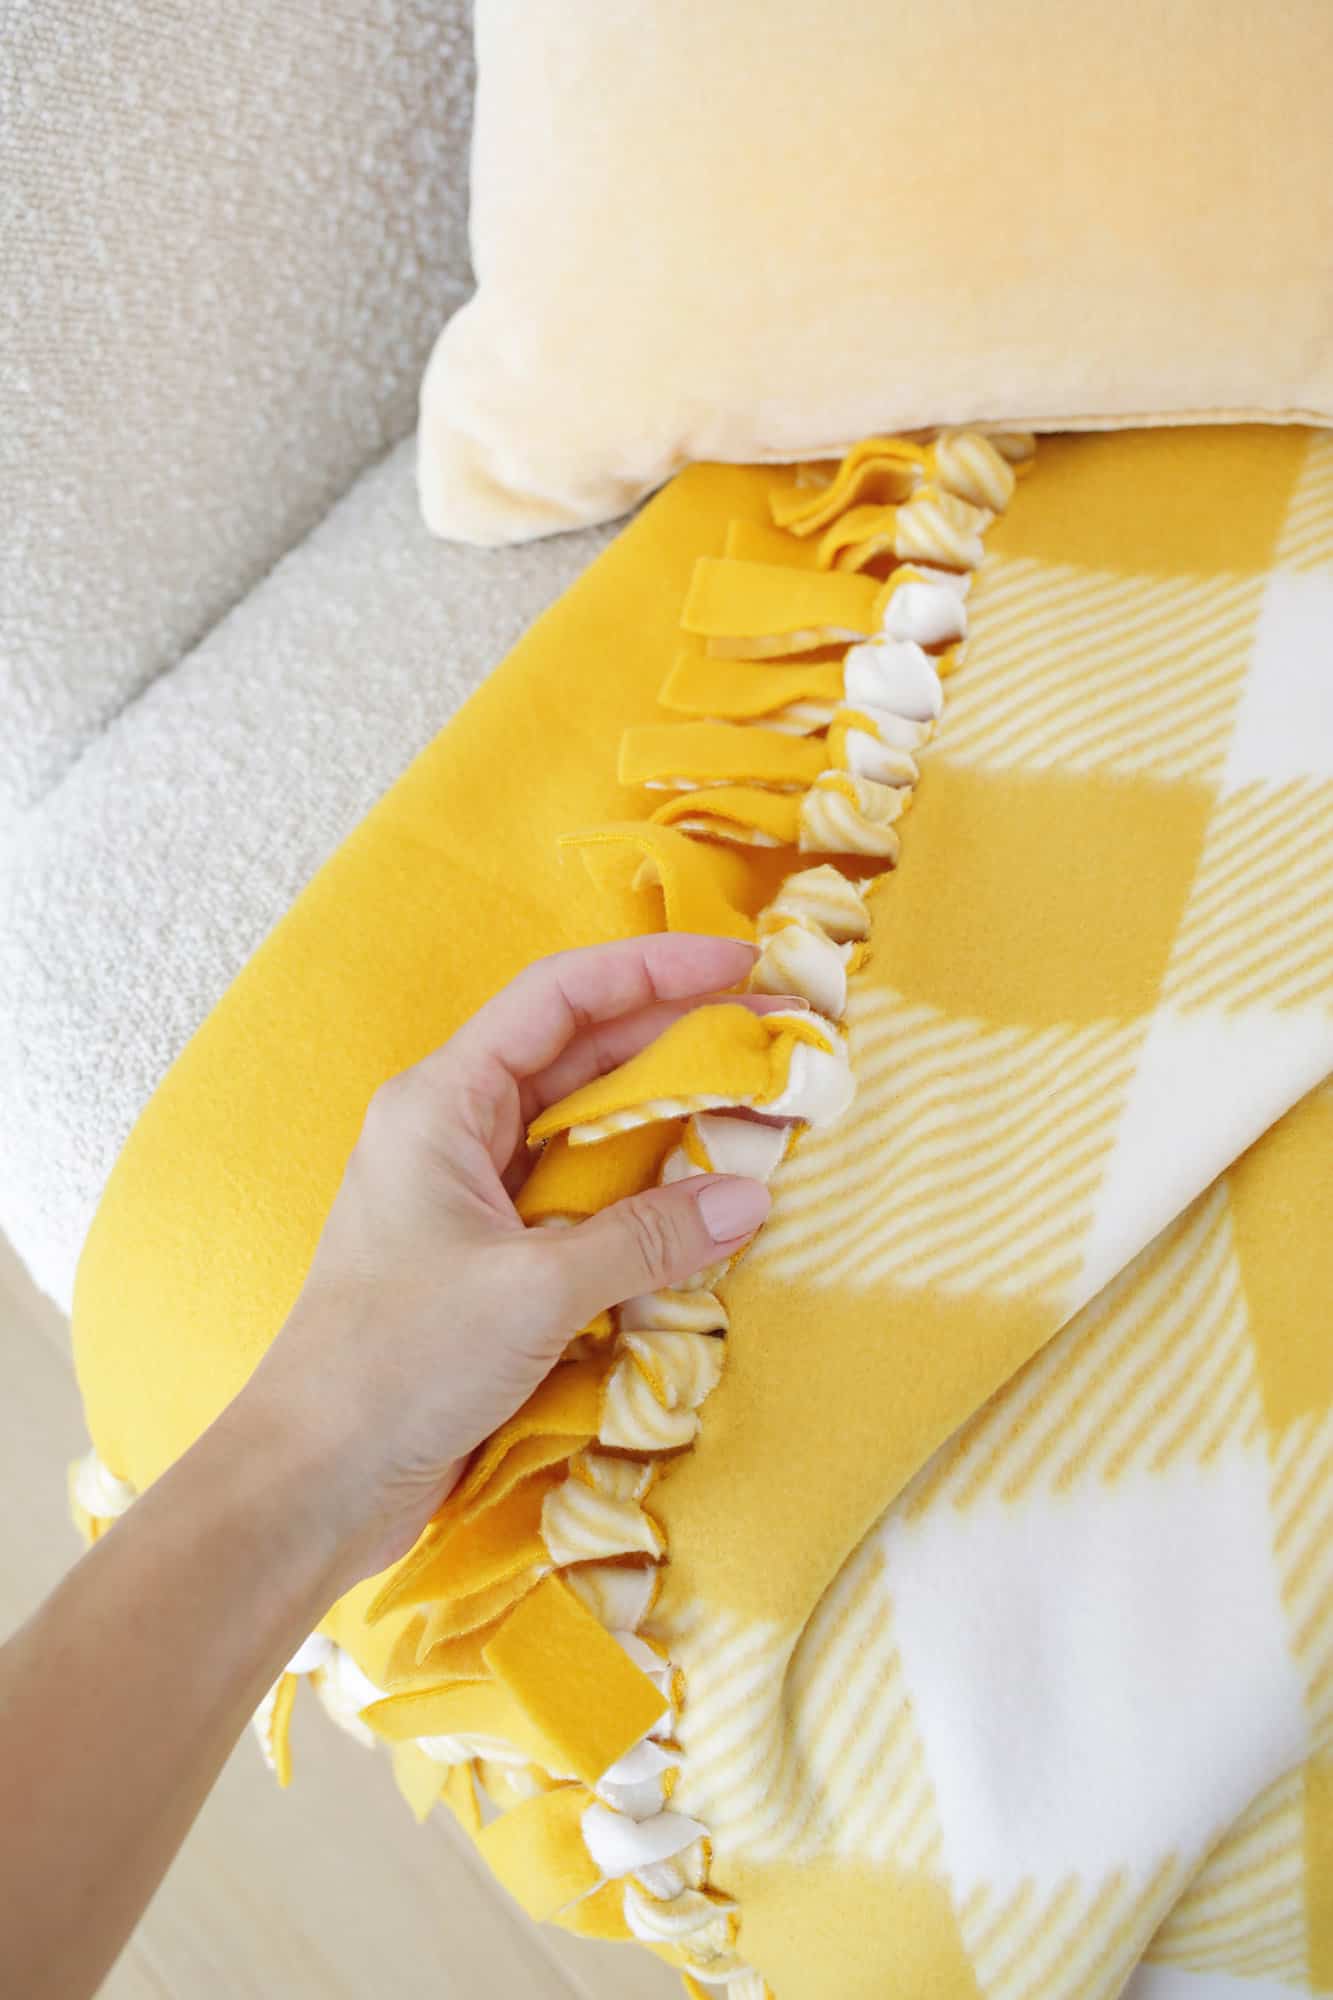
A no-sew fleece blanket is an easy way to create a quick blanket by laying two layers of fleece fabric together and cutting strips around the sides of the fabric. Tying those strips together in a balloon knot (just like you would tie a balloon) will give you a finished blanket edge without any sewing!
How many yards of fabric do I need for a no-sew fleece blanket?
While the size of your blanket is up to you, you’ll want at least 1.5 to 2 yards of fleece to make a blanket. You can use the smaller amount for a child’s blanket, but you’ll probably want the full 2 yards if making one that’s meant to be shared or for an adult.
Supplies:
–fabric scissors
-1.5 or 2 yards of fleece fabric in two colors/patterns (get the same amount for each color)
–rotary cutter, fabric ruler, and cutting mat (optional but helpful and it also comes in a set!)
-paper or thin cardboard for cutting template (optional)
Here’s a quick video tutorial to make your own no-sew fleece blanket, or keep scrolling to see the text and image tutorial:
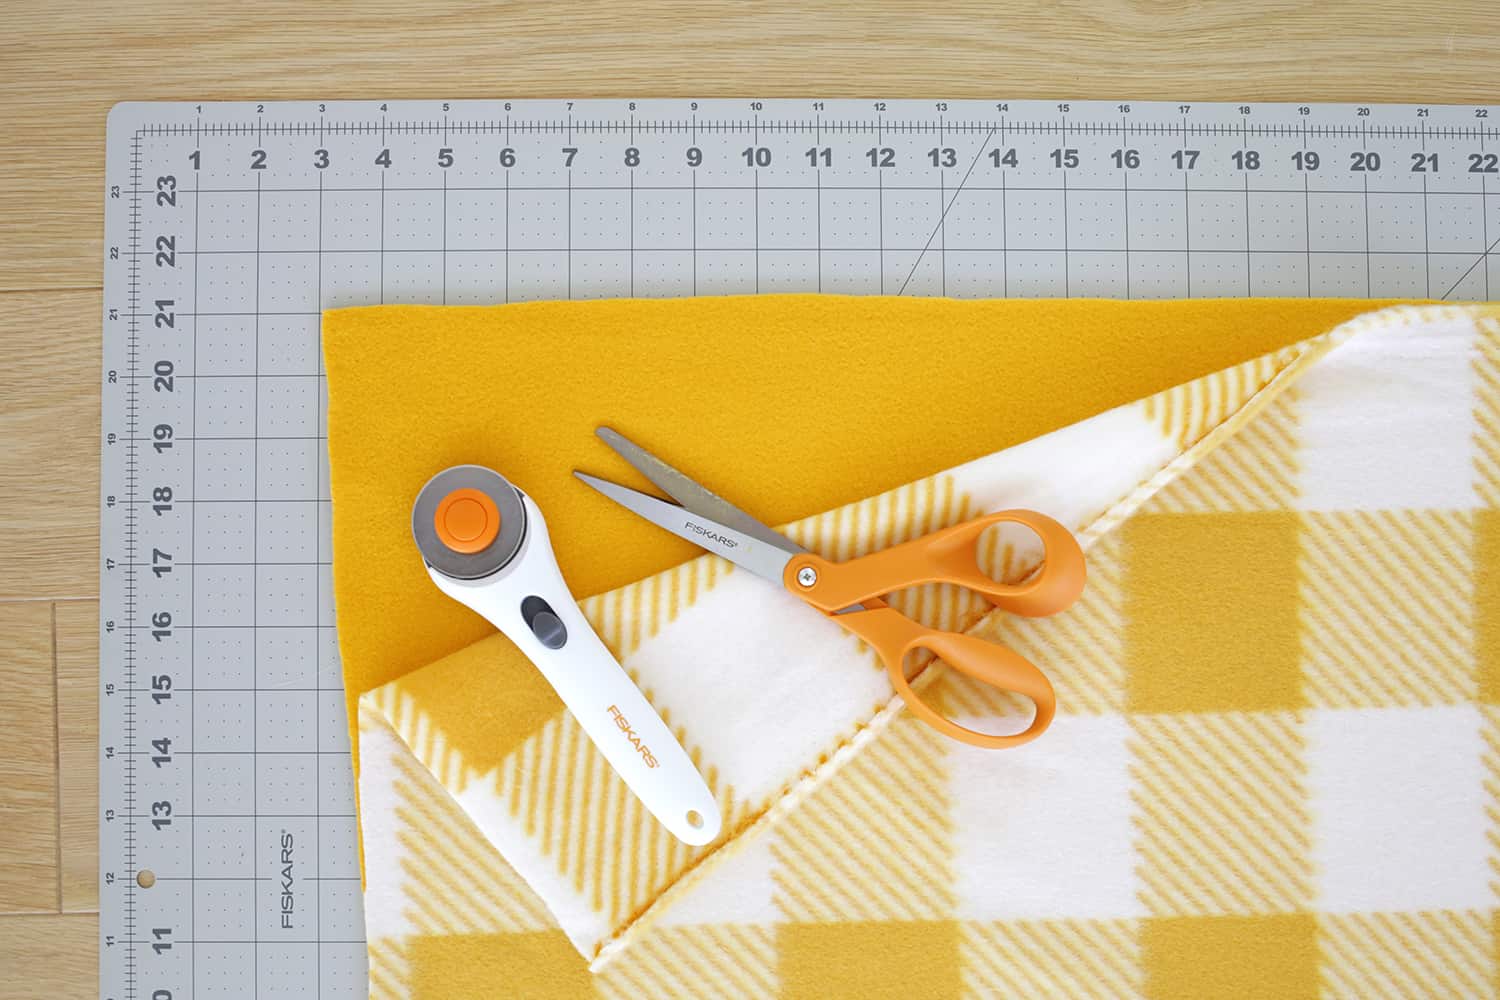
1. Trim your fabric:
Place your two fleece fabrics on the floor and line them up together the best you can. Use a rotary cutter, fabric ruler, and mat (or simply use fabric scissors) to cut off any curled ends or edges of the fabric that don’t line up exactly.
Just eyeball it to get the overall rectangular shape as even as you can, but once you have it all done, you won’t be able to tell if one area is cut a little bit more narrow or wide.
Note: If you are using blizzard fleece, the right side of the fabric is more nubby and the wrong side is more smooth, so put the nubby sides facing out when you line up your fabrics together.
Is there a type of fleece that’s best for a no-sew tied blanket?
Polar fleece is a popular choice for a no-sew tie blanket. It comes in anti-pill and non-anti-pill, so if getting those little pill balls on fabric is a concern after a few washings, choose an anti-pill option.
There are different weights of polar fleece, but since this blanket is a double layer one, thin or medium weight will be warm enough. Try to pick the same type of fleece for both sides of your fabric so it will wear evenly.
Blizzard fleece is also a great option for a no-sew blanket. The quality is not quite as good, but it is generally less expensive, so a good option when budget is a consideration.
Don’t pick an overly thick fleece for a tie blanket (the ones that look more like a thick sherpa material) as they won’t lay as flat and will be harder to tie.
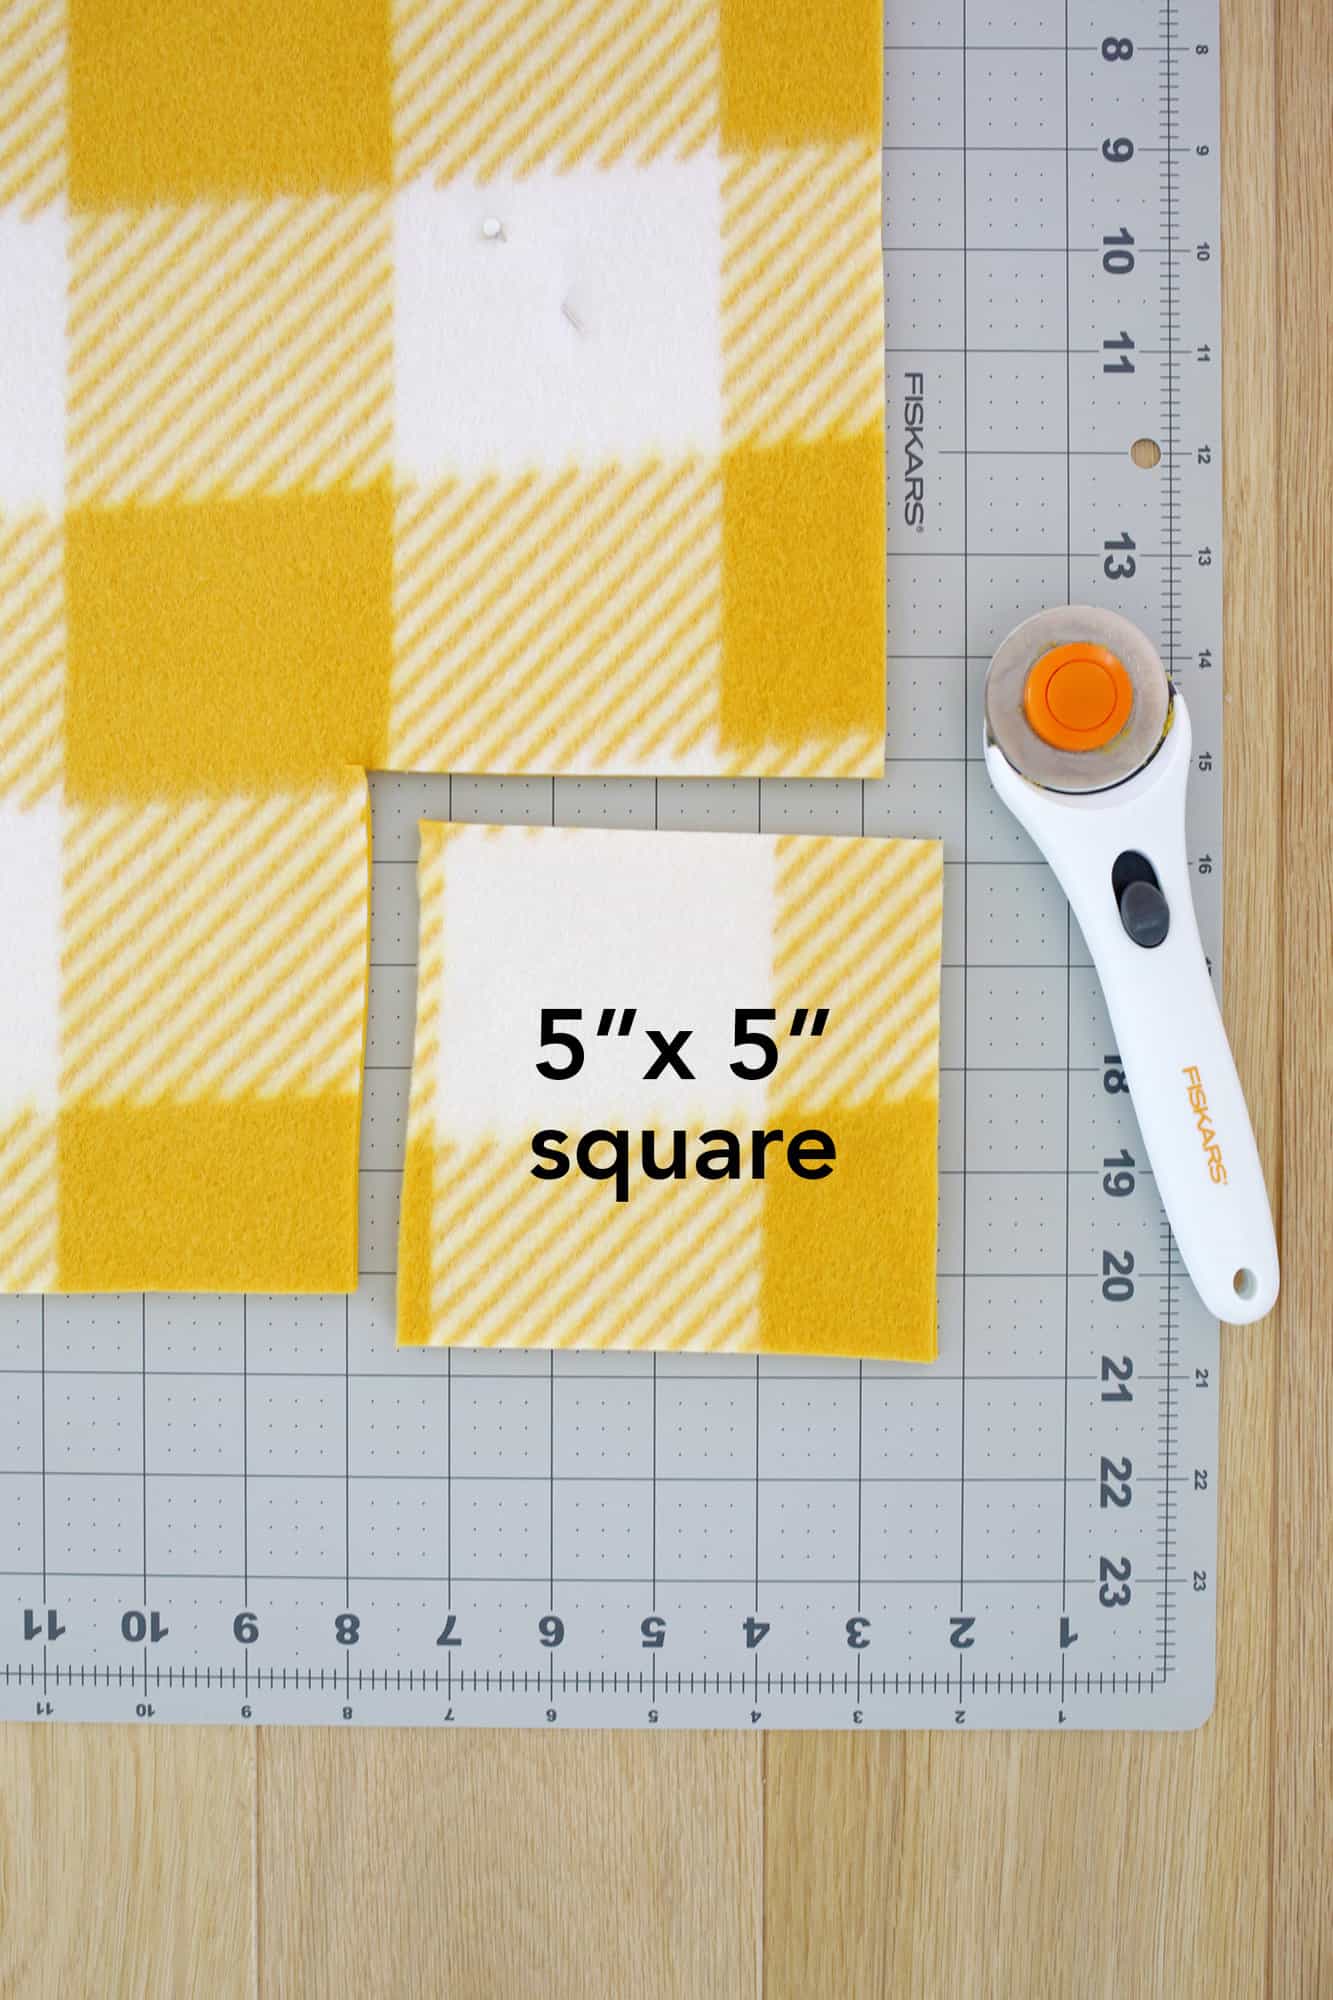
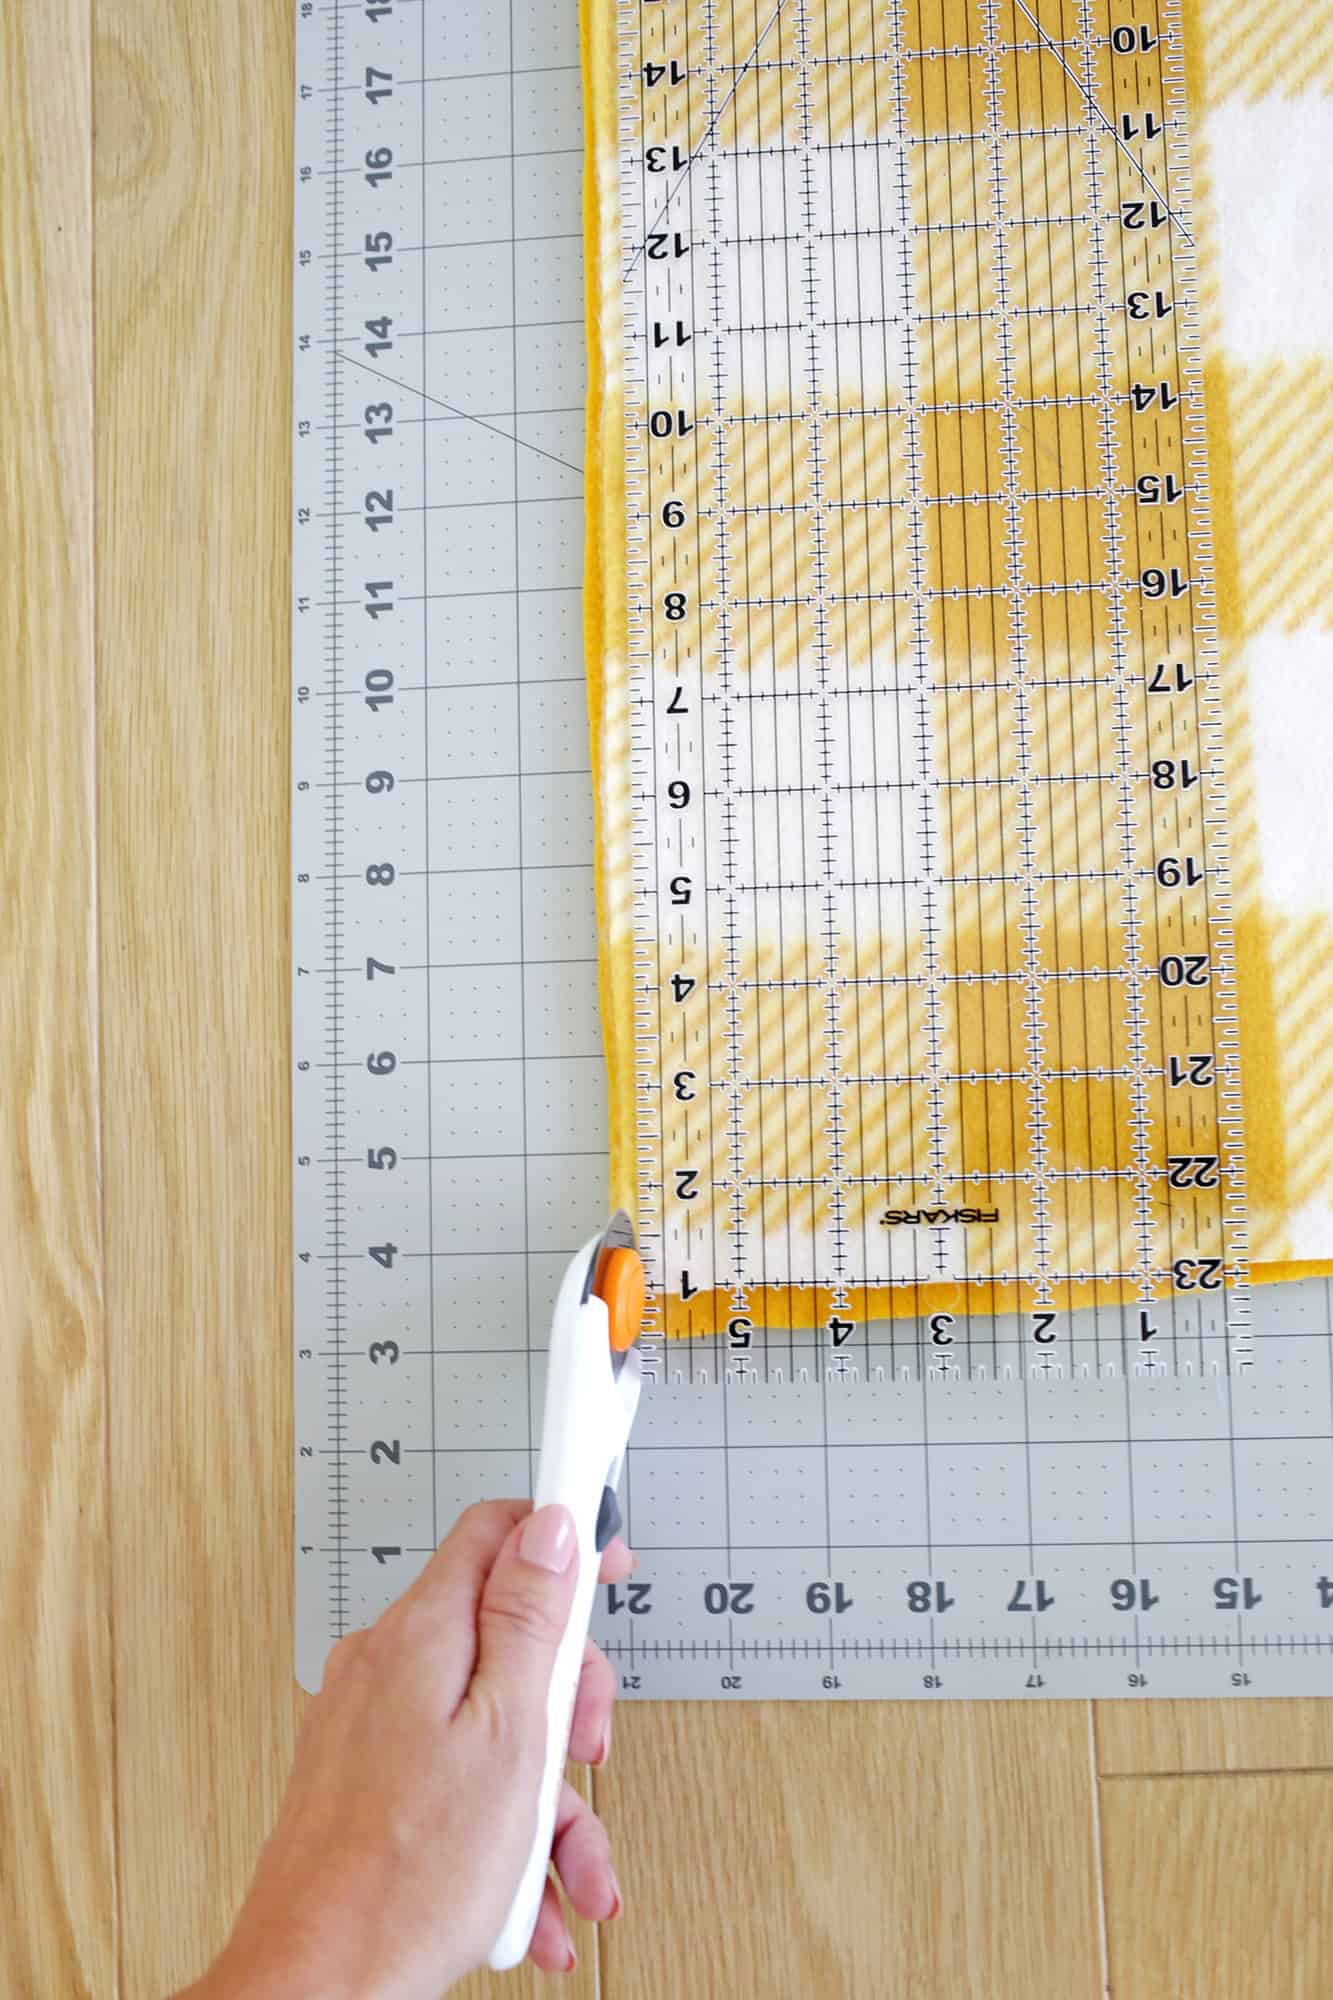
2. Cut squares out of your corners:
On each corner of your blanket, cut out a 5″ x 5″ square of fabric with a rotary cutter or fabric scissors. The strips that you will cut next will be 5″ long, so taking out this corner will remove excess material from the corners so things look nice and neat when done.
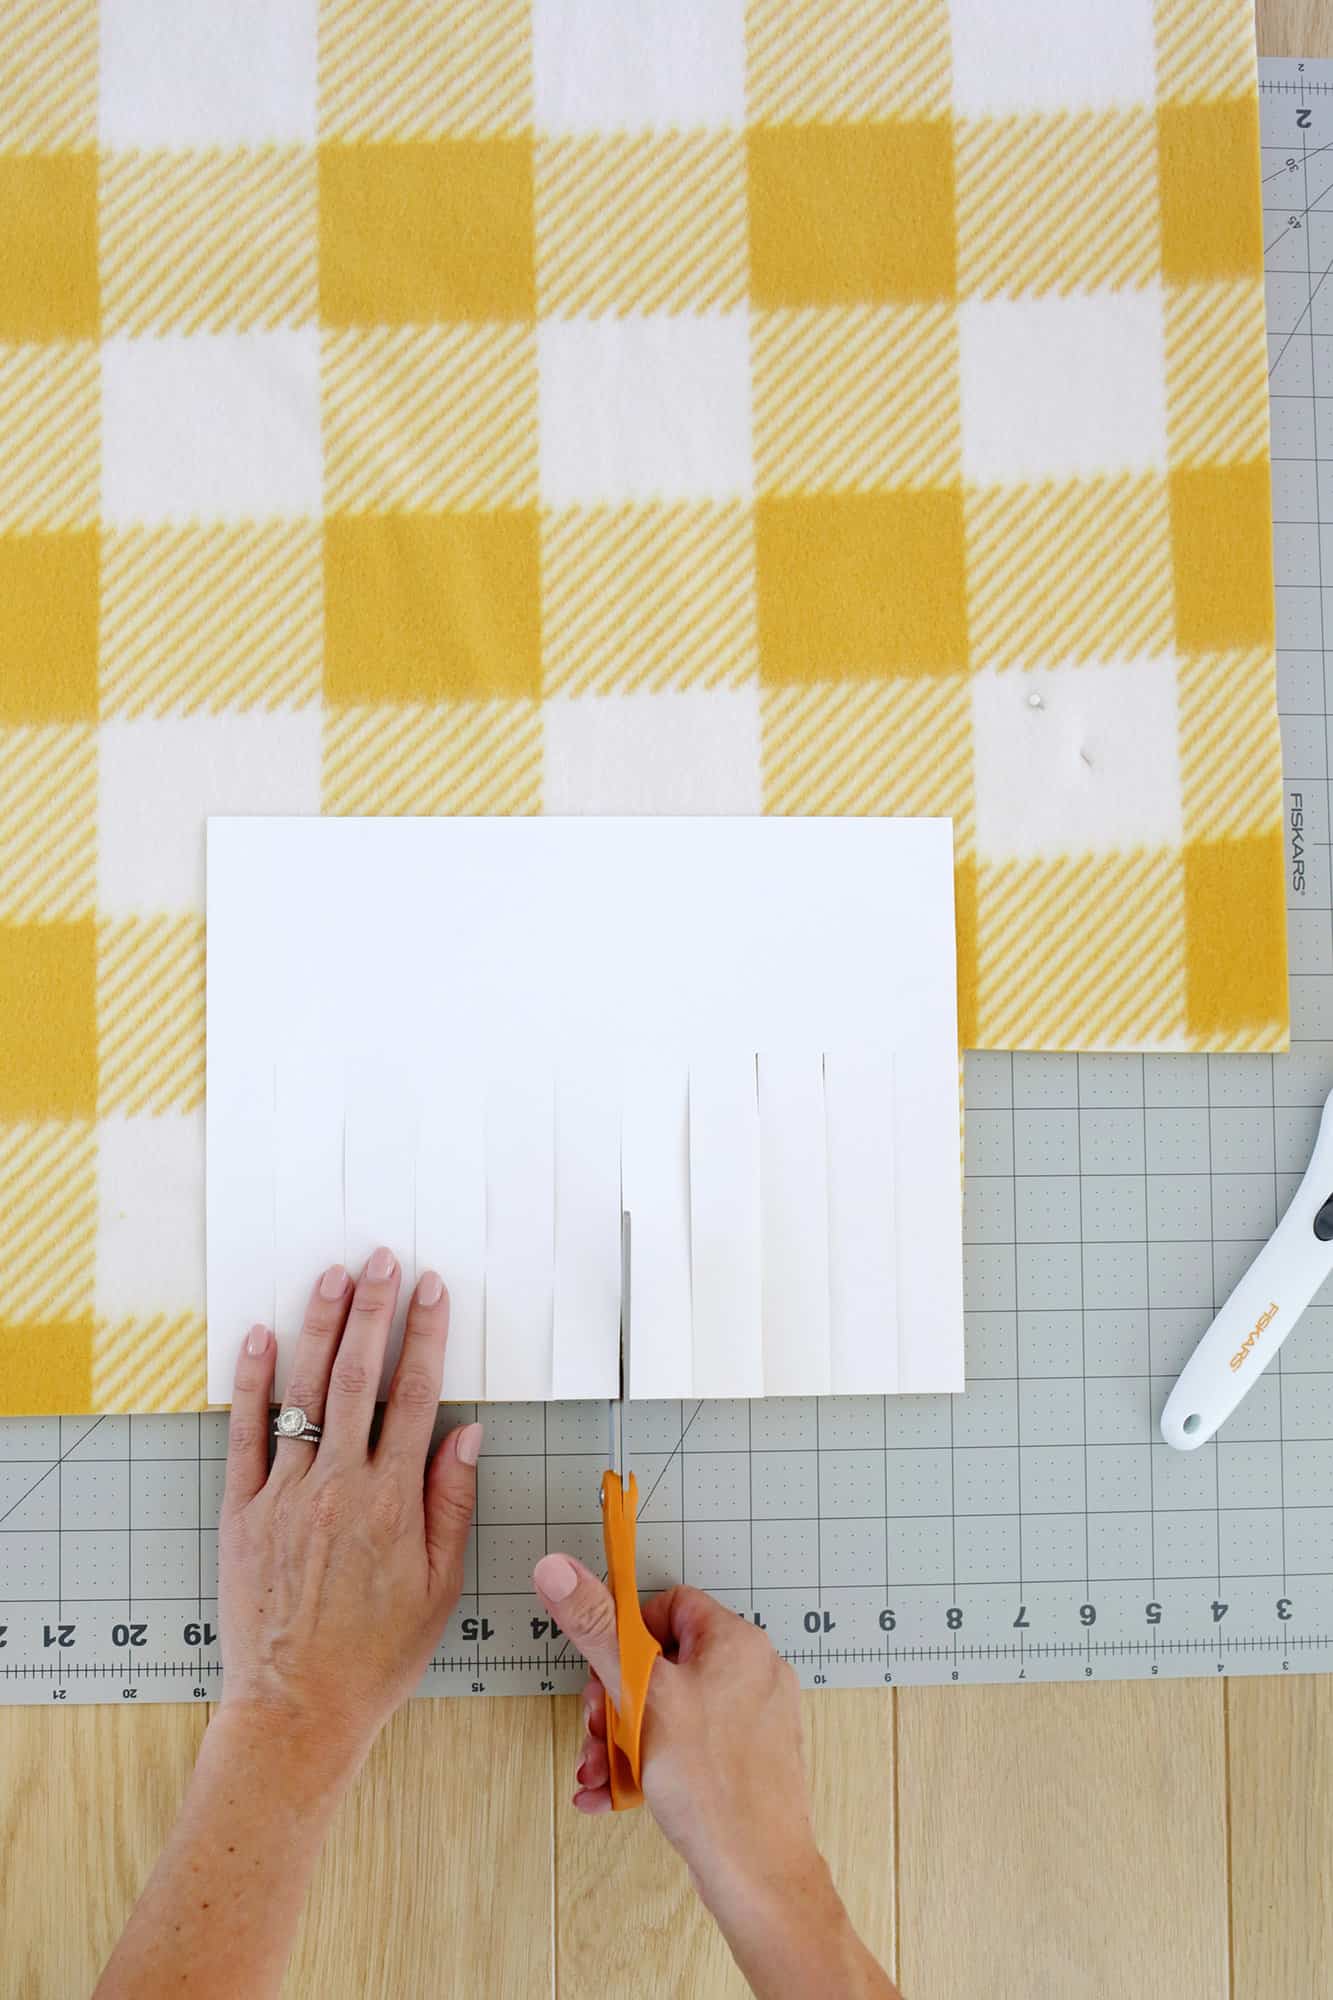
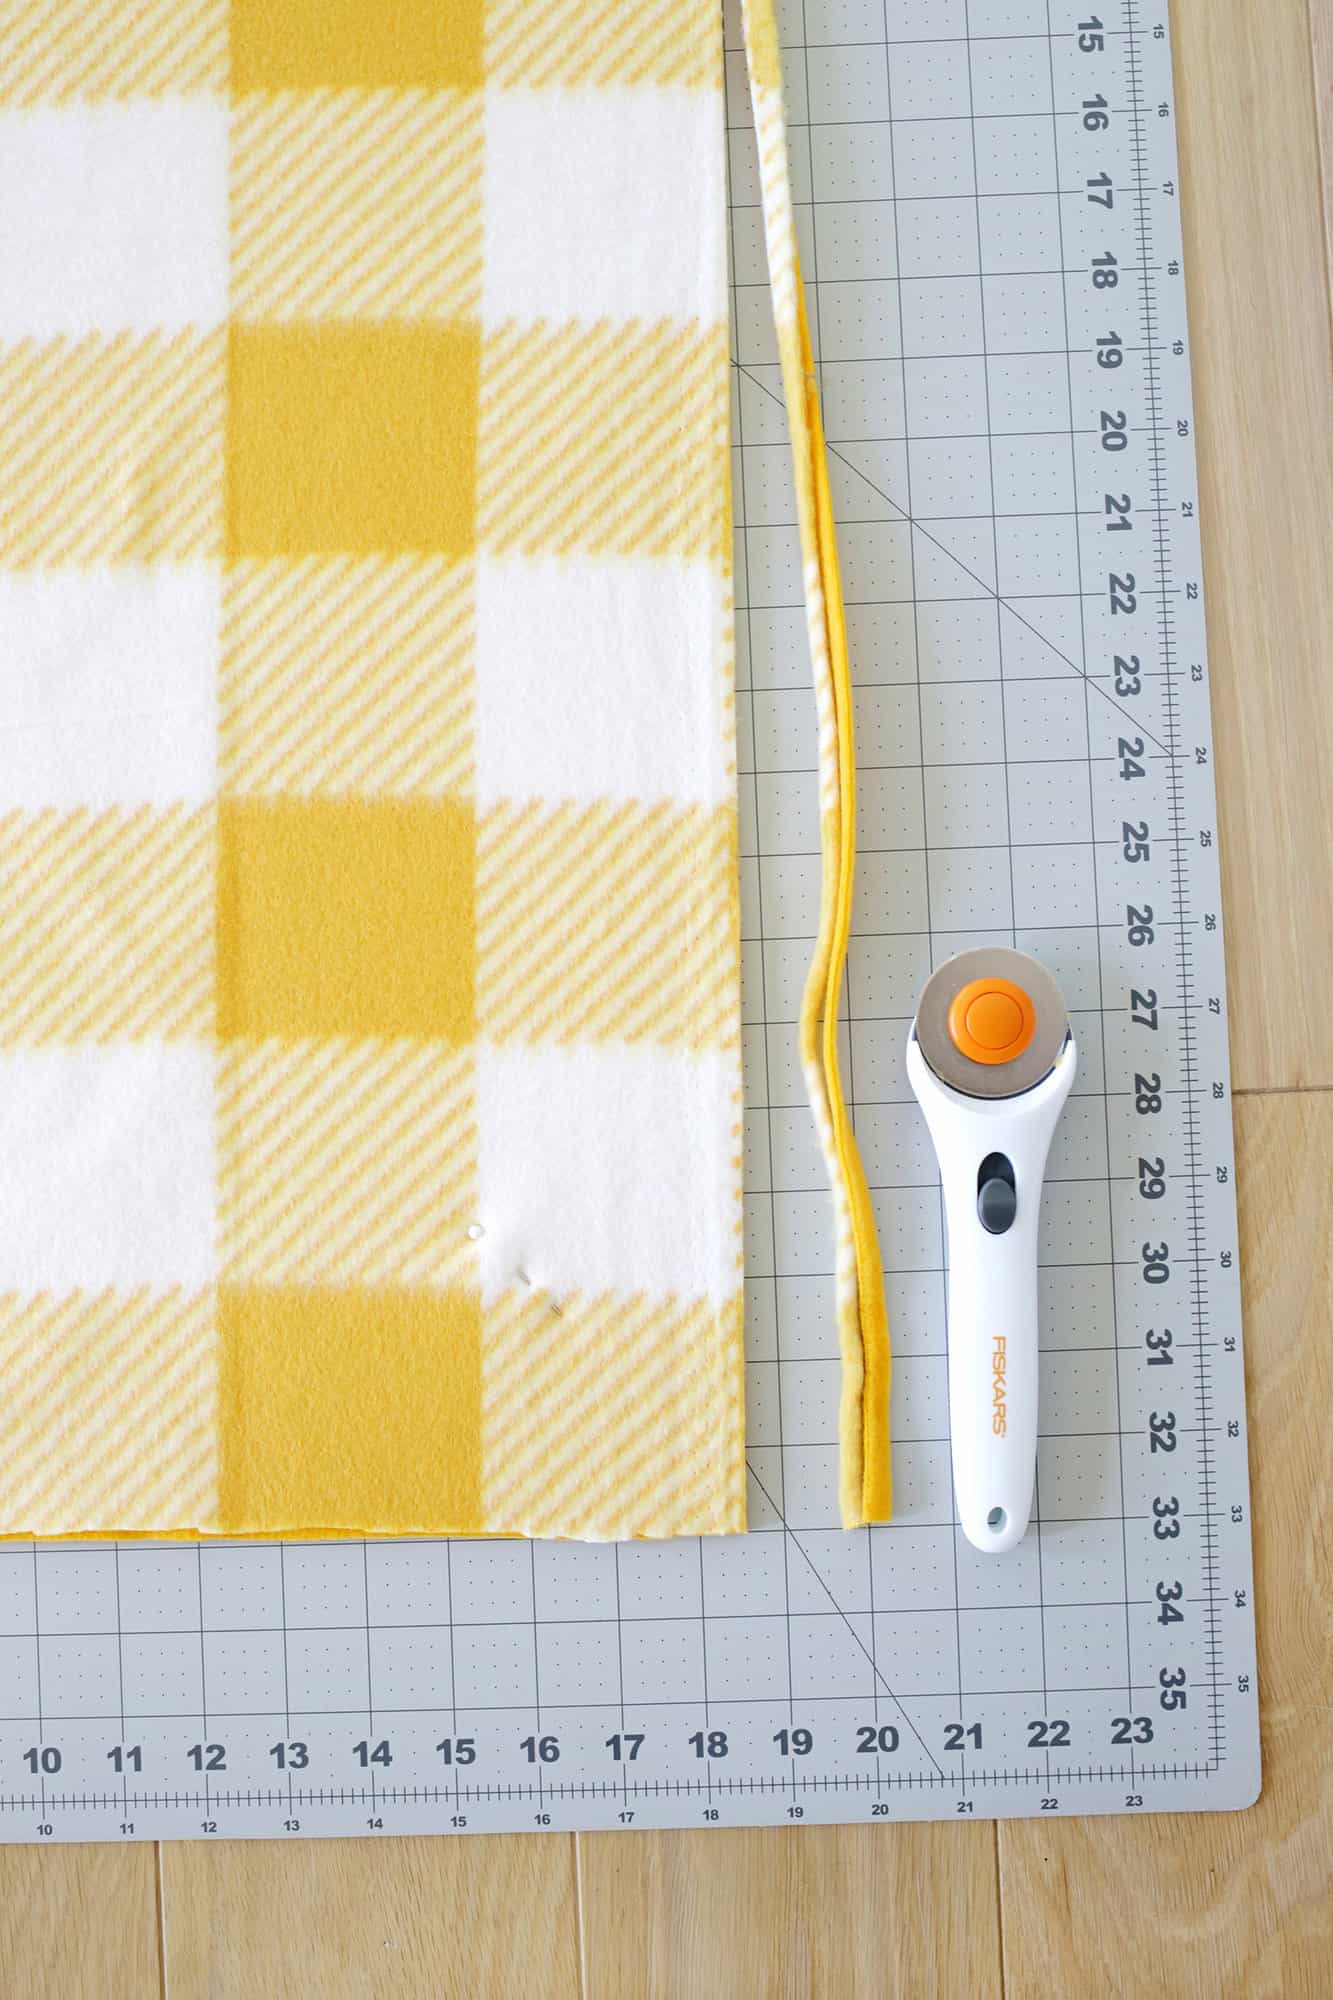
3. Cut your 1″ strips to tie together:
Now you are going to cut 1″ wide by 5″ long strips along all the sides of your double layer fabric. You can either use a rotary cutter and fabric ruler, or use fabric scissors to make the cuts.
Some people may prefer to just eyeball the cuts after measuring out the first few, or we suggest you make a cutting template like you see above!
Tip: Use a piece of paper (or thin cardboard like from a cereal box) and cut 1″ strips that are 5″ long across the length of it. Place the template on your fabric and cut along the preexisting cuts to create even strips, moving the template down as you go. Easy, and your cuts will all be even!
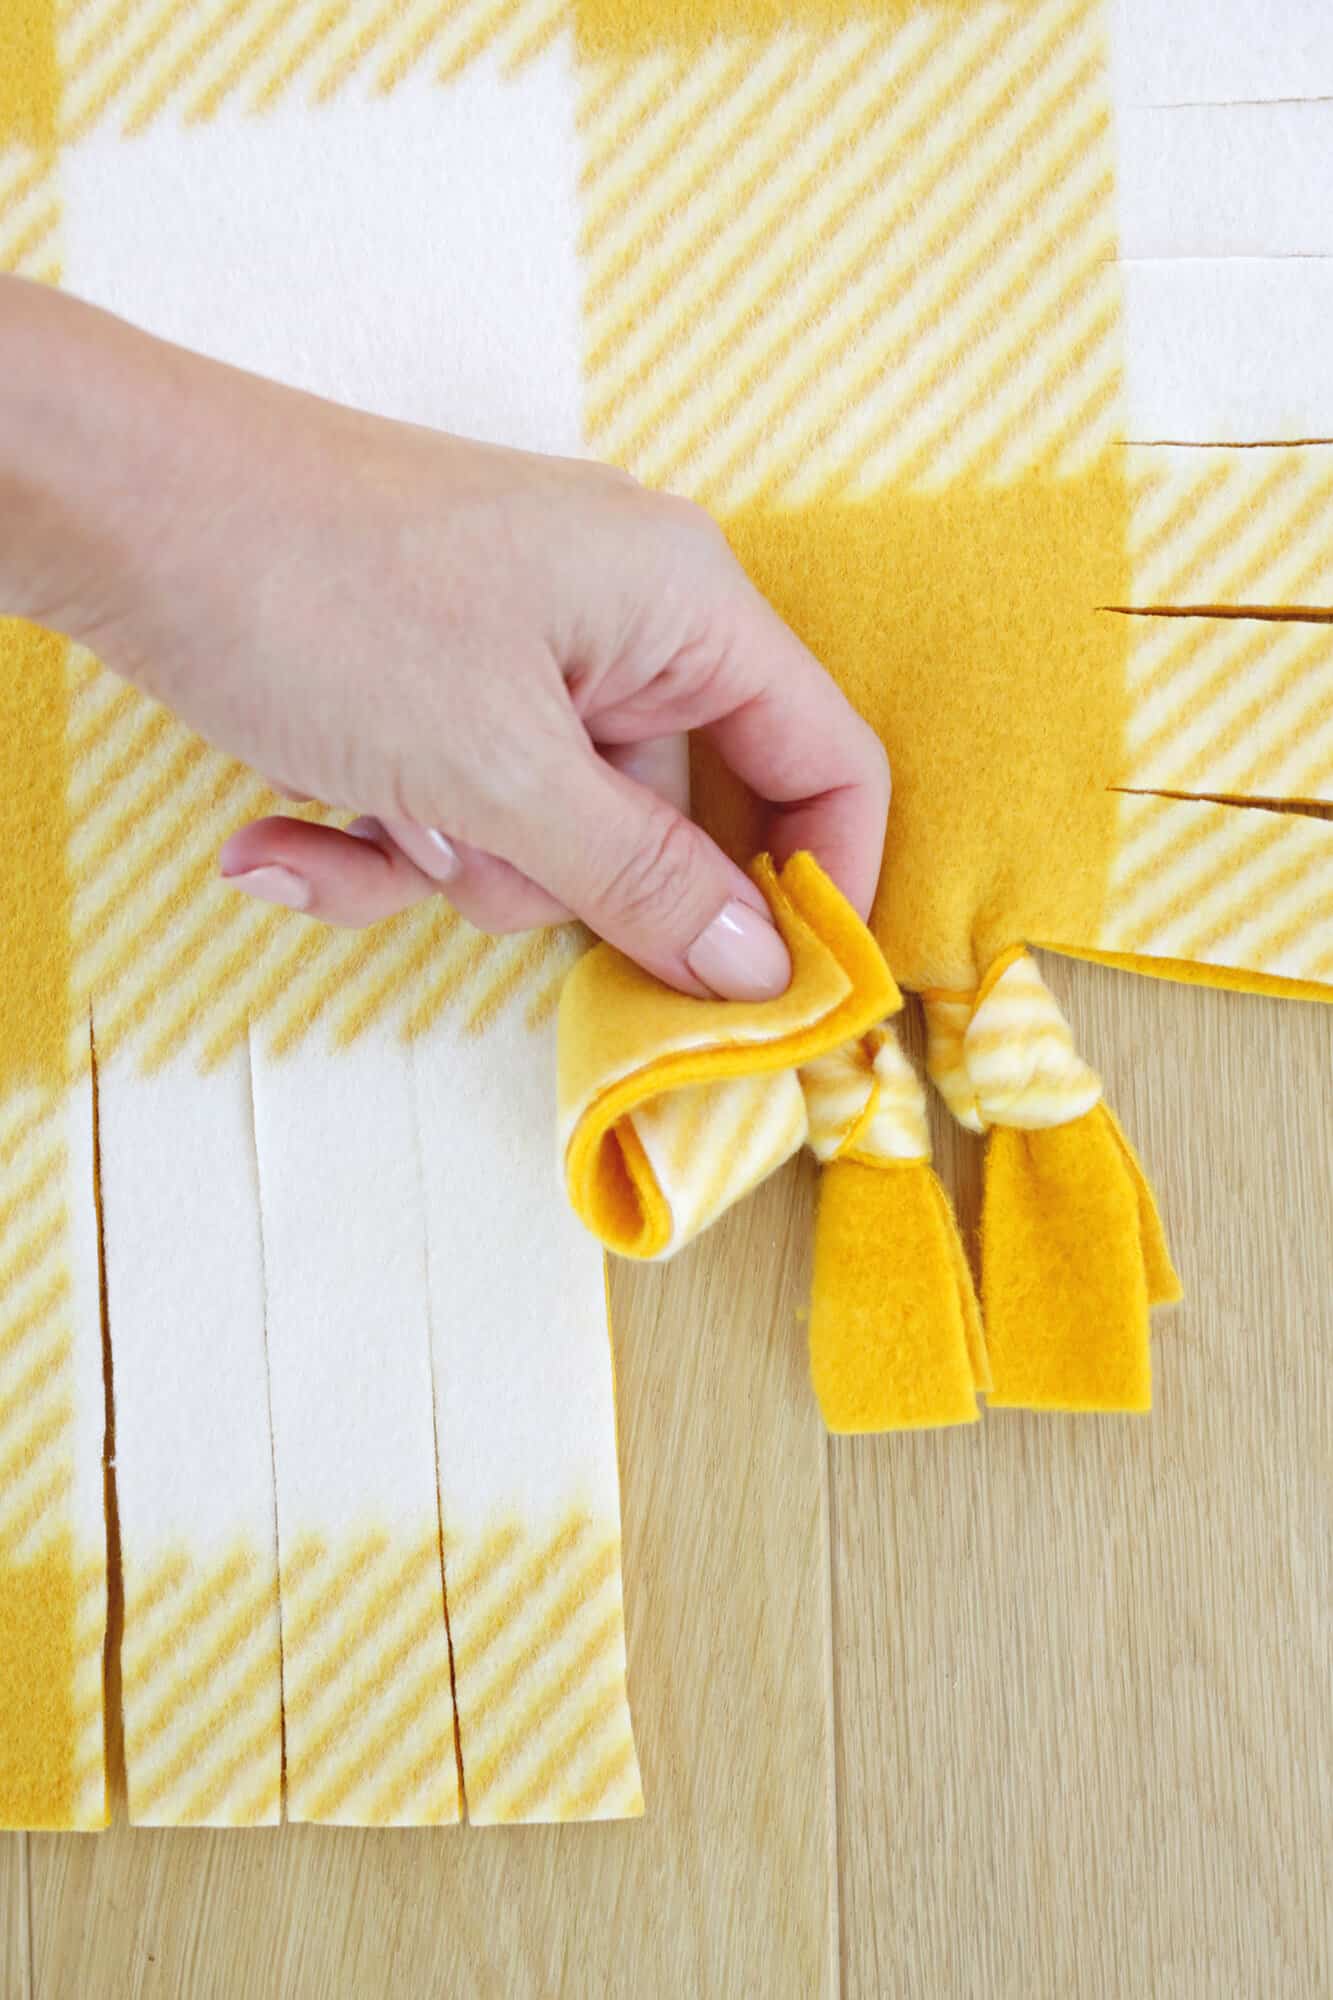
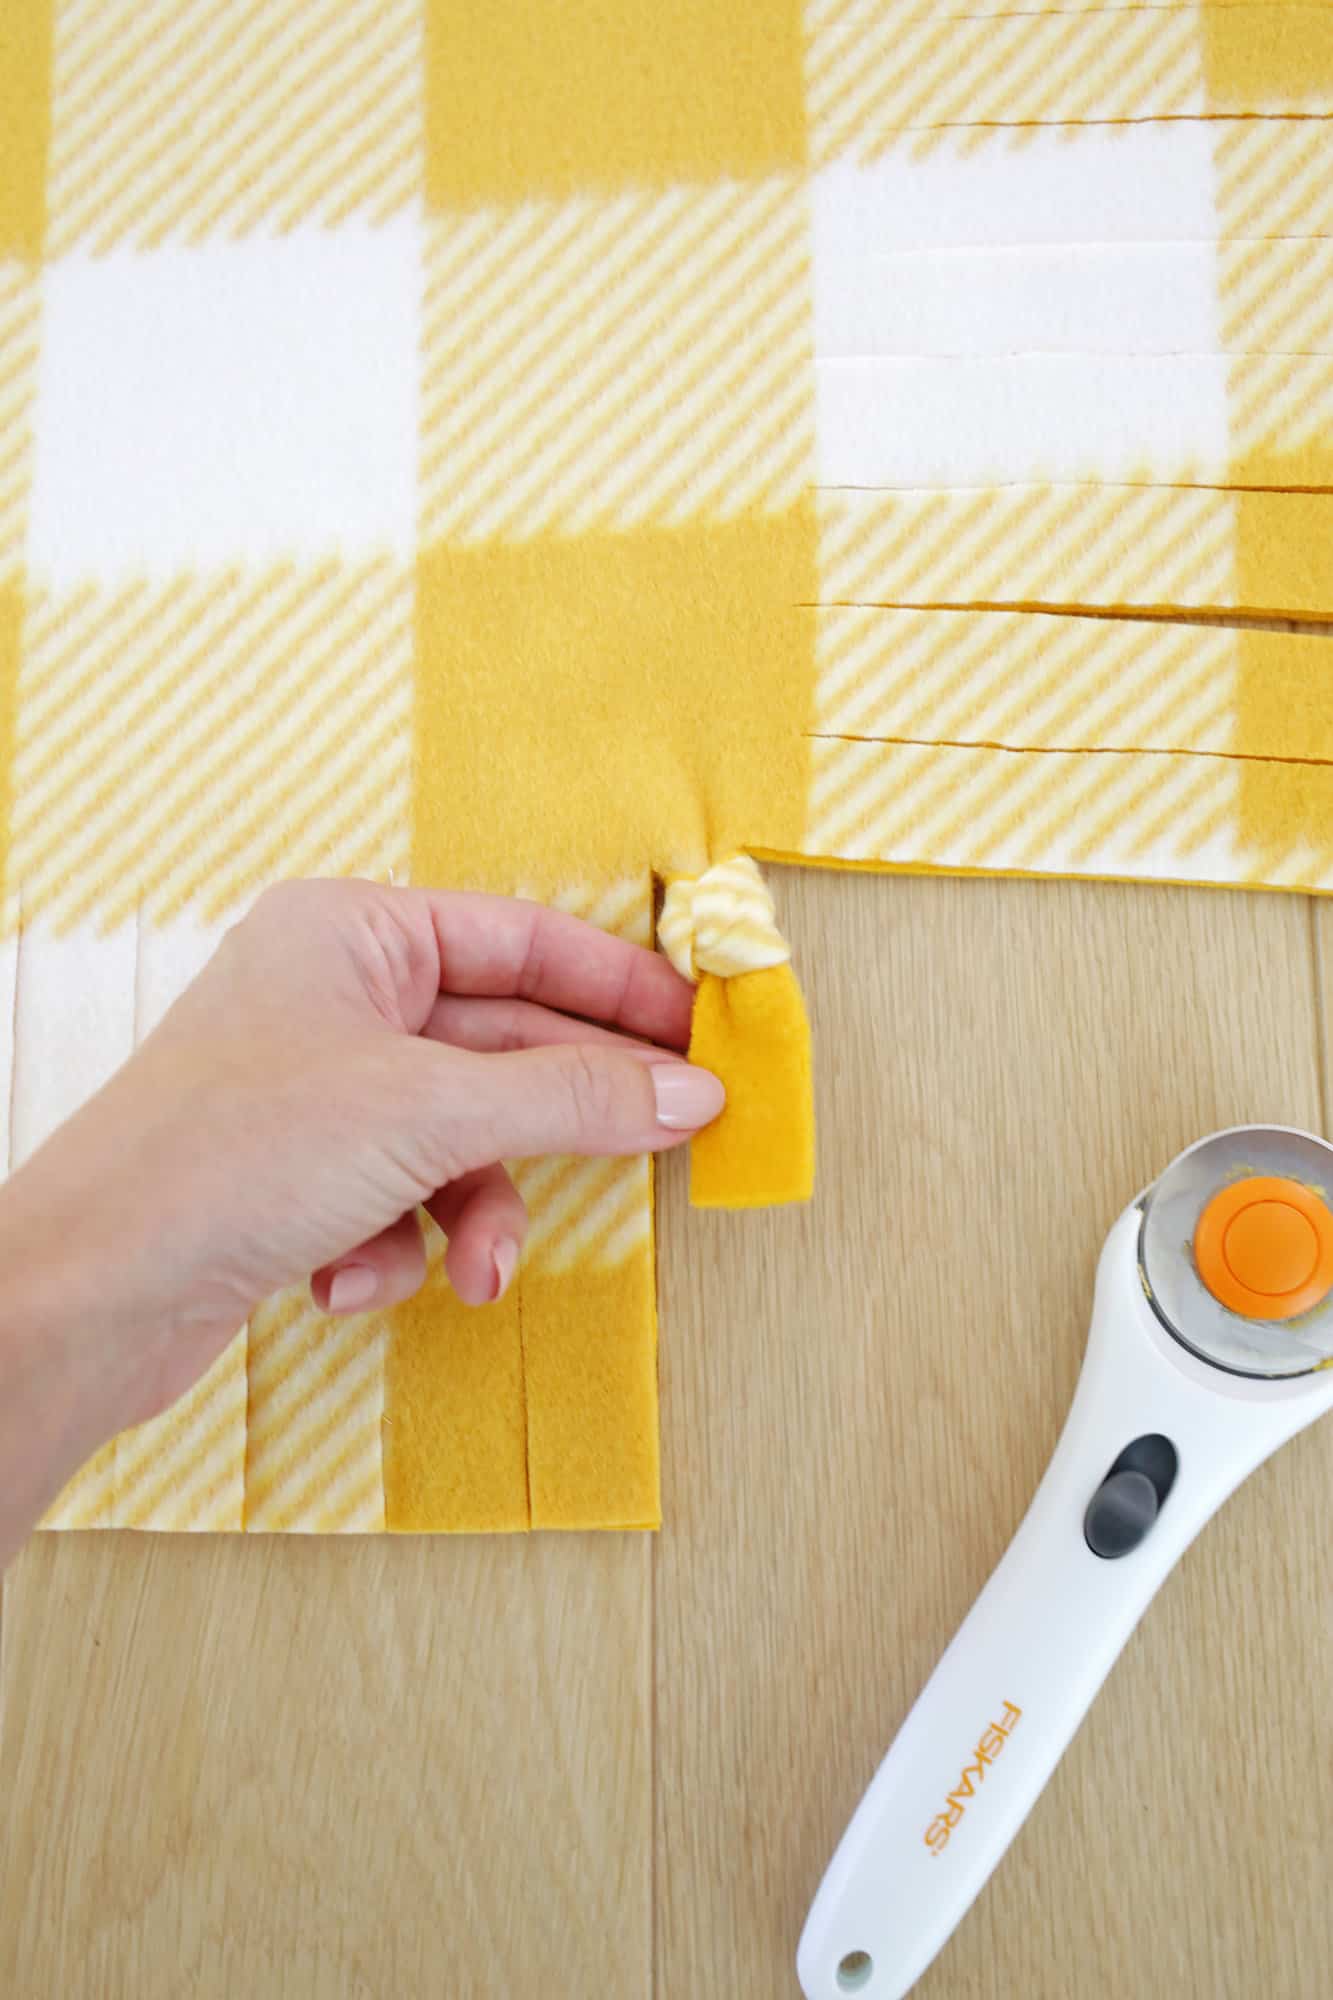
4. Tie your strips:
Now it’s time to finish your blanket! Tie each strip like you would when you tie a balloon closed (it’s called a balloon knot!) and work your way down each side until you have each tie completed. Once all your knots are tied, your blanket is ready to use or gift!
Do some sides seem harder to tie? You may notice that some sides are a little easier to tie than the others. This is because the fleece has a woven direction that makes it a little stretchier when you pull it one way vs. another.
5″ long ties should still be long enough to tie, even on the stingier side, but you’ll notice it’s easier to tie on the sides that give you that extra stretch and those sides will go a little faster.


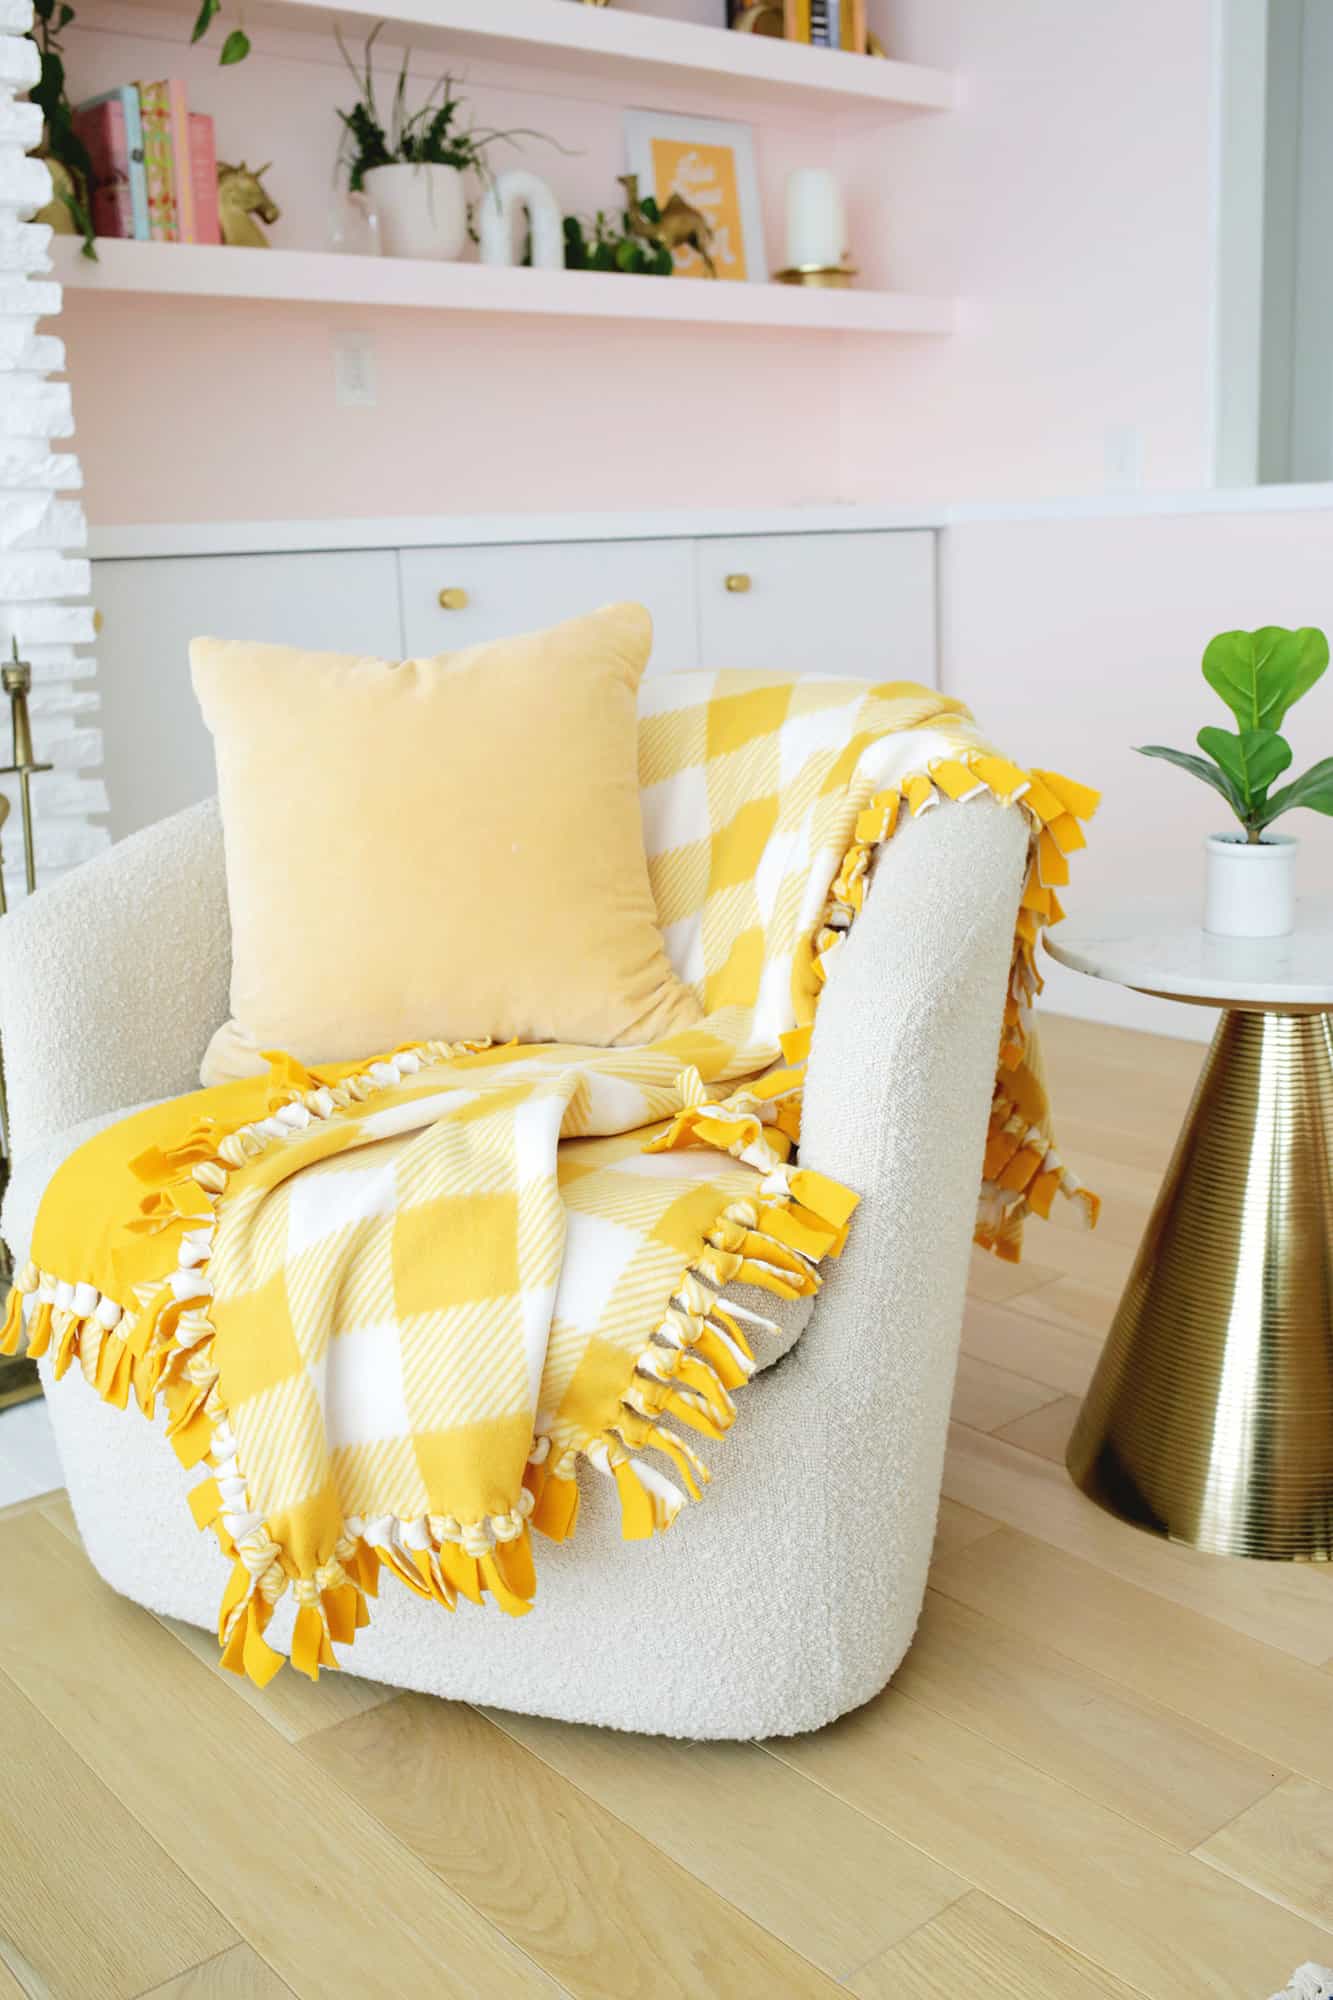
How easy is that? I know fleece blankets can have a lot of personal sentiment for people since you can make them for friends or family, and they last for years.
This is a great gift option if you want to be a little crafty but want to gift something useful (and you can personalize each one with color and pattern selection!).
Using great tools like Fiskars scissors and a rotary cutter also made this process a lot easier (having quality sharp blades is such a help when making a lot of cuts).
I’m so pleased with how my blanket turned out! Here’s to a cozy upcoming season for us all! xo. Laura
FAQ
How do I wash a no-sew fleece blanket?
Wash your fleece blanket in cold water on the gentle cycle and go easy on the detergent to keep it looking its best. The gentle cycle is easier on the fibers of the fleece and less soap keeps detergent from sticking to your fabric and making it feel soft.
Do I need to pre-wash fleece before making a no-sew fleece blanket?
No! Fleece doesn’t shrink when washed, so no need to pre-wash it before making your blanket. The usual purpose of that is to let the fabric shrink before making your item so it won’t ruin the dimensions later.
For more crafts like this one, don’t forget to subscribe!

Get creative ideas for recipes, crafts, decor, and more in your inbox!

Get the How-To
Easy way to make a no-sew tied fleece blanket
Instructions
1. Trim your fabric
-
Place your two fleece fabrics on the floor and line them up together the best you can. Use a rotary cutter, fabric ruler, and mat (or simply use fabric scissors) to cut off any curled ends or edges of the fabric that don’t line up exactly. Just eyeball it to get the overall rectangular shape as even as you can, but once you have it all done you won’t be able to tell if one area is cut a little bit more narrow or wide.
2. Cut squares out of your corners:
-
On each corner of your blanket, cut out a 5″ x 5″ square of fabric with a rotary cutter or fabric scissors. The strips that you will cut next will be 5″ long so taking out this corner will remove excess material from the corners so things look nice and neat when done.
3. Cut your 1″ strips to tie together:
-
Now you are going to cut 1″ wide by 5″ long strips along all the sides of your double layer fabric. You can either use a rotary cutter and fabric ruler or use fabric scissors to make the cuts. Some people may prefer to just eyeball the cuts after measuring out the first few, or, we suggest you …
-
Tip: Make a cutting template like you see above! Use a piece of paper (or thin cardboard like from a cereal box) and cut 1″ strips that are 5″ long across the length of it. Place the template on your fabric and cut along the preexisting cuts to create even strips moving the template down as you go. Easy and your cuts will all be even!
4. Tie your strips
-
Now it’s time to finish your blanket! Tie each strip like you would when you tie a balloon closed (it’s called a balloon knot!) and work your way down each side until you have each tie completed. Once all your knots are tied, your blanket is ready to use or gift!
Notes
Do some sides seem harder to tie? You may notice that some sides are a little easier to tie than the others and that’s because the fleece has a woven direction that makes it a little stretchier when you pull it one way vs. another. 5″ long ties should still be long enough to tie, even on the stingier side, but you’ll notice it’s easier to tie on the sides that give you that extra stretch and those sides will go a little faster.