
Hello! Last year, I showed you how to add lettering to sugar cookies, and today I’m happy to share some ways to add texture to royal icing cookies.
Spring is coming soon, so I decided to make a plant cookie set using these three ways to create a textured look.
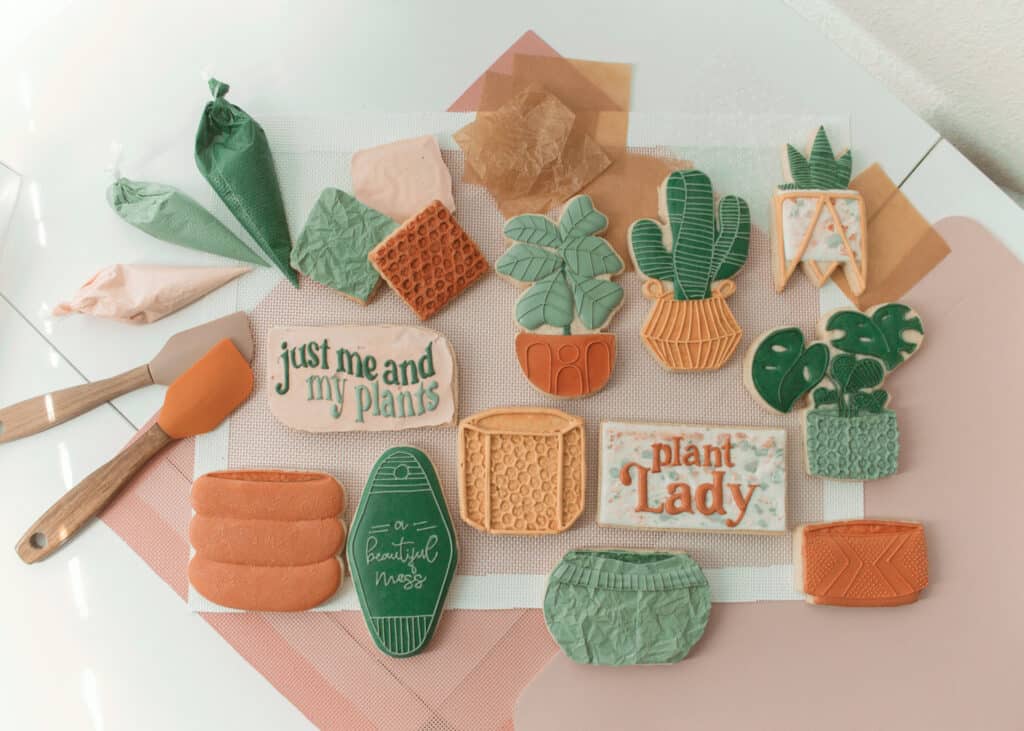
In this post, we’ll learn to make a honeycomb texture and two different concrete textures. Let’s begin!
Materials:
- bubble wrap
- parchment paper
Here’s the sugar cookie and royal icing recipe I used.
Creating a Honeycomb Texture
Step 1. Outline and flood your cookie.
Step 2. Cut a clean piece of bubble wrap to fit the size of your cookie.
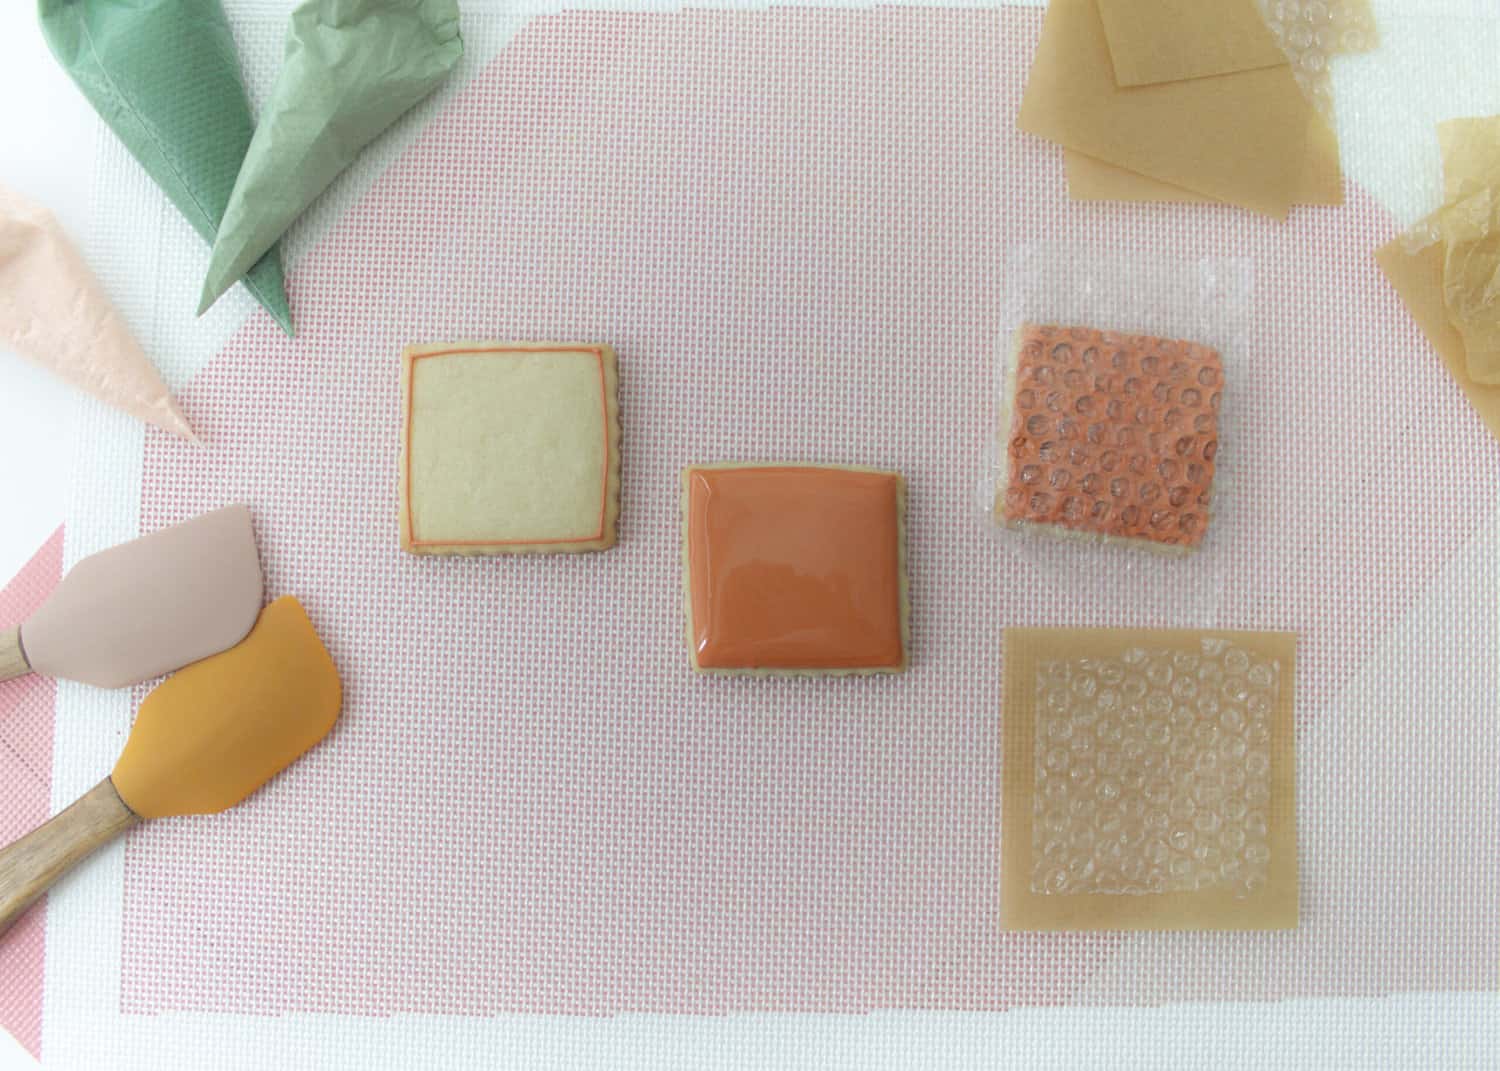
Step 3. Place the bubble wrap over flood and gently tap down all around, making sure the icing is fully touching the bubble wrap.
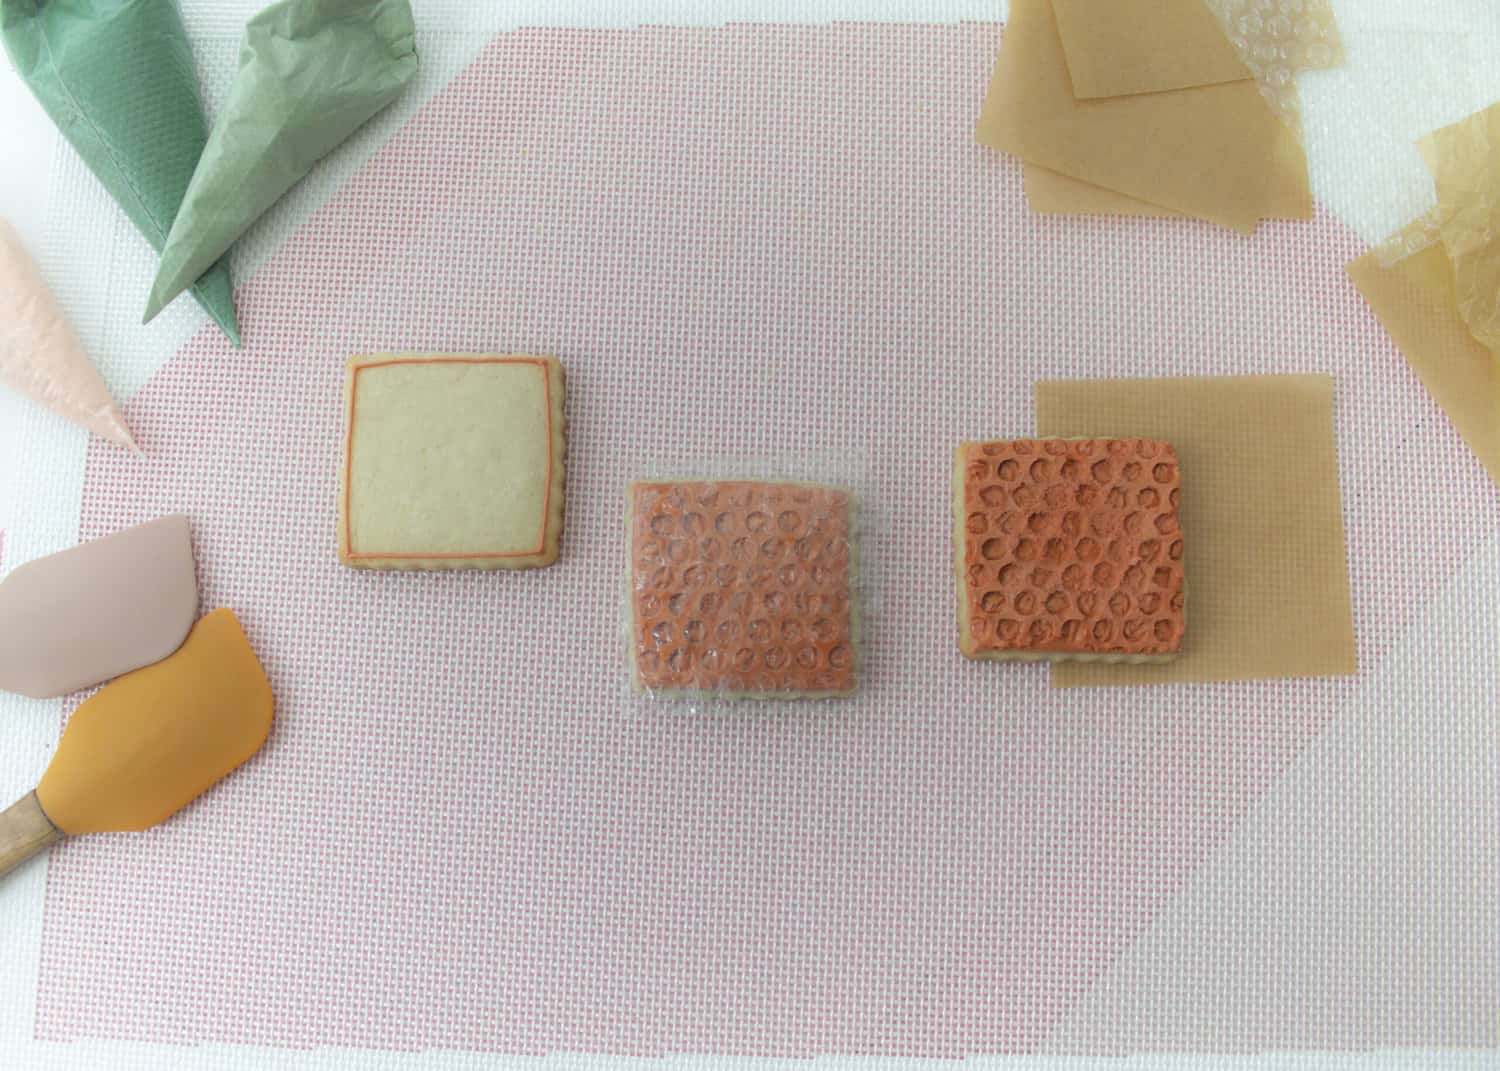
Step 4. Set aside to dry overnight. Peel the bubble wrap off gently.
How to Create a Concrete Texture
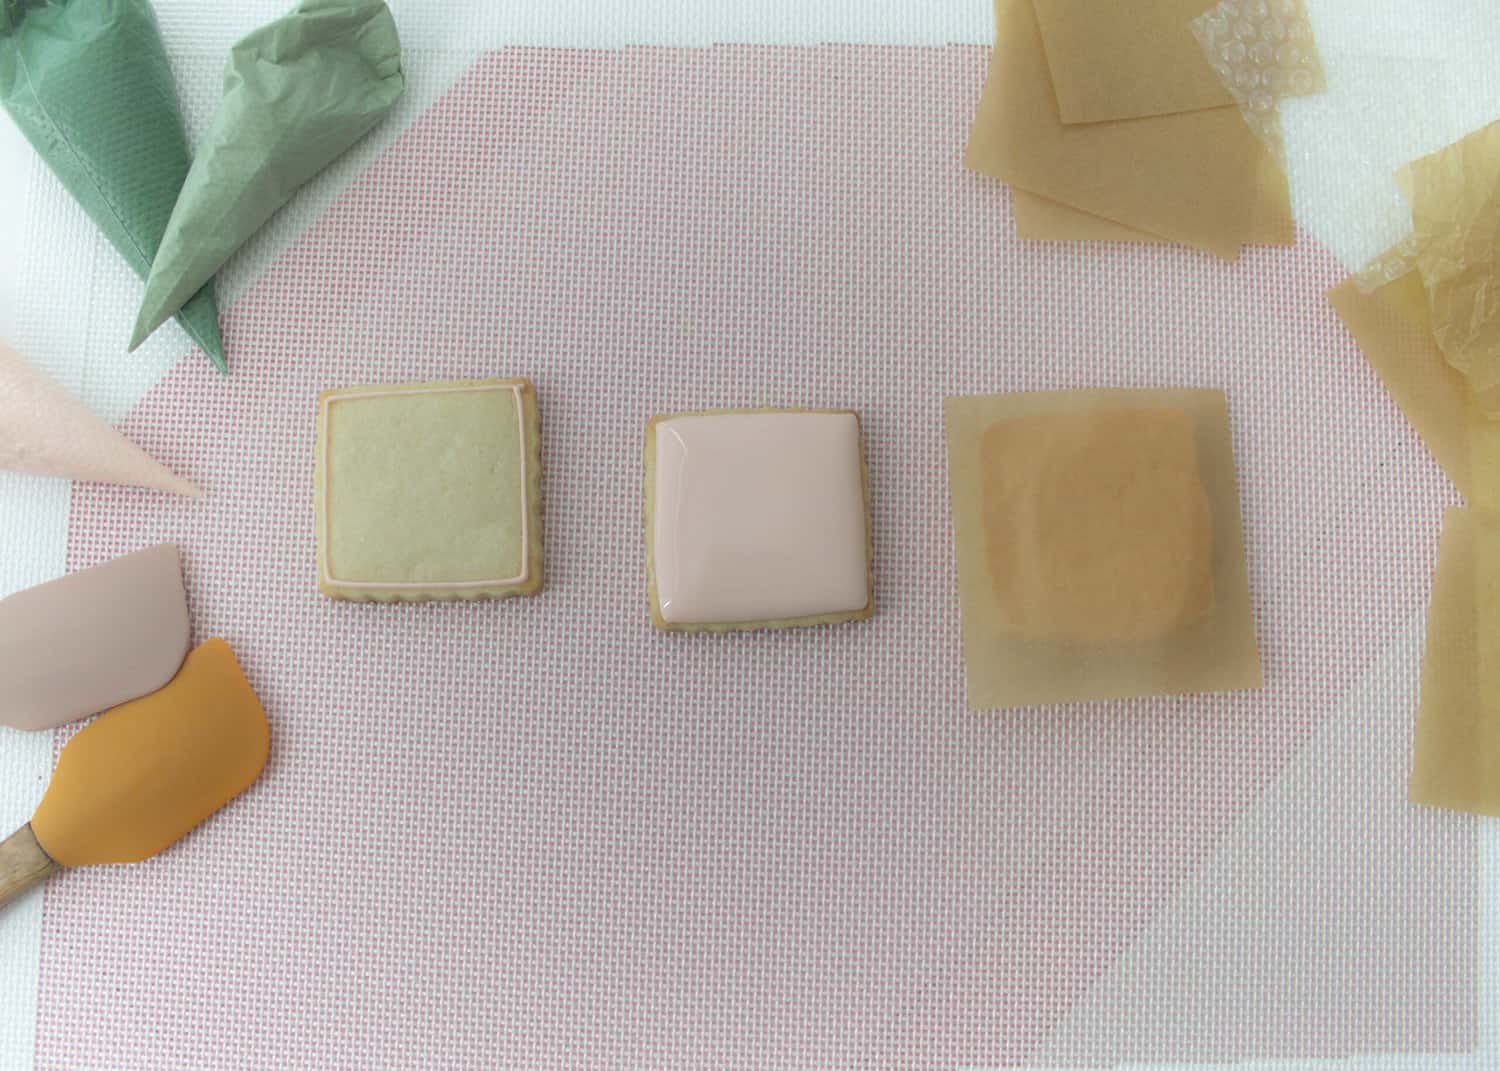
Step 1. Outline and flood your cookie.
Step 2. Cut a piece of parchment paper to the size of your cookie.
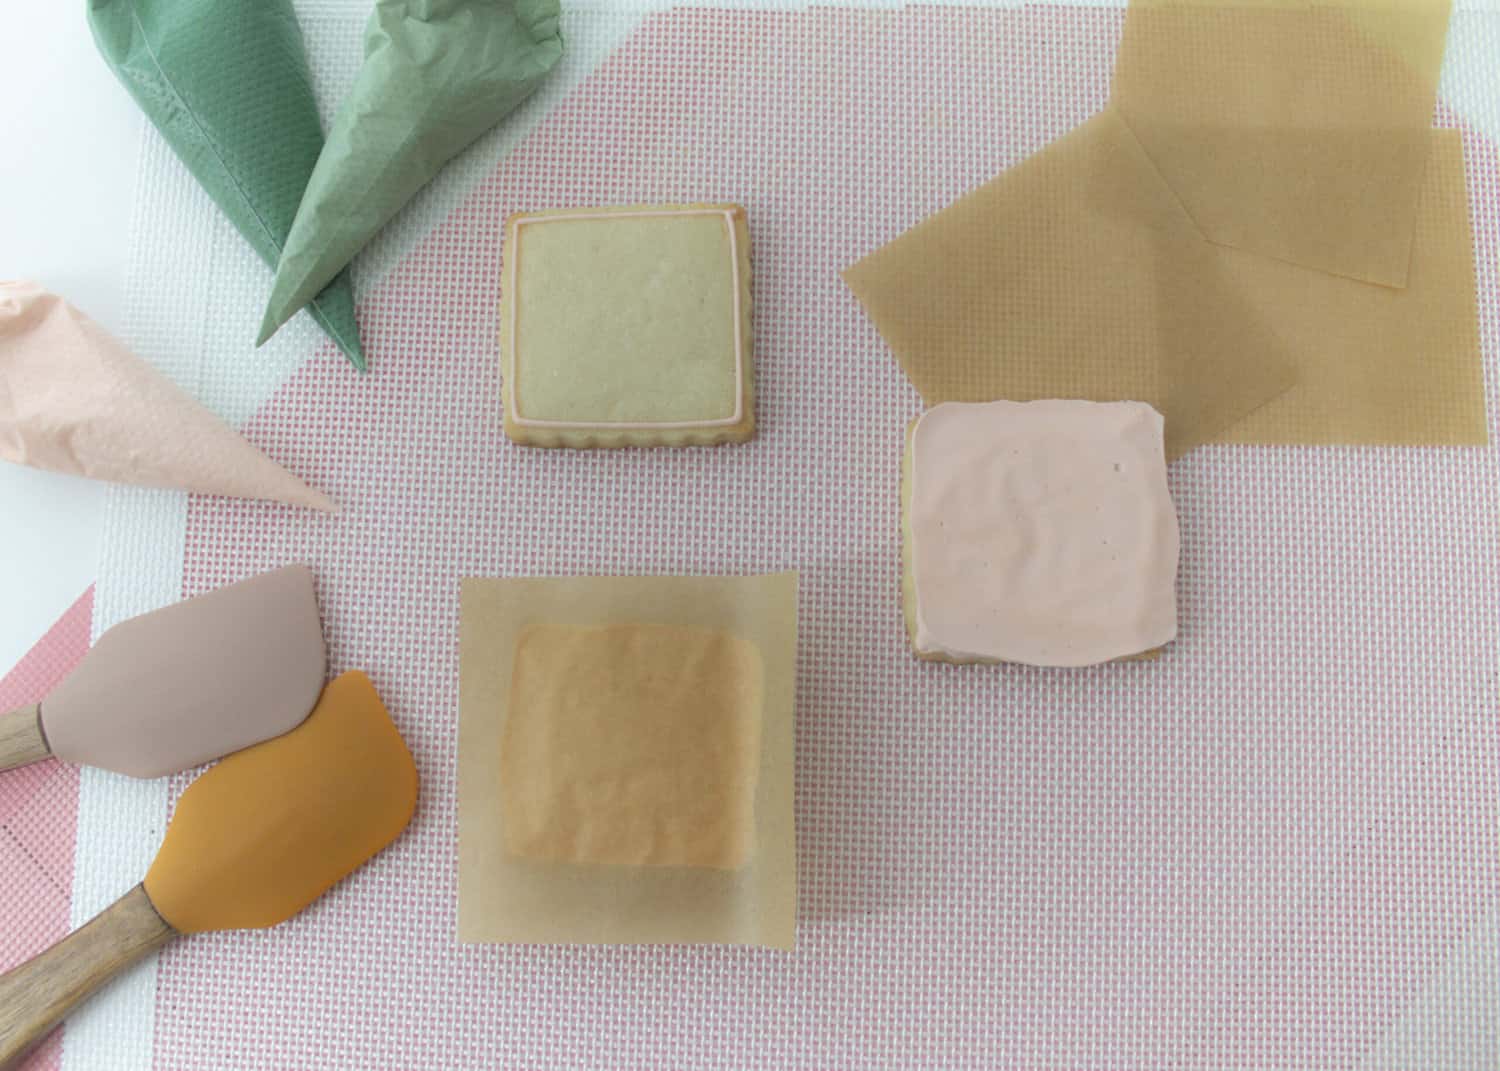
Step 3. Place the parchment over the flood and gently tap down all around, making sure the icing is fully touching the parchment.
Step 4. Set aside to dry overnight. Peel the parchment off gently.
Faceted Concrete Texture
Step 1. Outline and flood your cookie.
Step 2. Cut a piece of parchment paper to the size of your cookie. Then, crinkle it all up and open it back up.
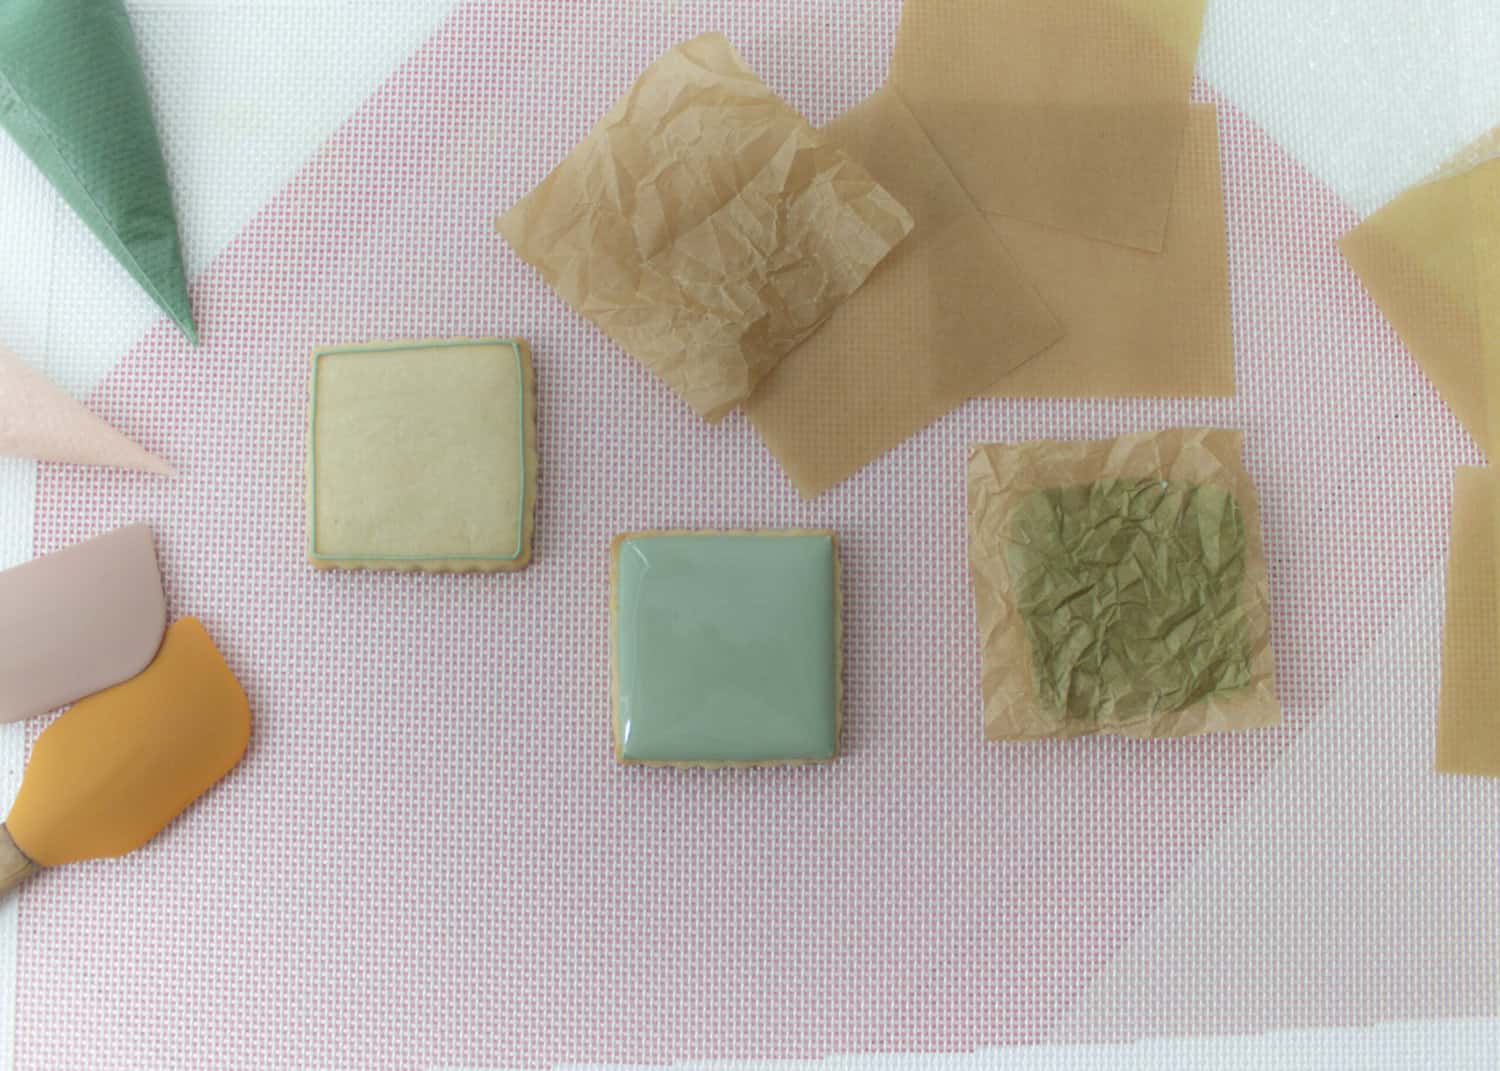
Step 3. Place the parchment over the flood and gently tap down all around, making sure the icing is fully touching the parchment.
Step 4. Set aside to dry overnight. Peel the parchment paper off gently.
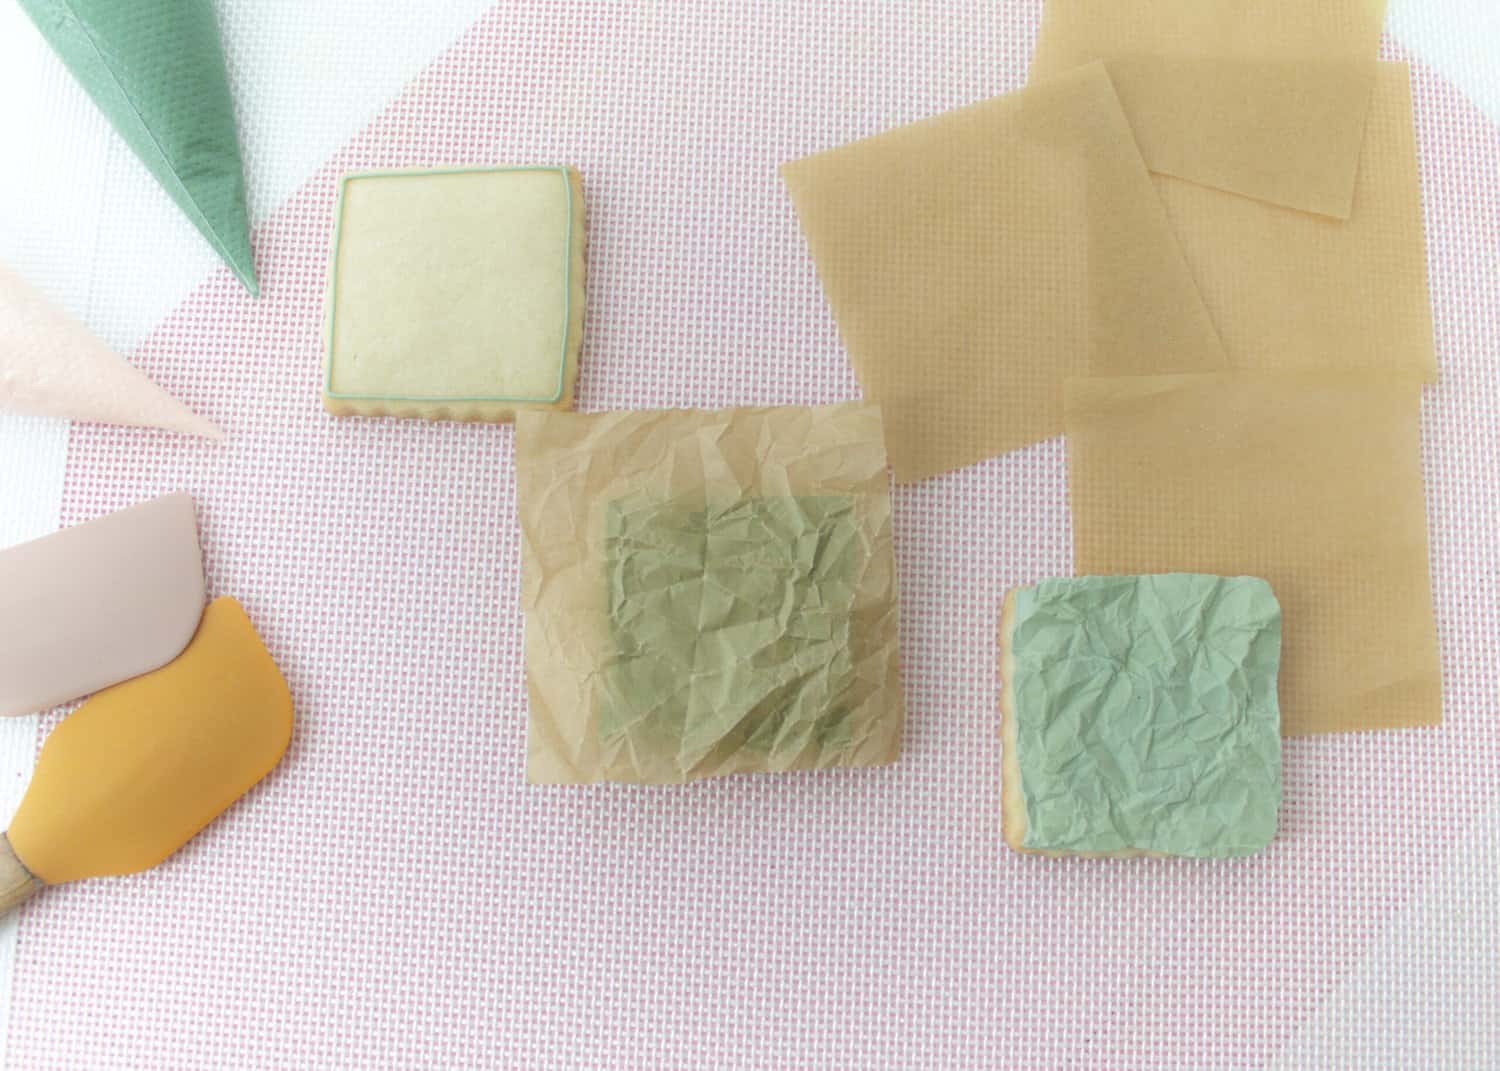
You can apply these techniques to whatever cookies you’d like. The honeycomb texture works great for bee cookie sets, but I used it to get a rattan cane-web look.
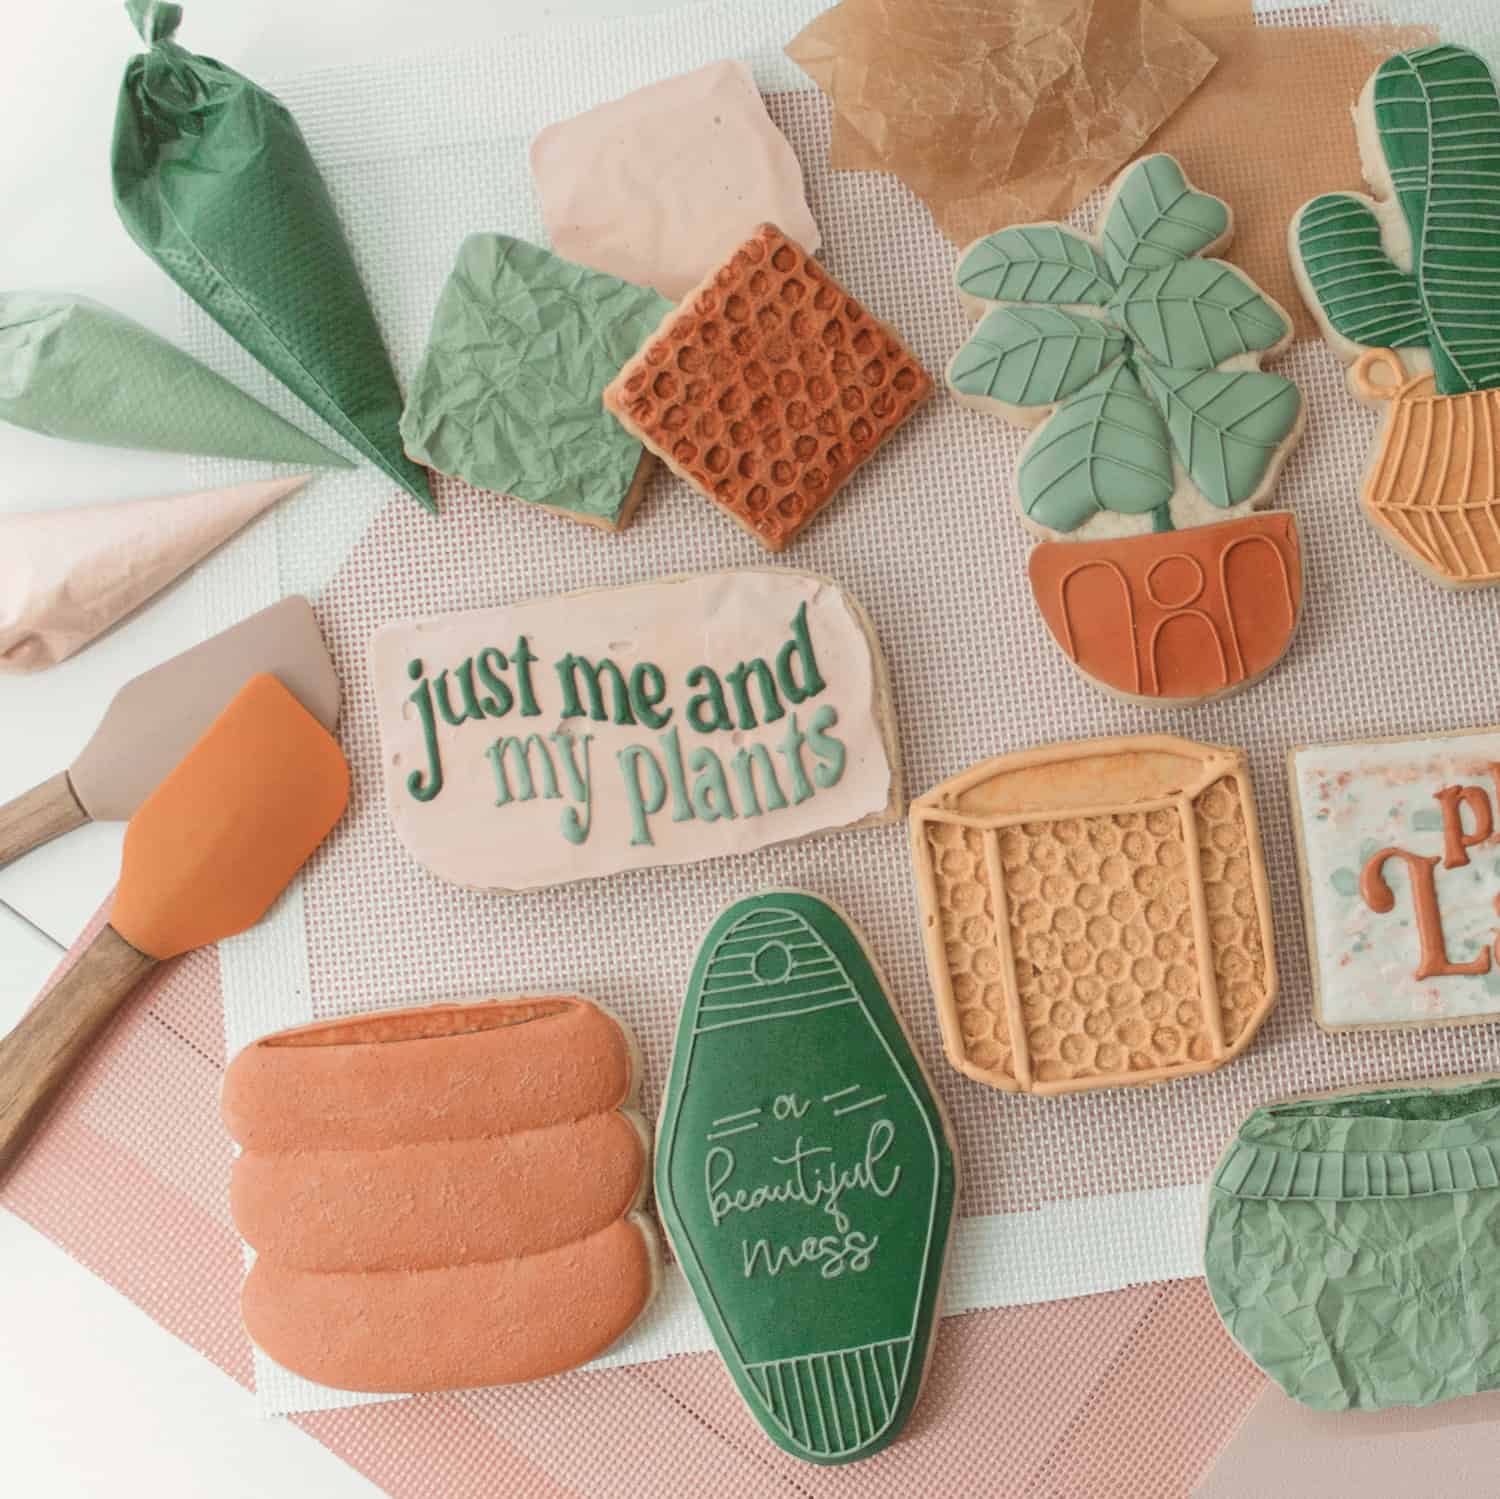
The concrete texture looks great in just about every cookie theme. I hope you try these techniques. Happy cookie-ing! xo, Ren
Looking for more cookie decorating techniques?
–How to Make Taco Cookies
–3 Ways to Add Lettering to Sugar Cookies
–How to Make Wall Weaving Sugar Cookies